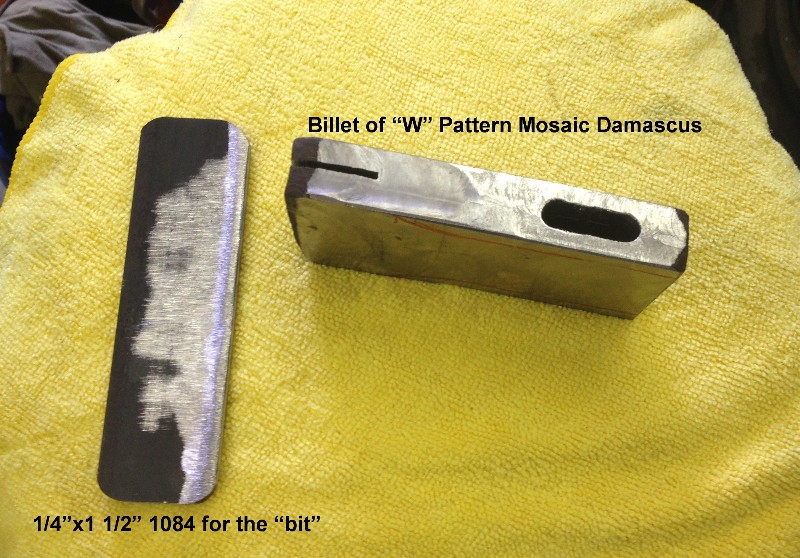
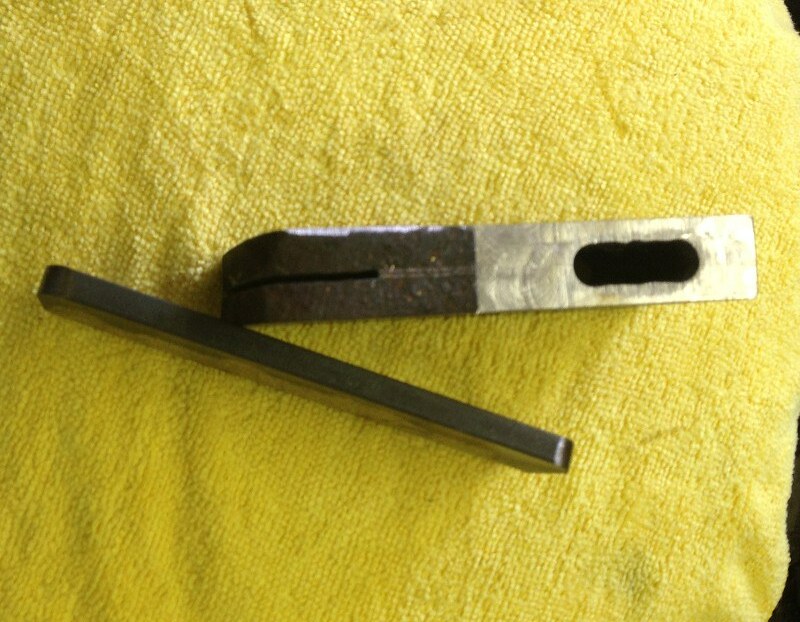
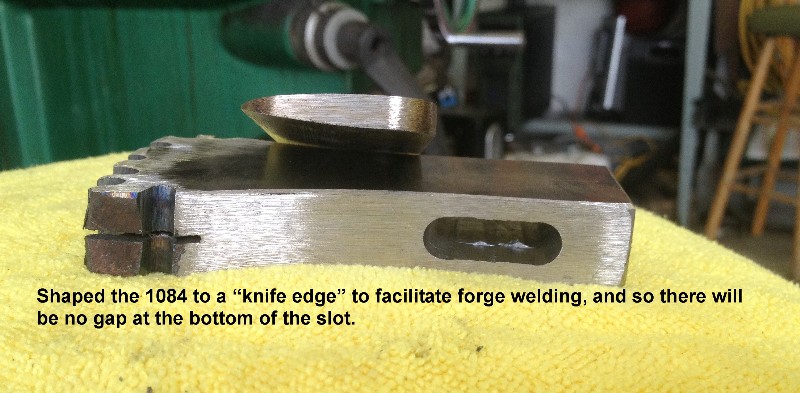
I always try to do something "differnt" for the Blade Show each year, and like to challenge myself and have fun in the process. I've become a fan of the History Channel series Vikings. After chasing down a decent image of the main charater's weapon, I decided I would make my own version.....of course it will be my own redition. The body is "W" pattern mosaic damascus, the "bit" is 1 1/2" X 1/4" 1084, and the current plan is for a Bocote Burl handle, with rawhide "wrap". Here's my "inspiration":

The idea actually struck me when I found an old rusty hunk of steel in the blacksmith shop, and after grinding it down a bit and etching, remembered that it was a failed attempt at a feather pattern....HMMMMM. I reforged it to the size I wanted, and yesterday started the project......."Ragnar's Dream"
 ragd1 by EdCaffreyMS, on Flickr
 ragd2 by EdCaffreyMS, on Flickr
 ragd3 by EdCaffreyMS, on Flickr
 ragd4 by EdCaffreyMS, on Flickr
 ragd5 by EdCaffreyMS, on Flickr
 ragd7 by EdCaffreyMS, on Flickr
 ragd8 by EdCaffreyMS, on Flickr
 ragd10 by EdCaffreyMS, on Flickr
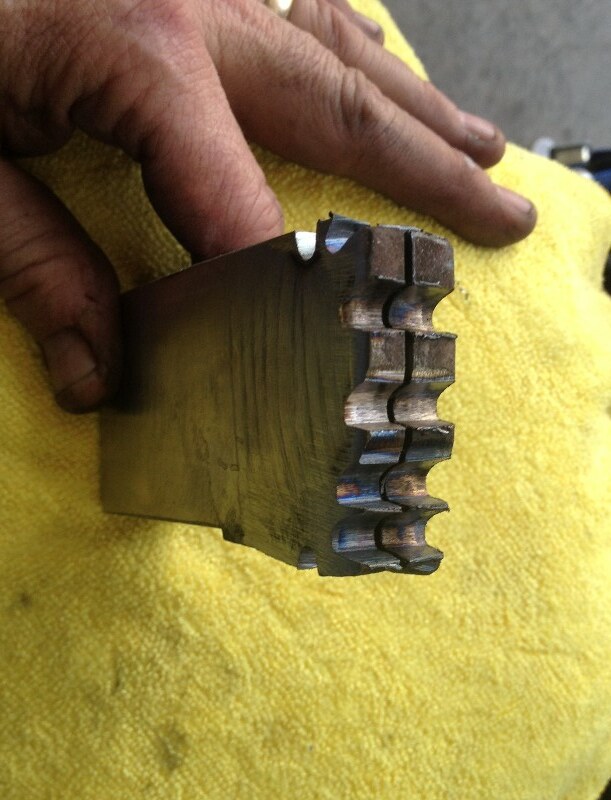
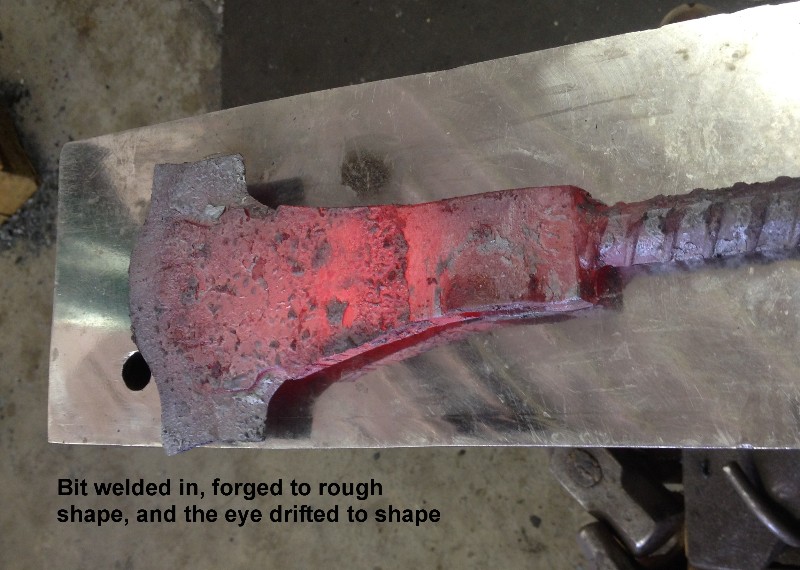
Sorry for the blurry photo...it's though to hold the work and snap a pick at the same time!<img src=' http://www.americanbladesmith.com/ipboard/public/style_emoticons//biggrin.gi f' class='bbc_emoticon' alt=':D' />
More coming as I proceed!
Ed Caffrey, ABS MS
"The Montana Bladesmith"
www.CaffreyKnives.net
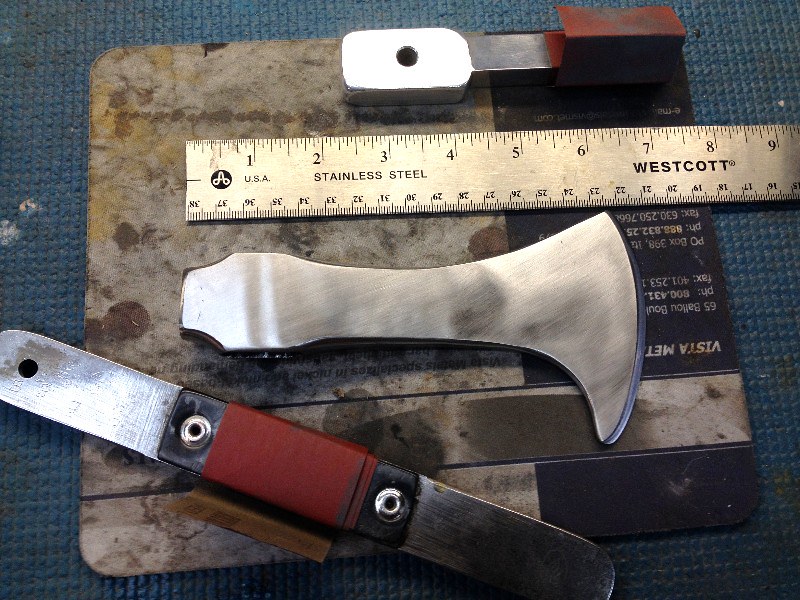
Been grinding for the past couple of hours..... it's almost ready for heat treating! Couldn't resist a quick etch before heat treating, just to see how things are looking.....


Got one little "booger" where the Ws overlap the edge section....but I think I can massage that out during finish grinding.

Another one of those "unsteady" pics..but you get the idea:D
Ed Caffrey, ABS MS
"The Montana Bladesmith"
www.CaffreyKnives.net

Looks good Ed.
This is not a criticism and not intended that way. For what its worth. If you grind a radius or bevel on the outer rim of the body where it overlaps the bit it will serve as a scarf for the weld. this will lessen the likelihood of sheers or roll overs. I think that is what the small flaw is, a roll over trapping a bit of scale.
I agree Lin! It's a rollover.....I neglected to scarf before I welded this one.....that's what I get for getting excited and not thinkin it through before I jumpped in! <img src=' http://www.americanbladesmith.com/ipboard/public/style_emoticons//smile.gi f' class='bbc_emoticon' alt=':)' />
Ed Caffrey, ABS MS
"The Montana Bladesmith"
www.CaffreyKnives.net
I have done it plenty, believe me. I love these projects.
I'm currently finishing up a small hunter made entirely of parts off of one mid 1800's buggy.
Well, nothing blew up during hardening! WHEW! That's always the real test if your welds are good.....and another reason I choose to use 1088/84 & 15N20 for nearly all my damascus.


Although there's a lot of "acreage" on something like this, none of is ever flat enough to allow marking/stamping, without warping something, so I took the route of least resistance.....marked it on the spine. Wasn't a lot of room there either, but at least I didn't have to spend time "tweaking" things straight again. <img src=' http://www.americanbladesmith.com/ipboard/public/style_emoticons//smile.gi f' class='bbc_emoticon' alt=':)' />

That will be all the pics for a couple of days....it's in the tempering oven, along with a couple of other "goodies" that I'll show everyone later. I always temper for 3 two hour cycles, allowing things to cool to room temp between cycles, so it will be tomorrow evening before I'm ready to get after finish grinding.
Ed Caffrey, ABS MS
"The Montana Bladesmith"
www.CaffreyKnives.net
Really liking this one Ed . Always nice to be able to venture off the norm and and get a little creative therapy in the process. Looking forward to the rest of this.

Ed,
Cool project!! Hope to see it in Atlanta!

Ed
Great project! Thank you for taking the time to share it with us.
Dan Cassidy
Journeyman Smith
Send an email to Dan

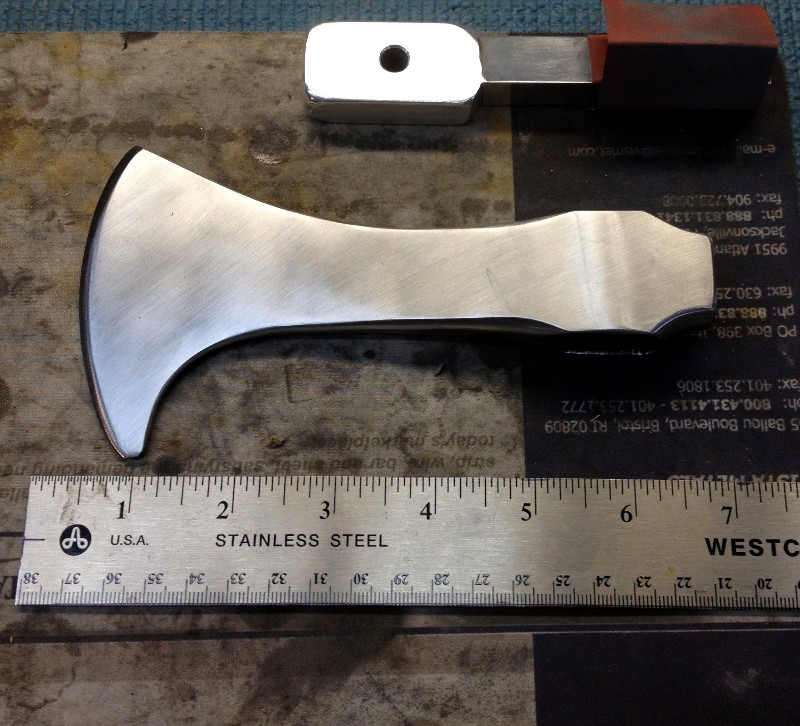
Finsh ground and beginning the hand sanding...... right now it's at 600 grit, on the way to 1200 prior to etching. I think 600 is all I'll go for now.....until after the handle is built and fit...then I can finish it out to 1200 and get it etched.
 600grit2 by EdCaffreyMS, on Flickr
 600grit1 by EdCaffreyMS, on Flickr
Ed Caffrey, ABS MS
"The Montana Bladesmith"
www.CaffreyKnives.net

Great work Ed. Thank you for posting this.
Brion
Brion Tomberlin
Anvil Top Custom Knives
ABS Mastersmith
After looking through every chunk of wood in the handle material cabinet, I went with my original thought.....a nice piece of Bocote Burl.
Fist thing I did was rough shape the portion of the handle to fit the axe head......

Working with the belt grinder, and a fresh 50 grit belt, I got the handle to where the axe head just STARTED onto the handle......

Next I started shaping the handle with a slack 50 grit belt.....I never completely decide how any handle is going to look, until I'm actually working on it, and although it might sound weird to some, I use my hands as my eyes.....feeling the contours, and making changes/adjustments as I go. This piece will be rawhide wrapped, so I tried to picture in my mind what would lend itself to the rawhide warp, and yet still feel/look "good".
This is what it looked like after roughing it out with a 50 grit belt.....

Next was refining it with a 220 belt.....

From here it will be all "hand work", to finish fitting the head, and getting everything the way I want it. The plan is to finish the handle out with several coats of Tru-Oil, and once dry, finish out the head, and get ready to do the rawhide wrap.

Sorta ran outta gas for today......so I'll hit it hard again tomorrow! <img src=' http://www.americanbladesmith.com/ipboard/public/style_emoticons//smile.gi f' class='bbc_emoticon' alt=':)' />
Ed Caffrey, ABS MS
"The Montana Bladesmith"
www.CaffreyKnives.net
Love the wood Ed. Bet your shop smelled like pickles, mine does with bocote. This is going to be good.
Brion
Brion Tomberlin
Anvil Top Custom Knives
ABS Mastersmith
Looking forward to seeing it in Atlanta! Nice work!
Russell
I hope to see a finished photo because I wont be in Atlanta. Great project Ed.
