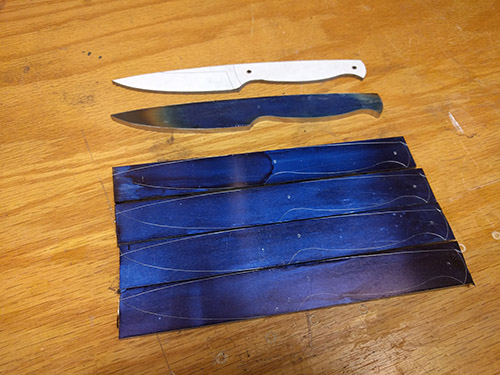
My first knife was made during a weekend class with a local journeyman bladesmith. Now I'm trying to do things solo, acquiring tools and material and iterating designs on the computer. I'm trying to keep it simple with my first solo knife, so I'm doing a fairly straightforward narrow drop-point hunter in 3/16" O1. For tools right now I'm using an angle grinder for cutting and rough shaping, then an inexpensive 1x30 belt sander and files for fine shaping and bevel grinding. I'm doing five of the same design primarily so I can practice each step multiple times. So far I've got my template made, laid out the lines on the steel and mostly shaped one of them in the time I had this weekend (after a while spent modifying the 1x30 a bit to make it a bit more usable with a longer platten and a cut out to get some slack grinding area along the upper rear). Here's the general idea so far.
I hope to shape the rest and start on the bevels this coming weekend. A bit nervous about the bevels. I'd had an aborted attempt on a solo knife that I started with a file jig that went pretty well, but refining the grind on the belt sander didn't go so well. I need more practice. I was about to head down the path of a forced angle jig of some kind, but saw enough feedback here and other places that relying on such things is ultimately limiting so decided on a different route for now: a bubble jig system. Until I get more "feel", having some confidence that I'm hitting near an intended angle should help me improve, while not mechanically forcing me to stay on an angle. Hopefully this will allow me to walk the fine line between a learning tool and a crutch, and still hopefully result in something beautiful at the end of the day.
Stock removal is a good place to start making knives. That's where I started. I had the equipment you have minus the bubble jig. Practice makes perfect. So keep on making them. I like your design. Simple is the way to start for sure.
How are you going to heat treat and temper these blades? Heat treat is the sole of a knife. Without proper heat treat the knife is just a piece of metal.
I am looking forward to seeing your bevels ground.
|quoted:
Stock removal is a good place to start making knives. That's where I started. I had the equipment you have minus the bubble jig. Practice makes perfect. So keep on making them. I like your design. Simple is the way to start for sure.
How are you going to heat treat and temper these blades? Heat treat is the sole of a knife. Without proper heat treat the knife is just a piece of metal.
I am looking forward to seeing your bevels ground.
I've got a DIY heat treatment oven in the "parts acquisition" phase <img src=' http://www.americanbladesmith.com/ipboard/public/style_emoticons//smile.gi f' class='bbc_emoticon' alt=':)' />. I'd thought about farming it out, but figured 1) the additional up-front expense would pay itself off in the long run, 2) I'd be learning an important aspect of knifemaking rather than paying someone to do it for me, 3) I'll get to learn even more valuable knowledge (e.g. welding), and 4) I'm stubborn that way.
I like the design Brian. Take your time and move towards the final angle of the bevels. Keep us posted on your progress.
Chris
Got the bevels ground on three of my five knives this weekend... here's two of them.

I feel like I'm improving a bit on each one. I have some cleanup to do on them but I've taken them down as far as I should before heat treatment, I believe. I'll grind the other two then get to work making the heat treatment oven so long as my thermocouple comes in time.
I realize the ABS is about the "forged blade" but we all have to start somewhere. I do plan on building a small forge as one of my next projects -- it's between that and a DIY 2x72 belt sander, frankly, and I'm thinking the belt sander would be a better initial investment -- but my biggest problem is I'm in my garage in a residential neighborhood. I can't imagine the sound of hammers on anvil will be welcome for long. So, I'll have to figure something out to make more progress toward journeyman. I am currently hoping to do the Intro to Bladesmithing course at HCC this spring.
That is a good way to do it, make each one a little better than the one before. It does take time and a lot of effort getting your forge and equipment set up, I don't see any problem with working with what you have toward the end goal. Some mighty fine knives are made without forging, even if I have more fun forging them
Chris
I just saw this thread and had to respond.
Way to go & get after it, Brian! <img src=' http://www.americanbladesmith.com/ipboard/public/style_emoticons//biggrin.gi f' class='bbc_emoticon' alt=':D' />
Many of us started with stock removal and many of us who teach, teach grinding first and making a stock removal knife is the best way to teach that. At least the student ends up with a usable product at the end.
I like the design and I like the plan. What's the steel?
Post some pics of your equipment, someone may have a suggestion on modifications, or techniques for using it.
Joshua States
www.dosgatosforge.com
https://www.youtube.com/channel/UCdJMFMqnbLYqv965xd64vYg
https://www.facebook.com/dos.gatos.71
Also on Instagram and Facebook as J.States Bladesmith
“So I'm lightin' out for the territory, ahead of the scared and the weak and the mean spirited, because Aunt Sally is fixin’ to adopt me and civilize me, and I can't stand it. I've been there before.â€
Thanks for the encouragement guys. Got my thermocouple in yesterday, so with favorable timing over the weekend I hope to get the last two ground and get down the road a bit toward a working heat treatment oven. I'll get some pics of my ever-so-modest work area for kicks and giggles while I'm at it.
These started out life as 3/16" x 1" O1 steel, btw. So I wasn't lying when I said "narrow" <img src=' http://www.americanbladesmith.com/ipboard/public/style_emoticons//smile.gi f' class='bbc_emoticon' alt=':)' />.
|quoted:
These started out life as 3/16" x 1" O1 steel, btw. So I wasn't lying when I said "narrow" <img src=' http://www.americanbladesmith.com/ipboard/public/style_emoticons//smile.gi f' class='bbc_emoticon' alt=':)' />.
My favorite choice for this type of project. I made quite a few stock removal blades from 3/16" O-1 in my early days, most of them hunters and I sold every one of them.
That's a good starting thickness for this size. With careful HT, you should finish out about .145", maybe less. It also finishes very nicely.
Joshua States
www.dosgatosforge.com
https://www.youtube.com/channel/UCdJMFMqnbLYqv965xd64vYg
https://www.facebook.com/dos.gatos.71
Also on Instagram and Facebook as J.States Bladesmith
“So I'm lightin' out for the territory, ahead of the scared and the weak and the mean spirited, because Aunt Sally is fixin’ to adopt me and civilize me, and I can't stand it. I've been there before.â€
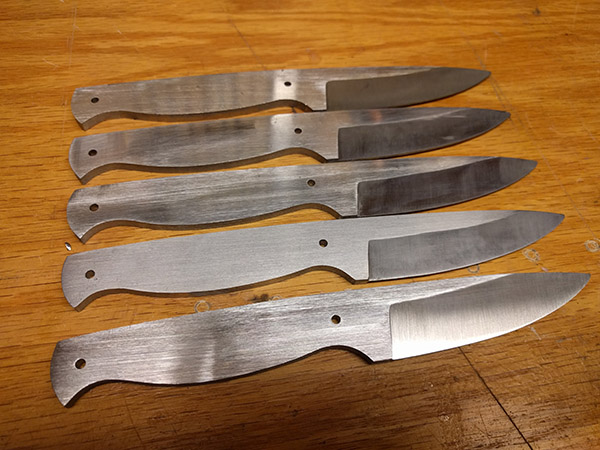
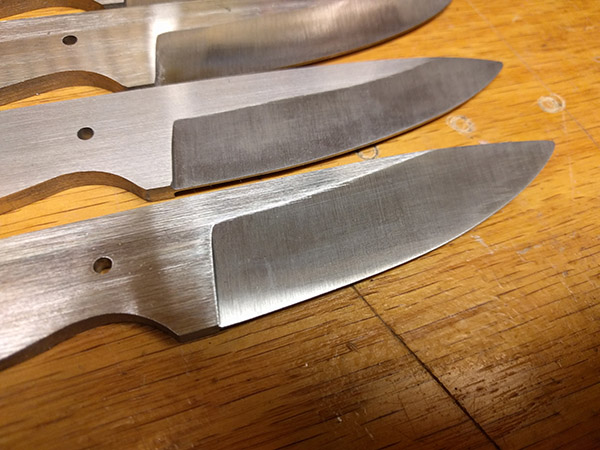
For those keeping track at home, I've completed my bevel grinds on all five of them. I feel like my fifth was the best of the bunch. I'm finally feeling like I can pick up the blade, grip it comfortably, and get it to the belt in an appropriate orientation reasonably well. Muscle memory for the win. On this one I really tried to consider everything I've read about for every pass: keeping elbows in, using legs primarily to move across the belt, use steady, even pressure. I took the bevel to 320 on the sander just to see it and I really like how it came out.
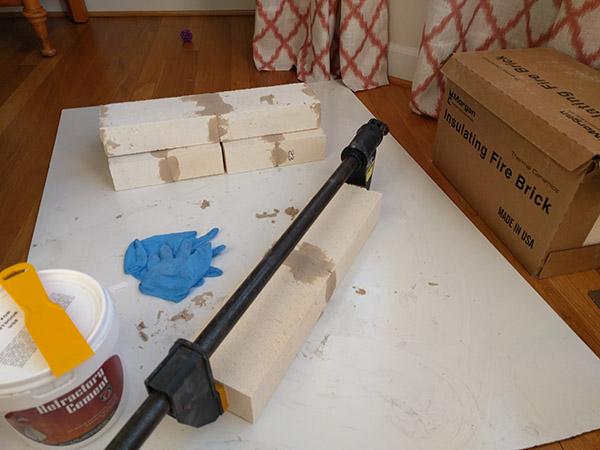
I've also started cementing the firebricks for my heat treatment oven. I'm going with a fairly small oven but with decent depth at 4" x 4.5" x 18", figuring while it might be nice to fit more knives in or have more room to reach I feel I'd outgrow it in depth before I got too tired of it. I'm trying to keep it suitable for my standard 15A outlets in my garage, so I couldn't go too large.
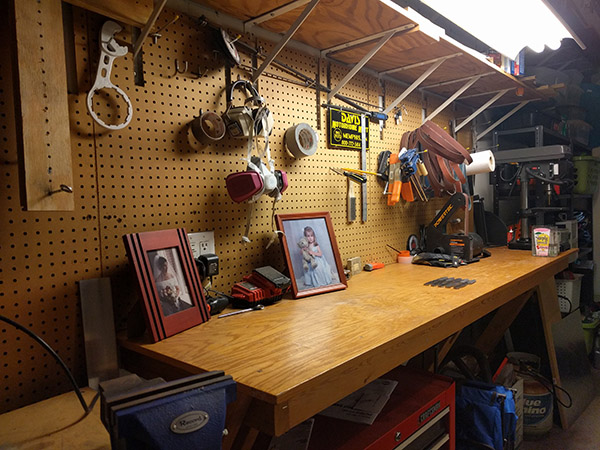
And, finally, here's a quick shot of my little work area. There's not much to it aside from the Powertec 1x30 -- "customized" with a larger flat platen and an opening along the back for slack belt work which I haven't used yet -- the HF drill press which has done pretty well so far, and various assorted things like the bench vise and angle grinder.
After a summer "vacation" from knife making due to my "workshop" being taken over with stuff during a home renovation I was finally able to get back to my knives recently and finished my first one. First, the end result.

I thought long and hard about what kind of handle I wanted to attempt on this first one. A simple composite handle of G10 or micarta? More complexity? I decided that I'd already done the simple handle when I worked with the bladesmith, so I might as well stretch and try to learn something new. So I went with brass bolsters, full brass liners, and a combination of ebony and tan G10 with a brass spacer. I'm actually really happy with how it turned out, though there are several things I'm going to work on when finishing the remaining four of this design.
- Work on my grinding to avoid the "one inch divot". I've already ground the final bevels on the rest, but since I was aware of the problem by then I hope I improved my technique enough to have avoided it on the follow-on blades.
- Align the pins better.
- Decrease the bolster size by about 30-40%. I feel like it's a bit large at that size and the visual balance would be more pleasing with a smaller bolster.
- Match the bolster and ebony size. I think that would help with the visual balance as well.
I'm very much hoping to be able to attend the Intro to Bladesmithing course at HCC this spring to start learning the rudiments of forging. Until then, I'm going to keep going with my little stock removal blades to hopefully improve. Thanks for looking.
Here's a different angle shot of the almost complete knife. I hadn't done my final round of sanding of either the blade or handle at this point, but it shows the liners a bit more.


