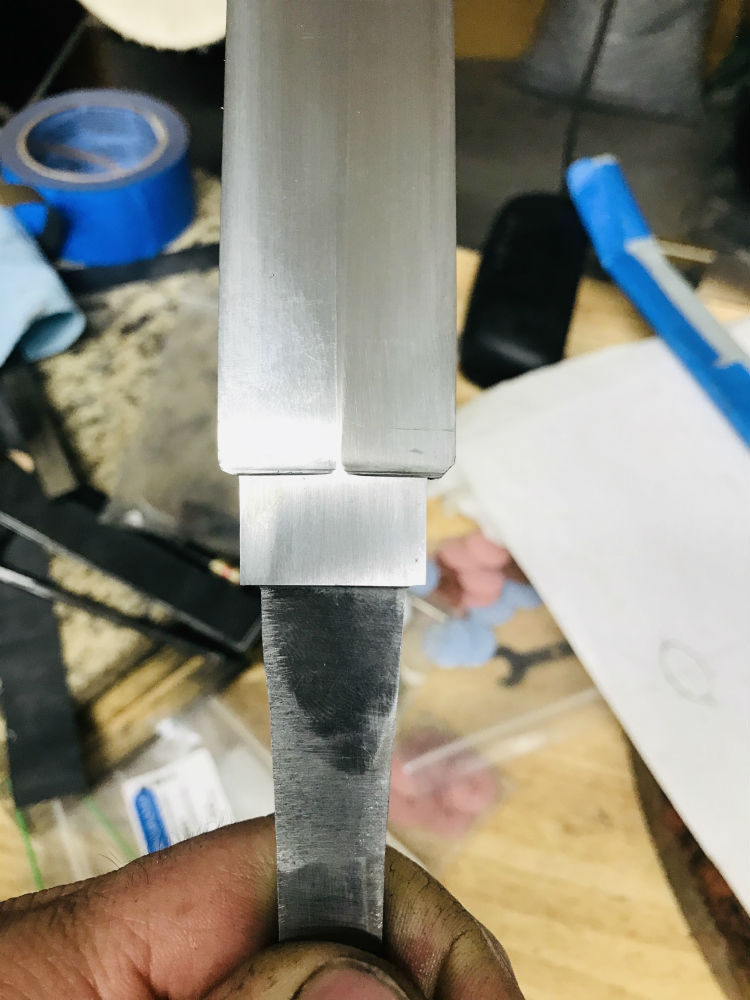
Well, last week I took this (and the other 5 blades) over to Hancock's to get his feedback on the design drawings and the blade progress. He has me rethinking the guard shape. So I'm taking some time to figure out what to do. In the meantime, I started fitting the other blades with their guards.
Joshua States
www.dosgatosforge.com
https://www.youtube.com/channel/UCdJMFMqnbLYqv965xd64vYg
https://www.facebook.com/dos.gatos.71
Also on Instagram and Facebook as J.States Bladesmith
“So I'm lightin' out for the territory, ahead of the scared and the weak and the mean spirited, because Aunt Sally is fixin’ to adopt me and civilize me, and I can't stand it. I've been there before.â€
This project came back online this weekend. I have a new design for the hardware per advice from Hancock, so I redesigned a bit.
Or in the words of Jason Knight, my design drawing "developed". <img src=' http://www.americanbladesmith.com/ipboard/public/style_emoticons//smile.gi f' class='bbc_emoticon' alt=':)' />
I thought I would share my preparation methods for plunge cuts and guard setting. Most of us use a file jig of some sort to create nice square shoulders and even plunge cuts on our knives. It's a simple process of putting the jig on the blade, squaring it to the blade spine, and going after it. On a dagger, there is no spine to rest the square on, and the edges usually have a continuous taper, so there's a dilemma here. How to get the jig square to the center rib of the dagger?
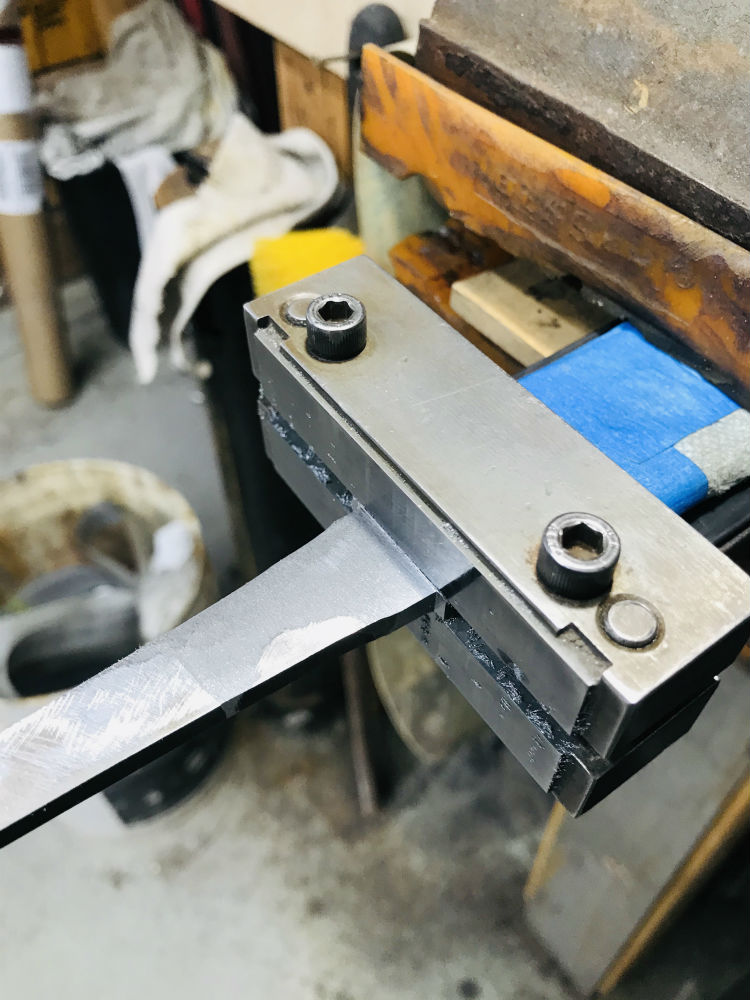
I use a mirror. Here is the jig set onto the blade with the carbide faces toward the tang. (cutting the shoulders for the guard)
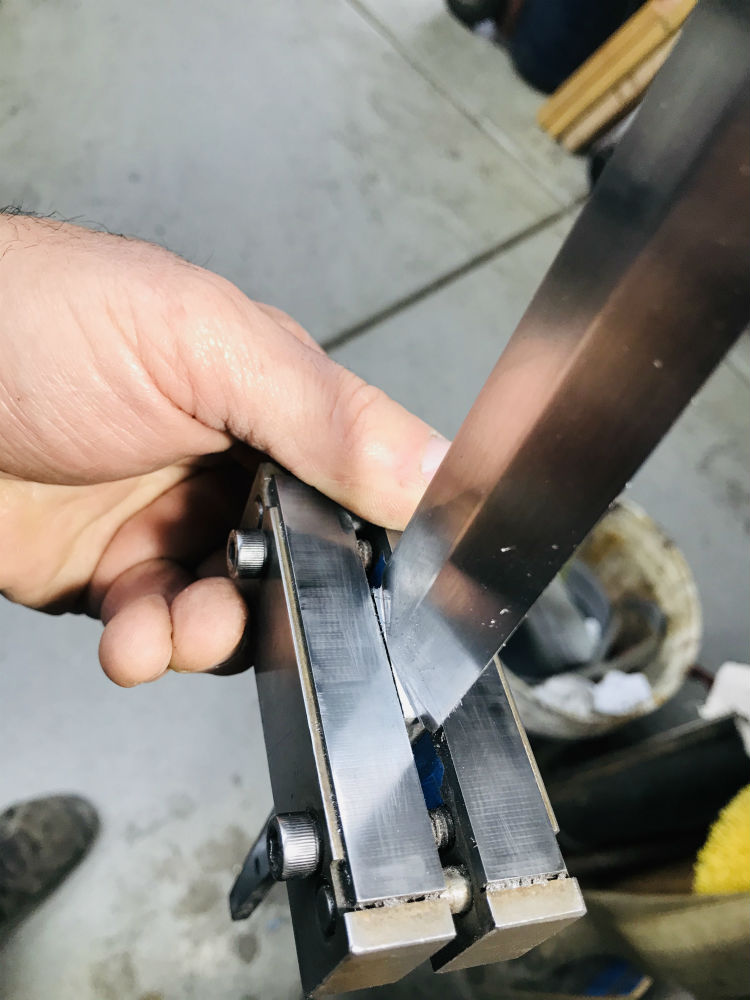
I place a mirror on the back side of the jig and adjust until the profile is a straight continuous image in the mirror. Hint: This also helps to ensure the center rib is straight!)
You can also use this to make sure the blade is straight by moving the mirror to the edge.
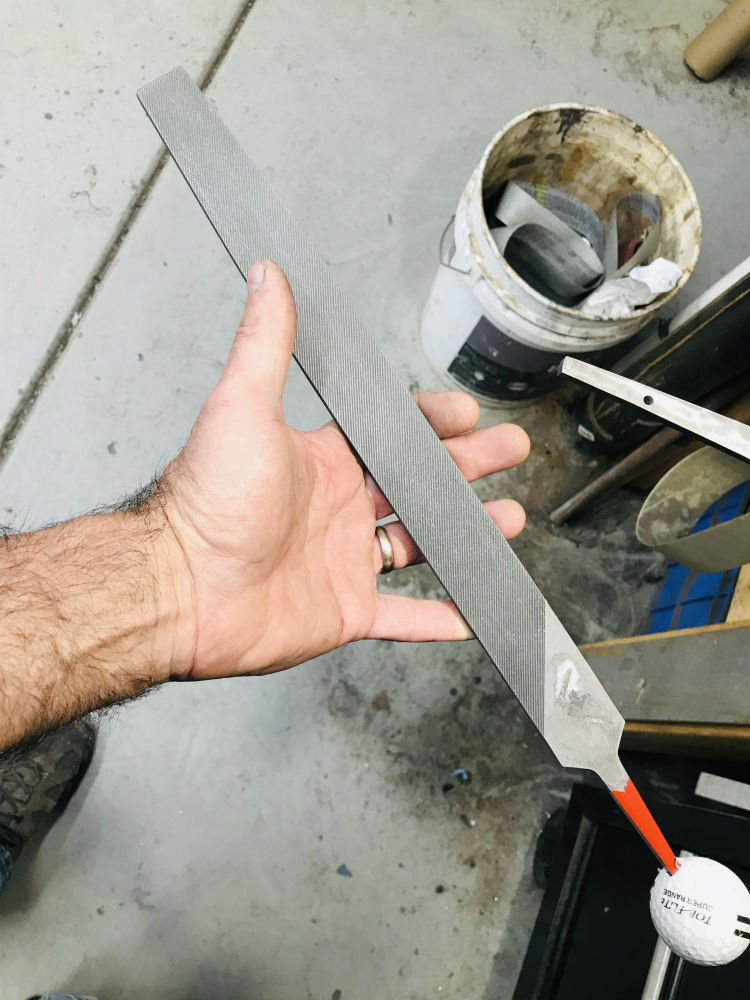
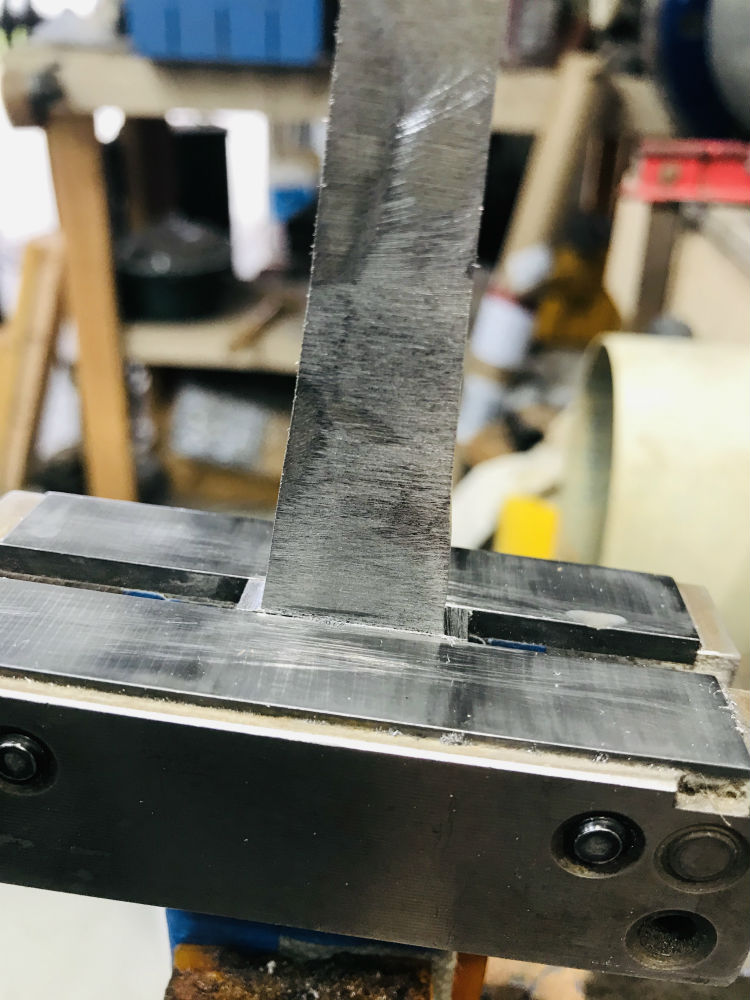
Now, I put this in my hand sanding station vice and get to filing the shoulders. I recently purchased a 14 inch Simonds lathe file that makes quick work of this task.
File all 4 sides. Clean up the cuts with a mill file and get the corners rounded with a 1/8" chainsaw file.
Joshua States
www.dosgatosforge.com
https://www.youtube.com/channel/UCdJMFMqnbLYqv965xd64vYg
https://www.facebook.com/dos.gatos.71
Also on Instagram and Facebook as J.States Bladesmith
“So I'm lightin' out for the territory, ahead of the scared and the weak and the mean spirited, because Aunt Sally is fixin’ to adopt me and civilize me, and I can't stand it. I've been there before.â€
I cut the shoulders and dressed the tang a little. There is also a bit of clean up on the disc with 320 grit paper.
Now flip the jig around and get it set up to do the plunge cuts. Do the mirror trick again to make sure the jig is square.
Cut all 4 plunge cuts with the files.
A quick check for equality.
And a final look at the whole thing.
You can see the center rib is not quite centered on this side. I will have to go back to the grinder and move it over a little bit.
It's about .01" difference. So I only have to move it .005". I may be able to do that hand sanding. We will see.
Joshua States
www.dosgatosforge.com
https://www.youtube.com/channel/UCdJMFMqnbLYqv965xd64vYg
https://www.facebook.com/dos.gatos.71
Also on Instagram and Facebook as J.States Bladesmith
“So I'm lightin' out for the territory, ahead of the scared and the weak and the mean spirited, because Aunt Sally is fixin’ to adopt me and civilize me, and I can't stand it. I've been there before.â€
Those "6" knives are going to be great. I would like to try a dagger sometime so thank you for the WIP. Are your files a higher Rockwell hardness than typical files?
Gilbert
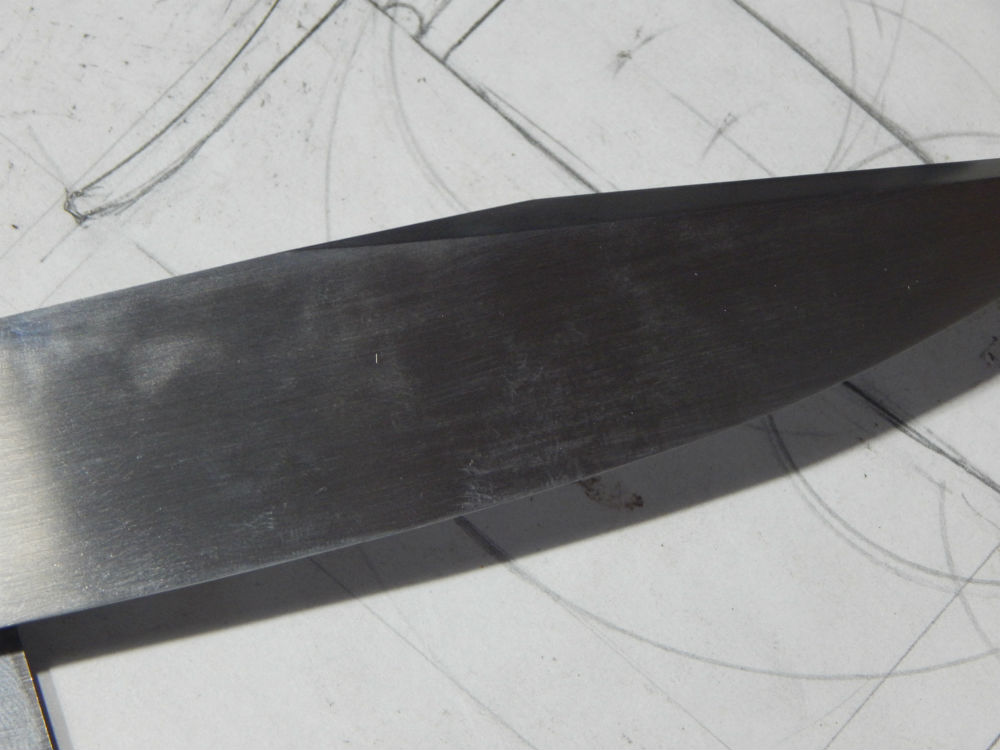
There is only one 6-inch blade in the group picture above. (second from the right) and it developed a weirdness in the steel that I can only describe as "clouds".
It's almost like an auto-Hamon in the 1095, but lacking in definition. It won't sand out and seems to get bigger at finer grits. So that one will go sit on the bench for a while as I figure out what to do with it. I may just scrap it and replace it. If anyone can shed some light on this phenomenon, I would appreciate it.
As for the files, I really don't know what hardness they are, or are supposed to be. I can tell you that all files are not created equally, and different manufacturers are turning out varying levels of quality from different factories. The files you can buy at the local hardware or big-box home improvement store are not really suitable for the steels we use. They should work OK for non-ferrous metals, and for roughing in decorative file work. You will want to find some #4 cut files for the file work finishing though.
Nicholson files are not what they used to be, although I find the ones coming out of Brazil and Honduras are better than the ones coming from Mexico.
I recently purchased three large Simonds files from Travers Tool Co. They are all made offshore, but seem to do the job well. The other Simonds files I have are working very well.
Joshua States
www.dosgatosforge.com
https://www.youtube.com/channel/UCdJMFMqnbLYqv965xd64vYg
https://www.facebook.com/dos.gatos.71
Also on Instagram and Facebook as J.States Bladesmith
“So I'm lightin' out for the territory, ahead of the scared and the weak and the mean spirited, because Aunt Sally is fixin’ to adopt me and civilize me, and I can't stand it. I've been there before.â€
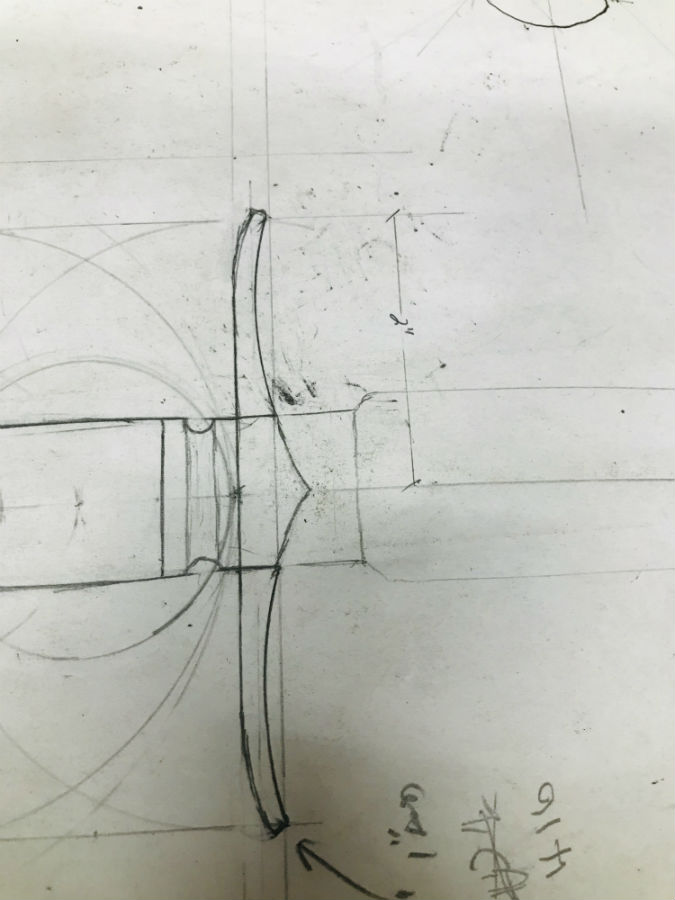
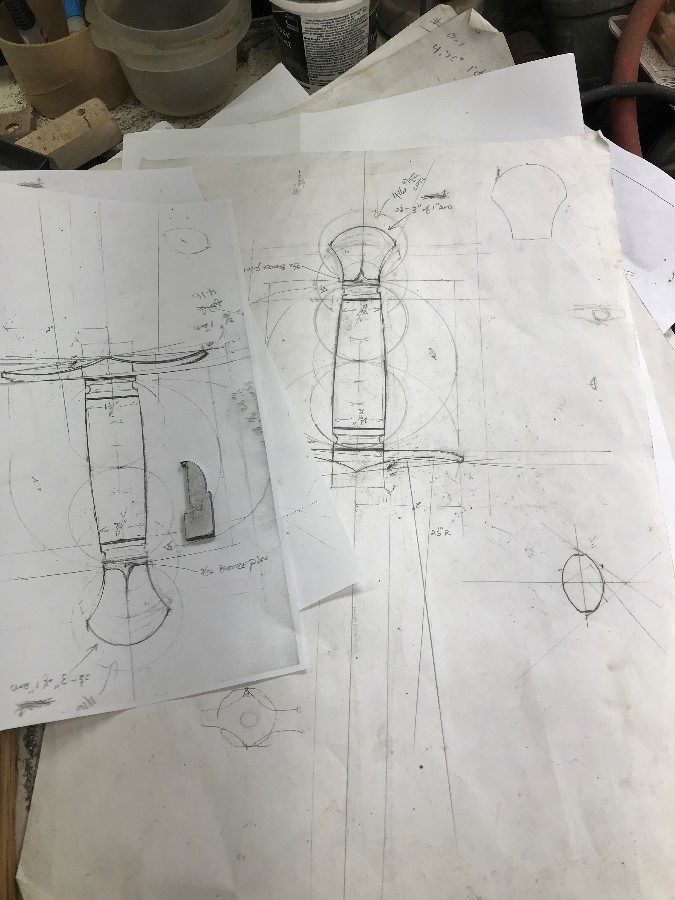
One of the things Hancock told me to do was to redesign the guard. (shape and materials) This is one of the drawings I made of the shape. It will come up onto the ricasso area a little, so the slot for this is going to be a little tricky to cut. I could try to hot fit the guard, but that's a little messy and not the path I would choose for this knife.
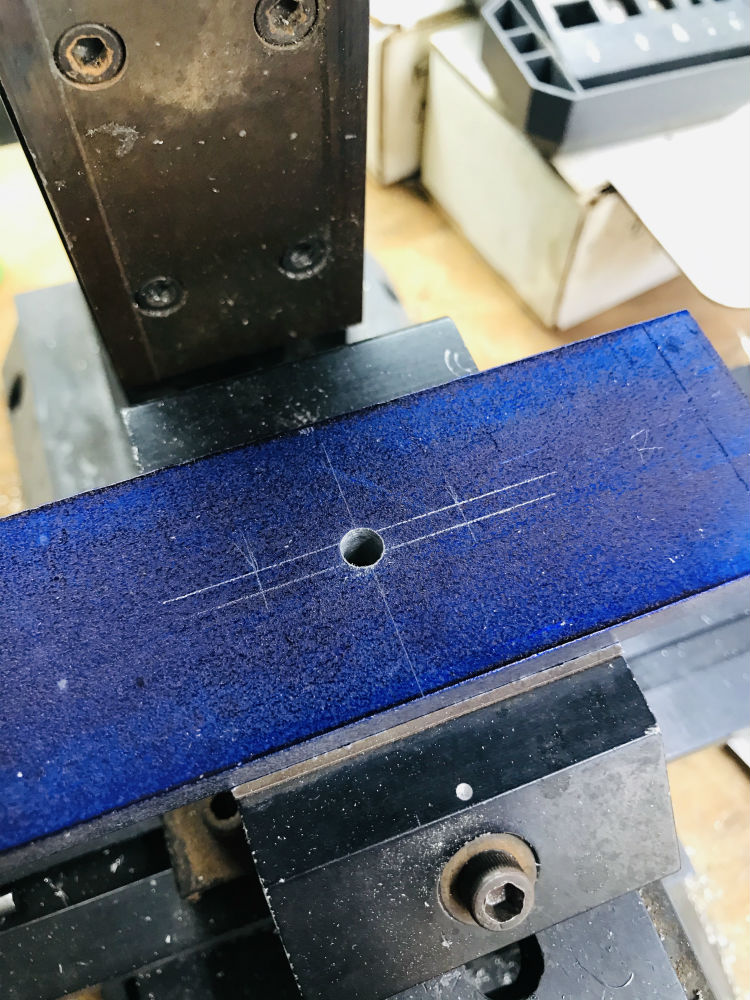
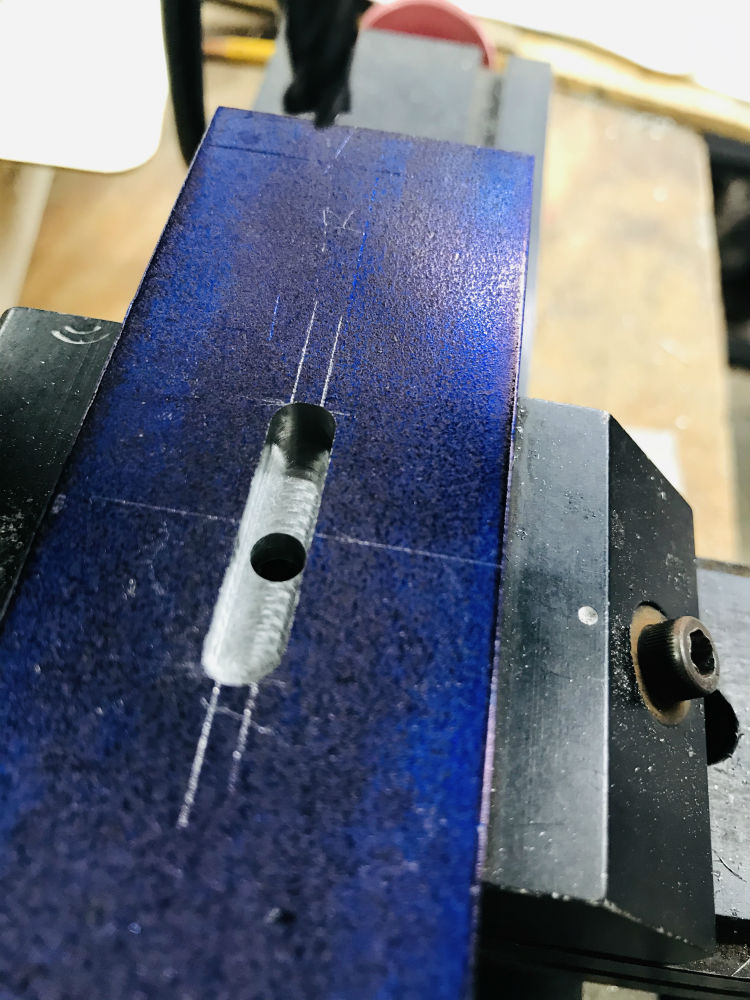
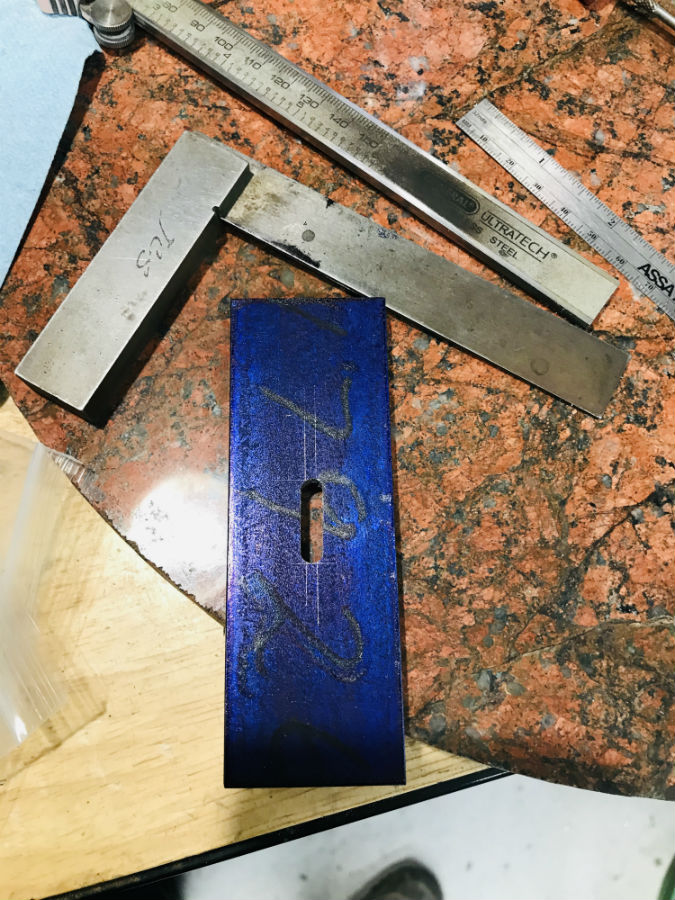
So it's time to do some serious mill work. Start with a piece of 3/8" by 1-1/2" by 4+ inch long 416 Stainless and layout where the ricasso will fit.
The ricasso is just a little thicker than .204" right now and it's finished to 600 Grit.
Drill a 3/16" hole all the way through.
Mill out a slot .200 wide about halfway through the stock.
Joshua States
www.dosgatosforge.com
https://www.youtube.com/channel/UCdJMFMqnbLYqv965xd64vYg
https://www.facebook.com/dos.gatos.71
Also on Instagram and Facebook as J.States Bladesmith
“So I'm lightin' out for the territory, ahead of the scared and the weak and the mean spirited, because Aunt Sally is fixin’ to adopt me and civilize me, and I can't stand it. I've been there before.â€
Take it out of the mill, flip it over, and layout the tang slot side.
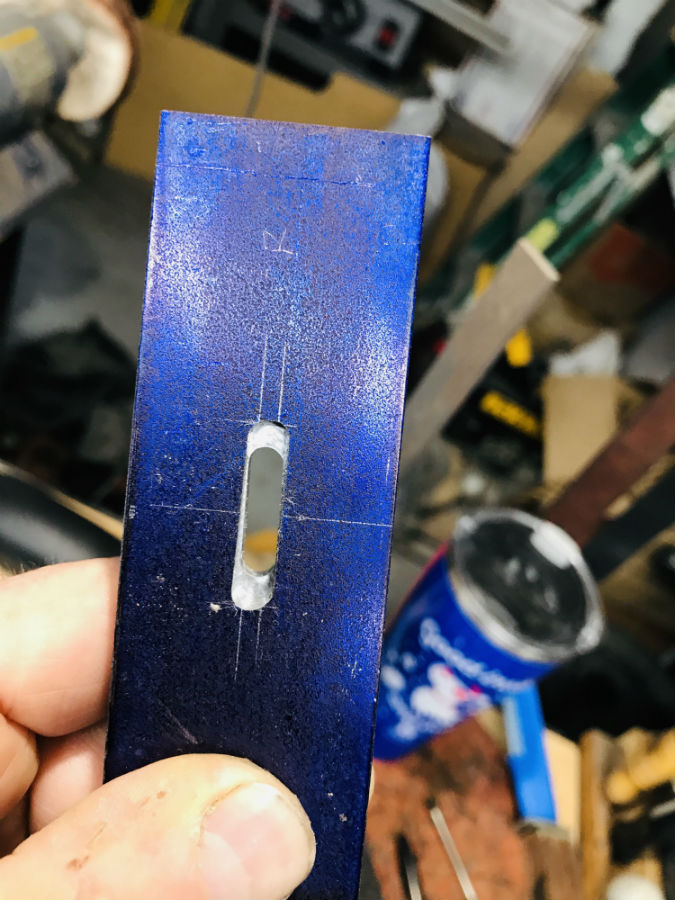
Mill that out until it daylights.
I now have a front slot made long enough for the ricasso, and a slot in the backside that will just fit the tang.
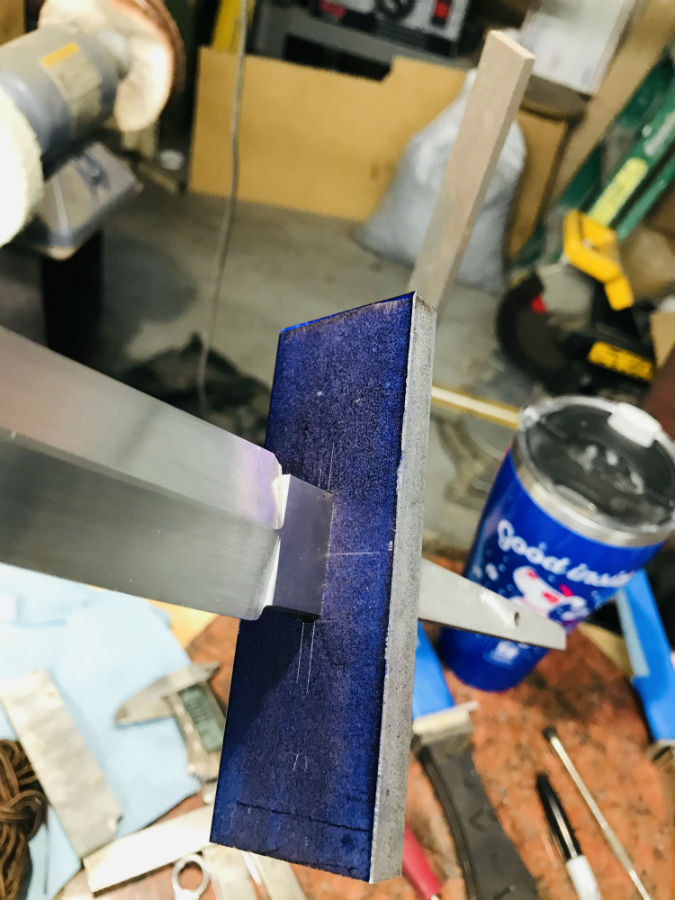
After a little file work to square the tang slot ends and even out the side shoulders, I get a snug fit onto the knife.
Now I will surface grind the guard stock and maybe some sanding, or do a little more filing and maybe milling to get a snug fit over the ricasso so the shoulders bottom out in the front slot.
The front slot is about .004" narrower than the ricasso. That gives me a little bit of room for final finish sanding and etching.
Joshua States
www.dosgatosforge.com
https://www.youtube.com/channel/UCdJMFMqnbLYqv965xd64vYg
https://www.facebook.com/dos.gatos.71
Also on Instagram and Facebook as J.States Bladesmith
“So I'm lightin' out for the territory, ahead of the scared and the weak and the mean spirited, because Aunt Sally is fixin’ to adopt me and civilize me, and I can't stand it. I've been there before.â€
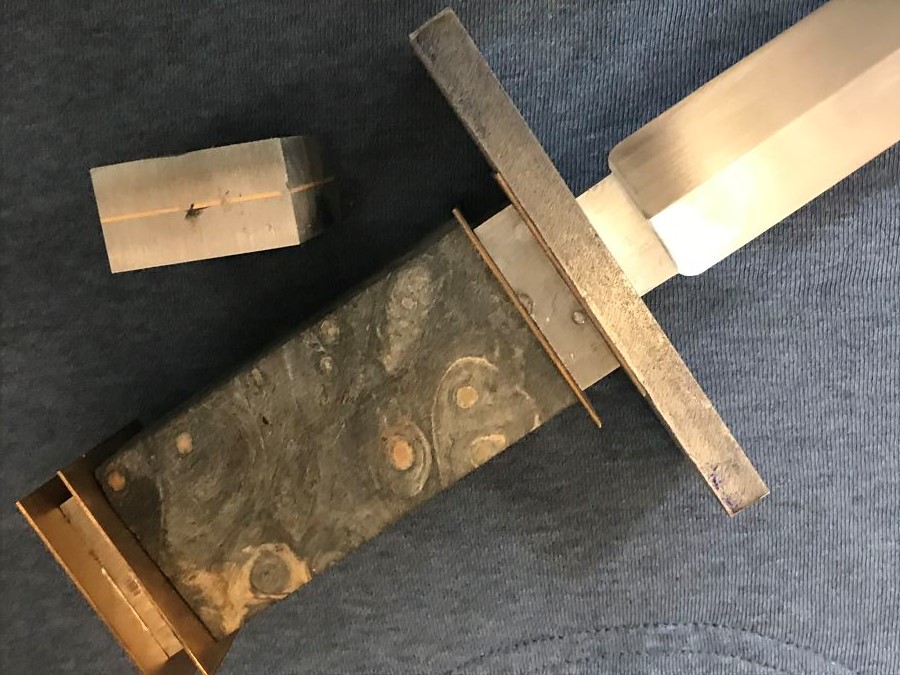
This project has taken a few turns along the way. My original idea for the guard got shaped and fitted, but just didn't look right so I scrapped it. My original handle wood was going to be blackwood, and I changed that out to stabilized Buckeye Burl. My original pommel plan failed to braze and came apart in the machining, twice. Here are a few shots of the process anyway.
All the pieces slotted and fitted to the tang. Wood block has been bedded for a tight fit. All parts have blind alignment pins.
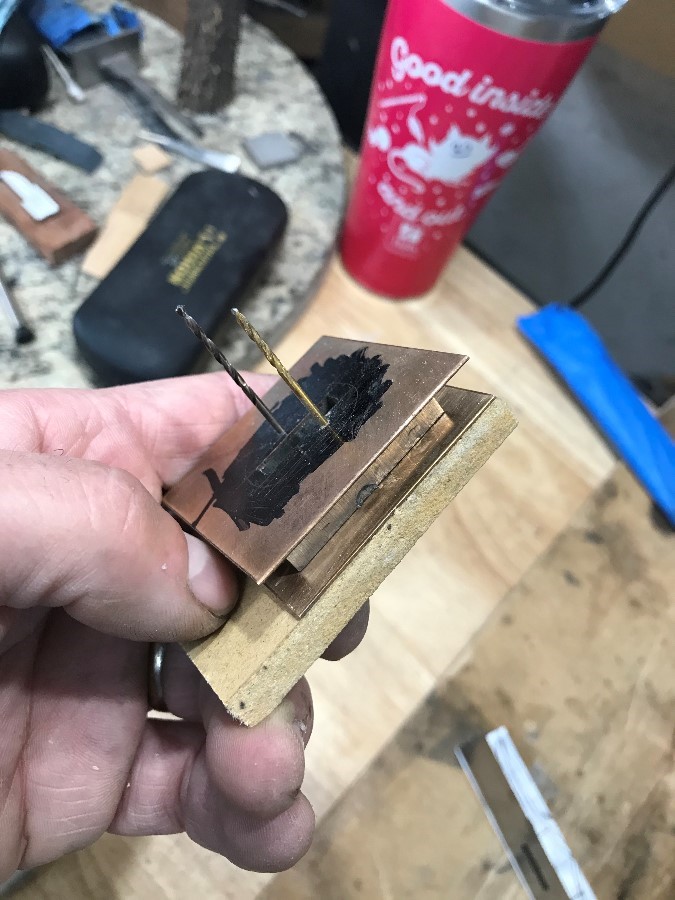
Creating a template for the front spacer.
Pinning the spacer package to a board for shaping.
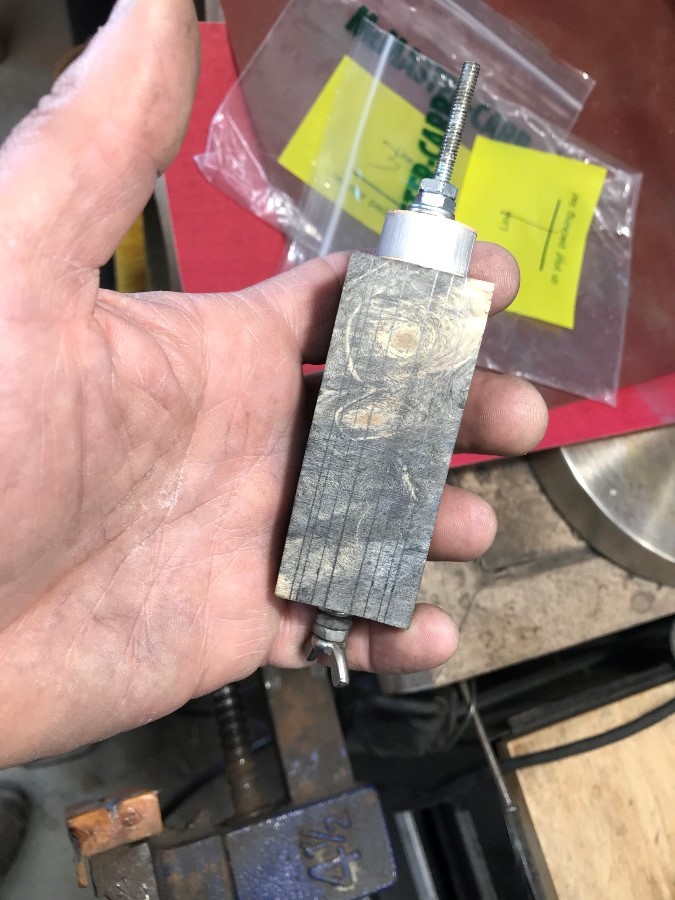
Using a threaded rod to hold it together for marking the handle and grinding.
Both spacers and the wood shaped and sanded.
Joshua States
www.dosgatosforge.com
https://www.youtube.com/channel/UCdJMFMqnbLYqv965xd64vYg
https://www.facebook.com/dos.gatos.71
Also on Instagram and Facebook as J.States Bladesmith
“So I'm lightin' out for the territory, ahead of the scared and the weak and the mean spirited, because Aunt Sally is fixin’ to adopt me and civilize me, and I can't stand it. I've been there before.â€
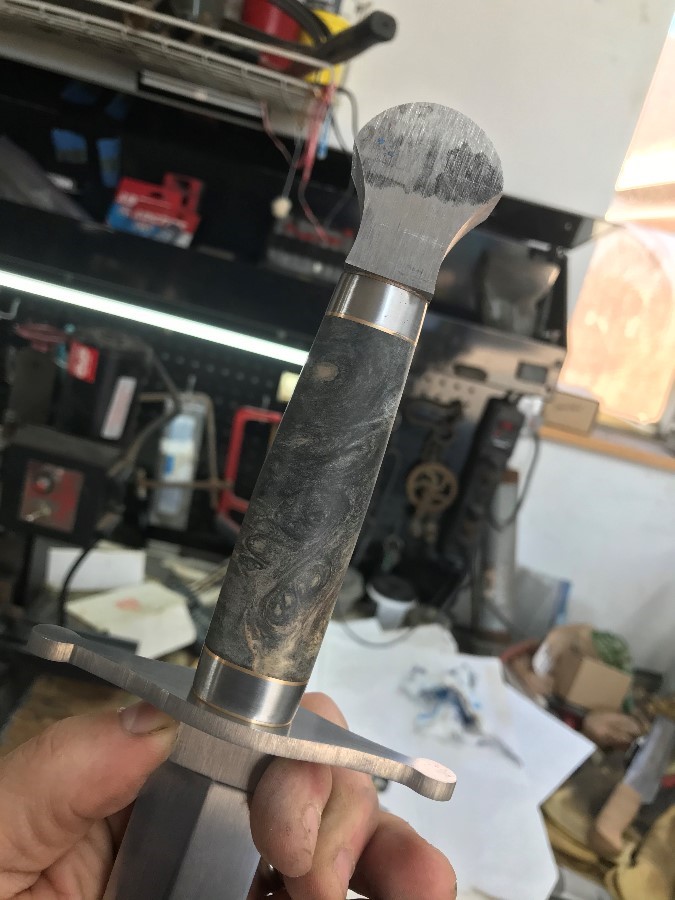
The handle and guard (new design) fitted to the tang.
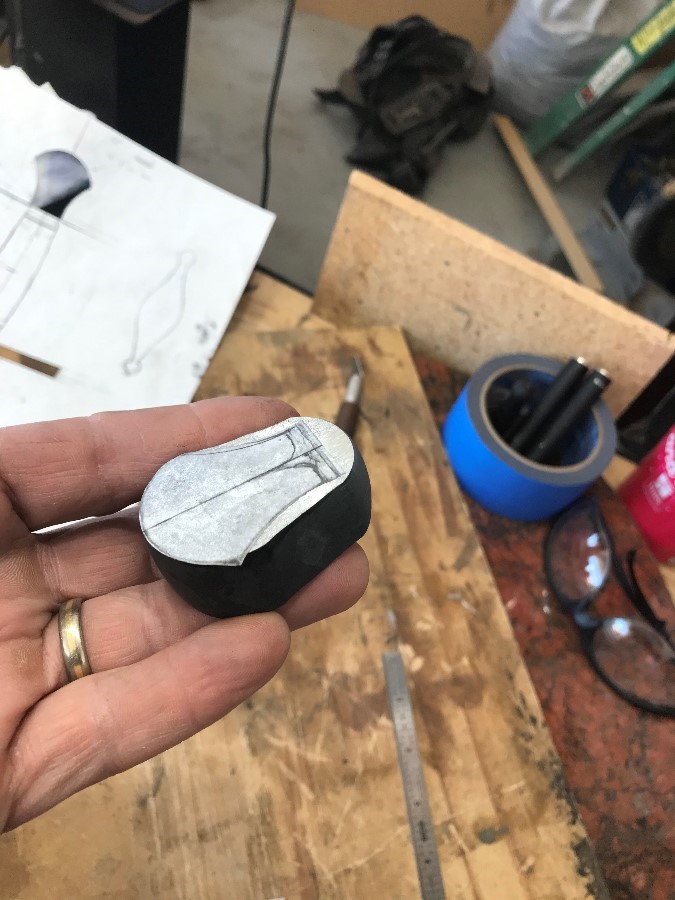
I did some intermediate forging from a bar of 416 to create the pommel rough shape. After surfacing, superglue holds the drawing to one face for profile shaping.
Profiled
Slotted to fit the tang
Today I will transfer the alignment pins to the pommel and get it fit tight
Joshua States
www.dosgatosforge.com
https://www.youtube.com/channel/UCdJMFMqnbLYqv965xd64vYg
https://www.facebook.com/dos.gatos.71
Also on Instagram and Facebook as J.States Bladesmith
“So I'm lightin' out for the territory, ahead of the scared and the weak and the mean spirited, because Aunt Sally is fixin’ to adopt me and civilize me, and I can't stand it. I've been there before.â€
The pommel fit to the tang end.
Joshua States
www.dosgatosforge.com
https://www.youtube.com/channel/UCdJMFMqnbLYqv965xd64vYg
https://www.facebook.com/dos.gatos.71
Also on Instagram and Facebook as J.States Bladesmith
“So I'm lightin' out for the territory, ahead of the scared and the weak and the mean spirited, because Aunt Sally is fixin’ to adopt me and civilize me, and I can't stand it. I've been there before.â€
I like that blade profile a lot.
Thanks for putting in the effort.
Karl B. Andersen
Journeyman Smith
Thanks Karl. I have to remake the pommel. I am not entirely satisfied with the shape.
Joshua States
www.dosgatosforge.com
https://www.youtube.com/channel/UCdJMFMqnbLYqv965xd64vYg
https://www.facebook.com/dos.gatos.71
Also on Instagram and Facebook as J.States Bladesmith
“So I'm lightin' out for the territory, ahead of the scared and the weak and the mean spirited, because Aunt Sally is fixin’ to adopt me and civilize me, and I can't stand it. I've been there before.â€
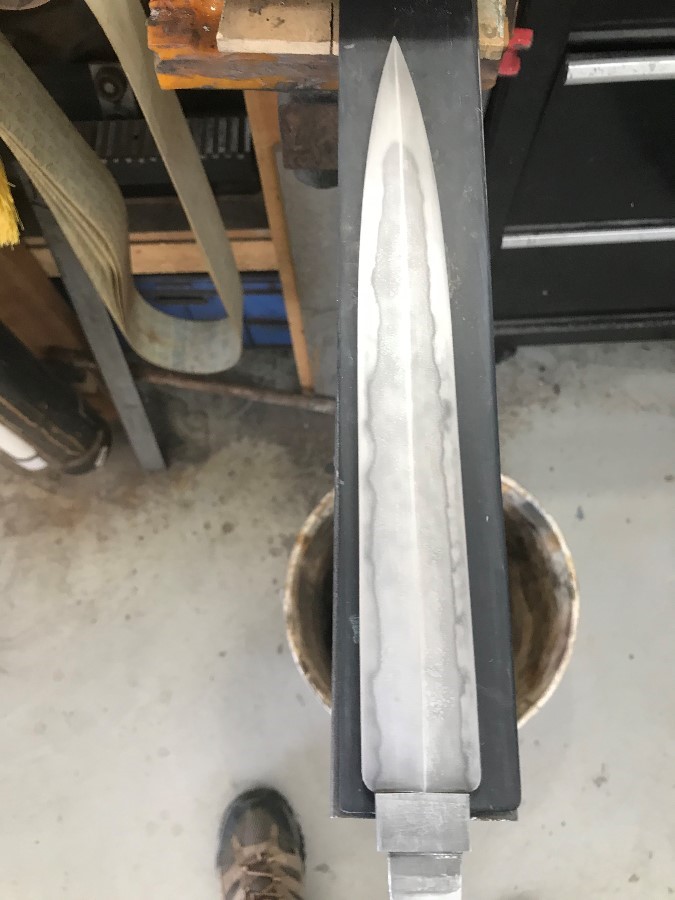
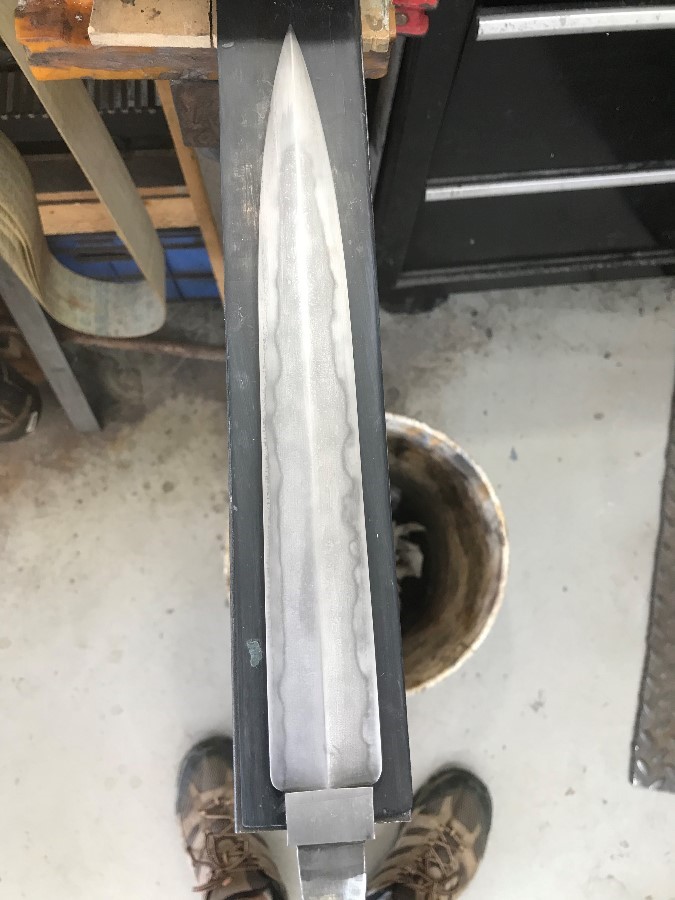
Well, Brion Tomberlin said he was curious how the hamon would look, so I finally put on my big-boy pants and etched the blade today.
This is straight out of the etch after taking the oxides mostly off with loose abrasives.
Joshua States
www.dosgatosforge.com
https://www.youtube.com/channel/UCdJMFMqnbLYqv965xd64vYg
https://www.facebook.com/dos.gatos.71
Also on Instagram and Facebook as J.States Bladesmith
“So I'm lightin' out for the territory, ahead of the scared and the weak and the mean spirited, because Aunt Sally is fixin’ to adopt me and civilize me, and I can't stand it. I've been there before.â€
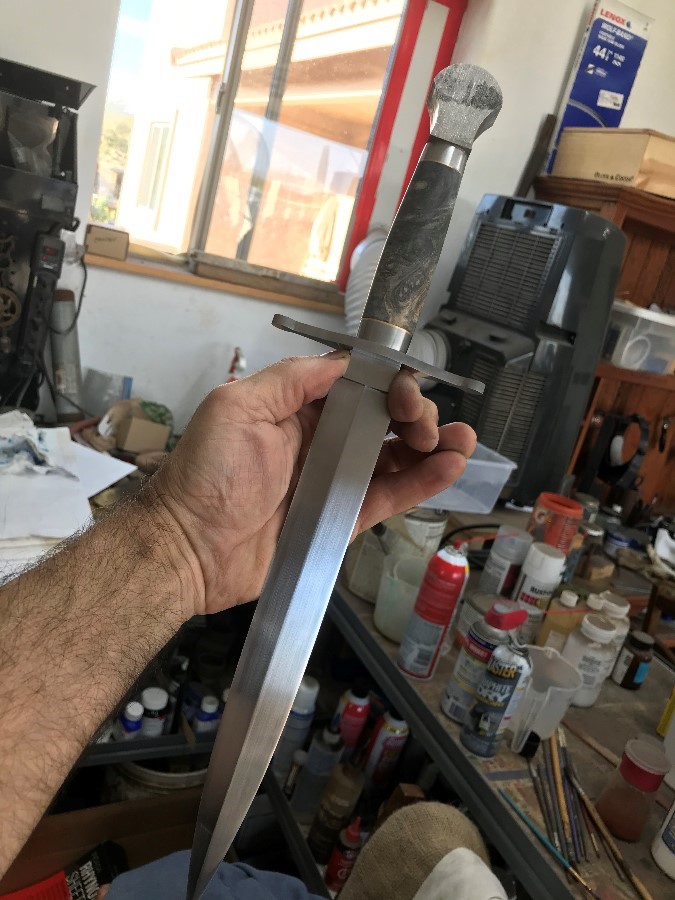
Well, for those of you with the eagle eyes who noticed that the heels are not even on that dagger, thanks for not mentioning it.
I noticed when I really looked at these two pics above. It's one of those little things that's easy to miss when you are motoring through the process and you only find when you stop and take a photo.
That must be fixed.
Joshua States
www.dosgatosforge.com
https://www.youtube.com/channel/UCdJMFMqnbLYqv965xd64vYg
https://www.facebook.com/dos.gatos.71
Also on Instagram and Facebook as J.States Bladesmith
“So I'm lightin' out for the territory, ahead of the scared and the weak and the mean spirited, because Aunt Sally is fixin’ to adopt me and civilize me, and I can't stand it. I've been there before.â€
Well, I accidently put a scratch in the blade and had to hand sand it down again. Will have to do the etch thingy one more time.
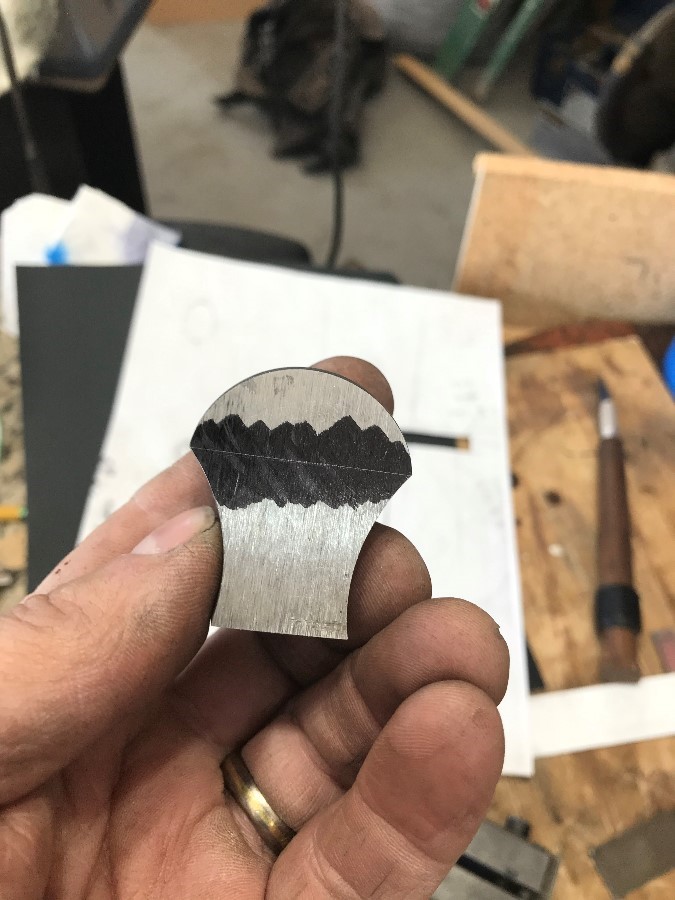
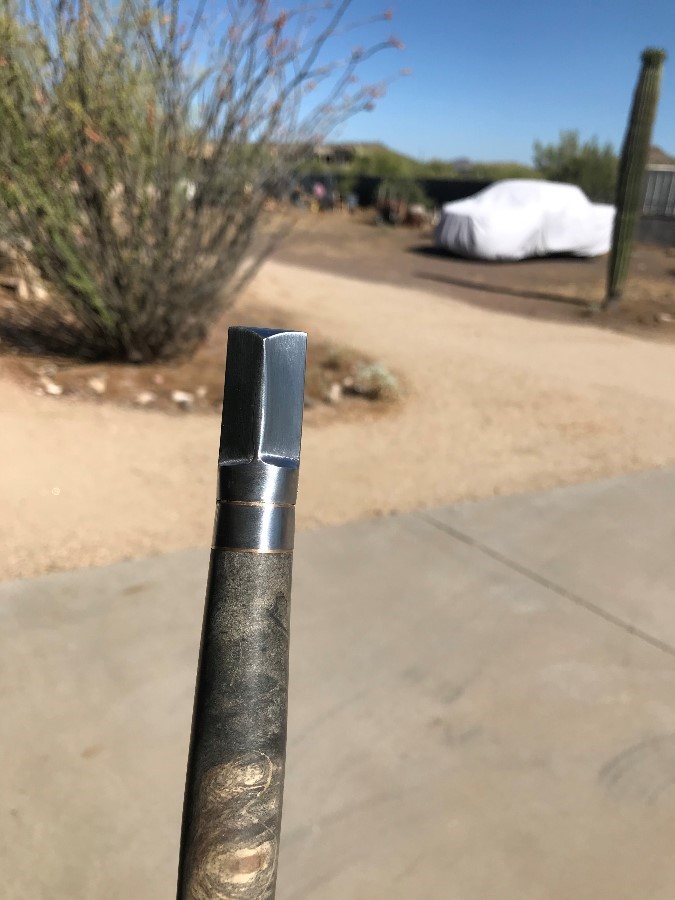
Today I finally put my big-boy pants on and worked the pommel into shape. I made it from a 1-1/2" round bar of 416 SS.
The "bevels" are at 400 grit hand sanded and the rounds and ribs are at 600 grit. I will take the bevels up to at least 600 before buffing.
This is the butt end view. The 3/32" bronze pin will be hammered through the pommel and out the other side. (it's a tight fit) Then the ends get trimmed and domed over.
I still have to file work the spacers and shape the guard. (and re-etch for the hamon)
Joshua States
www.dosgatosforge.com
https://www.youtube.com/channel/UCdJMFMqnbLYqv965xd64vYg
https://www.facebook.com/dos.gatos.71
Also on Instagram and Facebook as J.States Bladesmith
“So I'm lightin' out for the territory, ahead of the scared and the weak and the mean spirited, because Aunt Sally is fixin’ to adopt me and civilize me, and I can't stand it. I've been there before.â€


