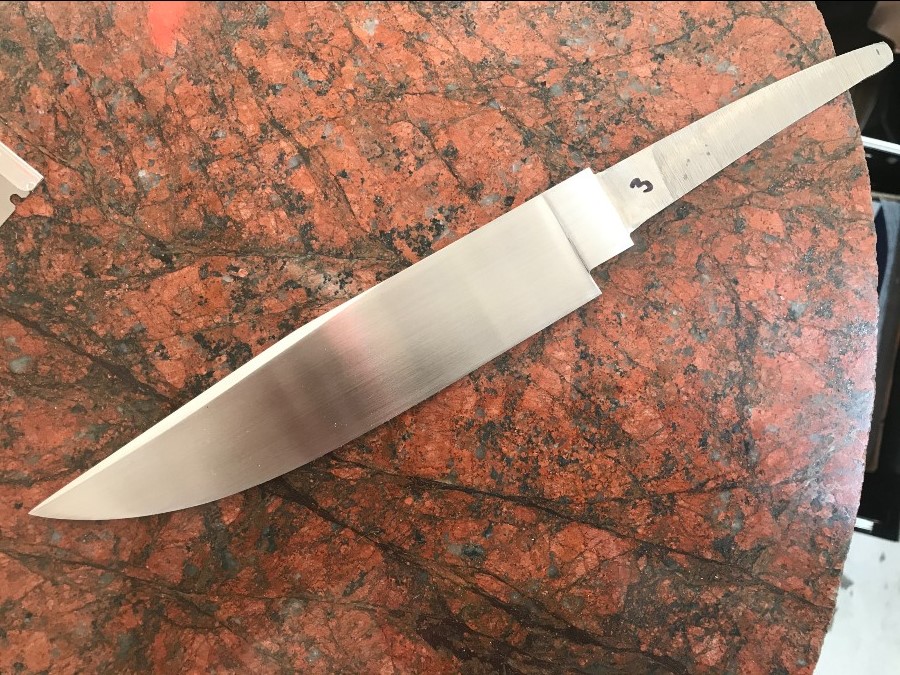
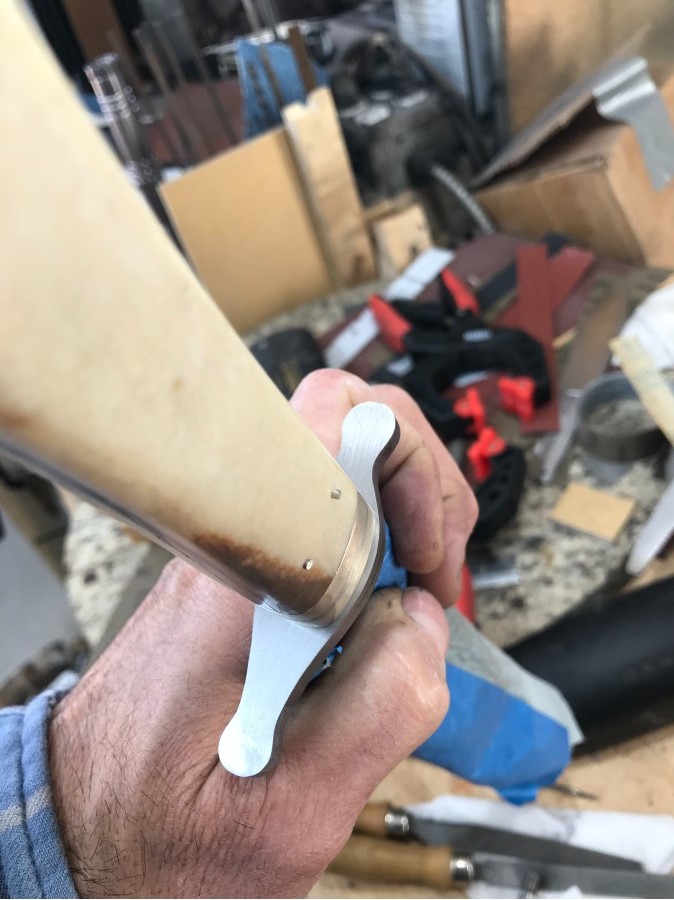
I'm starting a new Bowie project with a frame handle and thought I'd show the handle making procedure I use.
The blade is forged from my typical 1' drill rod (O-1 steel) and is hand-finished to 320 Grit at this point.
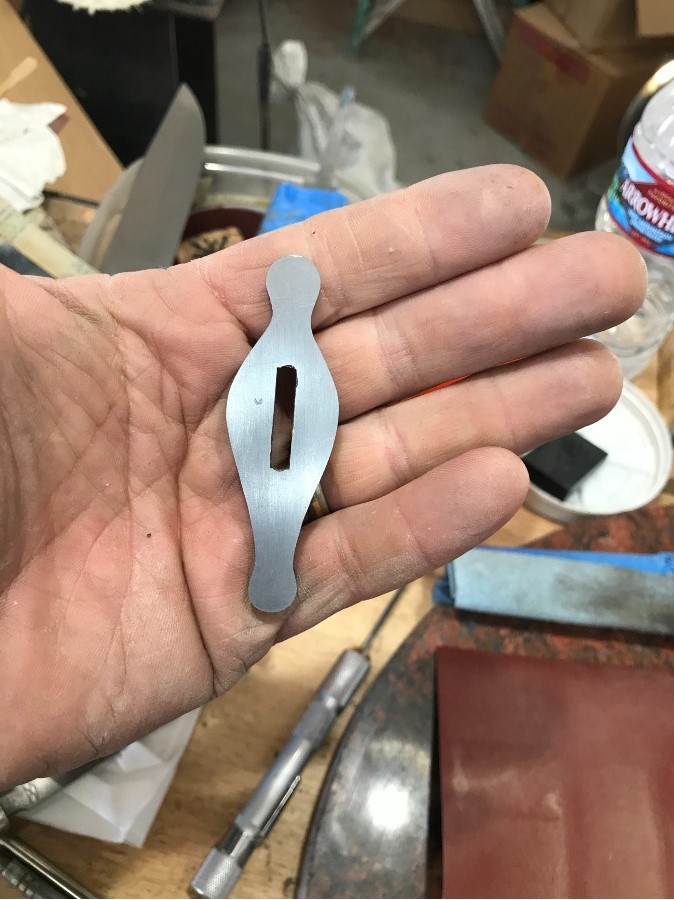
I then take the blade and create a detailed design drawing of the finished project. The handle portion is copied, cut out and superglued to a piece of 1/8" mild flat bar to create the frame handle template.
Joshua States
www.dosgatosforge.com
https://www.youtube.com/channel/UCdJMFMqnbLYqv965xd64vYg
https://www.facebook.com/dos.gatos.71
Also on Instagram and Facebook as J.States Bladesmith
“So I'm lightin' out for the territory, ahead of the scared and the weak and the mean spirited, because Aunt Sally is fixin’ to adopt me and civilize me, and I can't stand it. I've been there before.â€
Looking forward to this thanks for taking the time Joshua.
Really looking forward to following along too. Should be a beautiful project!
Thanks guys. This may take a little while to complete. I have another project I am working on for the local blacksmith organization. They asked me to do a video demo and I stupidly agreed to do an axe forging. That project is a pattern welded, bearded axe via the asymmetric welded eye technique by Jim Austin. It's got some serious challenges for my ability as a smith. This Bowie is what I can work on when Liz is in the shop making too much background noise for the video.
I should have some updates later today.
Joshua States
www.dosgatosforge.com
https://www.youtube.com/channel/UCdJMFMqnbLYqv965xd64vYg
https://www.facebook.com/dos.gatos.71
Also on Instagram and Facebook as J.States Bladesmith
“So I'm lightin' out for the territory, ahead of the scared and the weak and the mean spirited, because Aunt Sally is fixin’ to adopt me and civilize me, and I can't stand it. I've been there before.â€
This is a symmetrical handle, and I have a method for these. Symmetrical handles, like a coffin or dog-bone, take a little extra time and work, as opposed to something asymmetrical like a pistol grip or bird head handle. In the photo above, you will see the template I made from the drawing. Now try as I might, this is not symmetrical and the pin layout is not quite the same on opposing sides. So, I have this little hack trick to make sure that these things all line up correctly when I make the frame piece.
The template has two alignment holes that will define the center line. I chose which side of the template I will use and clearly mark the other side with black X's.
I cut out a piece of material for the frame. In this case, I am using 3/16" 410 SS sheet.
I paint the frame material with Dykem blue or other layout dye, clamp the template to it, and drill the alignment holes. I put pins in as I drill them.
Now I drill the pin holes only on the side that I want to use and scribe that half of the outline.
I remove the template and place it face down on the same side of the frame material. I put the pins back in the two alignment holes. Now I repeat the pin hole drilling and outline scribing on the other side of the frame. I am using the same two template holes that I used for the first side
The outline is now perfectly symmetrical and the pin holes are equally placed from the sides, front, and rear of the outline.
Joshua States
www.dosgatosforge.com
https://www.youtube.com/channel/UCdJMFMqnbLYqv965xd64vYg
https://www.facebook.com/dos.gatos.71
Also on Instagram and Facebook as J.States Bladesmith
“So I'm lightin' out for the territory, ahead of the scared and the weak and the mean spirited, because Aunt Sally is fixin’ to adopt me and civilize me, and I can't stand it. I've been there before.â€
I cut the outline with the bandsaw, leaving a little excess for grinding down to the scribed line.
To isolate the front edge, and make it parallel to the front pins, I place a parallel block from my bag of mill toys against two pins in the front holes, and scribe a line. Cut on the bandsaw and grind down as before.
The frame is placed on the surface grinder and finished to 220 grit. Then I flatten and smooth it out by hand on the granite slab.
The result is a perfectly flat frame stock at 220 grit smooth. This is now around 0.165" thick.
The template can now go back in the box. The scales will be shaped and drilled for pins using the frame stock piece.
Joshua States
www.dosgatosforge.com
https://www.youtube.com/channel/UCdJMFMqnbLYqv965xd64vYg
https://www.facebook.com/dos.gatos.71
Also on Instagram and Facebook as J.States Bladesmith
“So I'm lightin' out for the territory, ahead of the scared and the weak and the mean spirited, because Aunt Sally is fixin’ to adopt me and civilize me, and I can't stand it. I've been there before.â€
Great symmetry hacks. Always have to have yer thinkin' cap on.
Karl B. Andersen
Journeyman Smith
The spacers for this project will be shibuichi. I make this in my shop with fine silver and 99.9% copper sheet. I will mix parts by weight and melt it in a large crucible in the forge to make bars. This I cut pieces off of, and make fittings as I need them. Some I sand cast, others I just make plates and cut away the excess to throw into the stock pile. Here is the plate casting process.
Melt in a crucible with the oxy-acetylene torch.
Pour into the plate mold.
Remove the rough plate.
One face gets ground on the 2x72 to 220 grit, and hand sanded on the same face to 220 grit on the granite slab. That face gets glued to a surface plate and the other face is surfaced to 220 grit and hand sanded flat. I surface grind both pieces at the same time to ensure they are the same thickness. The center spacer is a dummy piece of 410 SS while I wait to create the fine silver one at a later time in the process. All three pieces get slotted and fit to the tang after fitting the guard. The spacers are tight fitting to the tang.
Joshua States
www.dosgatosforge.com
https://www.youtube.com/channel/UCdJMFMqnbLYqv965xd64vYg
https://www.facebook.com/dos.gatos.71
Also on Instagram and Facebook as J.States Bladesmith
“So I'm lightin' out for the territory, ahead of the scared and the weak and the mean spirited, because Aunt Sally is fixin’ to adopt me and civilize me, and I can't stand it. I've been there before.â€
Now I need to drill the holes for the blind pins. So I superglue the spacers together along the edges, and carefully remove the spacer package.
Then I drill the alignment pins holes through all three pieces.
Now I blacken the front face with a Sharpie pen and put the whole package back on the knife (no guard) and using a template against the ricasso, scribe a rough outline of the spacer package on the black face. I also use a series of straight lines parallel to the ricasso for reference. (I have shown this before) Now I remove the spacer package, and pin it to a piece of 1/4" mdf for easier handling. This I cut away the excess from on the band saw (save the pieces!) and grind down to the lines on the 2x72.
Here you can still see the reference lines and the profile line.
Joshua States
www.dosgatosforge.com
https://www.youtube.com/channel/UCdJMFMqnbLYqv965xd64vYg
https://www.facebook.com/dos.gatos.71
Also on Instagram and Facebook as J.States Bladesmith
“So I'm lightin' out for the territory, ahead of the scared and the weak and the mean spirited, because Aunt Sally is fixin’ to adopt me and civilize me, and I can't stand it. I've been there before.â€
Well, the pieces of ivory I was thinking of did not fit the handle I wanted to make. So I had to choose a different set of scales.
Anyway, The inside face of the ivory gets sanded flat to 220 or 320 grit by hand and I use my surface grinder to put a parallel flat area down the center of the outside face. This allows me to clamp the frame to the scale and mill table for drilling.
I place a pin after every hole I drill to keep it secure and make sure the holes all line up when done. Once I have the scale all drilled, I cut of the excess on the bandsaw, leaving a little room to grind down to the frame.
To sand the profile, I blacken the frame sides with a Sharpie pen. This shows me very clearly when I have reached the frame. With the handle assembly together, I can make use of the parallel outside faces to lay the handle on the 2x72 work rest and grind down just until the black starts to disappear at 220 grit.
Joshua States
www.dosgatosforge.com
https://www.youtube.com/channel/UCdJMFMqnbLYqv965xd64vYg
https://www.facebook.com/dos.gatos.71
Also on Instagram and Facebook as J.States Bladesmith
“So I'm lightin' out for the territory, ahead of the scared and the weak and the mean spirited, because Aunt Sally is fixin’ to adopt me and civilize me, and I can't stand it. I've been there before.â€
Here's another symmetry hack for you. I grind these handles off the knife. Drawing reference lines on the scales is a visual aid in seeing the sides relative to each other and relative to the ends. I am going to use a pair of photos from a different knife I made a while back.
I pin one scale to the frame and lay the frame side down on the granite slab. I take a very sharp pencil and put a flat shim under it until the point is above the frame.
Then I scribe a line all the way around the profile of the scale. I put a thicker shim under the pencil and repeat until I have 3 parallel lines all the way around the scale. Pull that scale off and repeat the 3-line process for the other scale. All these lines are parallel to the frame and center line of the handle. When you pin both scales to the frame, you will see this.
Now you have a reference for depth and curvature to look at while you grind the handle down. You can easily see whether those corners are even across the sides and across the ends.
Joshua States
www.dosgatosforge.com
https://www.youtube.com/channel/UCdJMFMqnbLYqv965xd64vYg
https://www.facebook.com/dos.gatos.71
Also on Instagram and Facebook as J.States Bladesmith
“So I'm lightin' out for the territory, ahead of the scared and the weak and the mean spirited, because Aunt Sally is fixin’ to adopt me and civilize me, and I can't stand it. I've been there before.â€
I made some progress on this one yesterday. I roughed out the guard. This will be a double-branch design. These can be a little tricky to get both branches symmetrical to them selves and centered on the blade. So, guess what I have? Yep, another symmetry hack for you.
I have drawn a variety of fitting designs out on paper, transferred them to 0.04" copper, and created templates. Some of these (like this one) is a base for multiple guard forms. This one can be used to create clamshells, fleur-de-lis, bishop hats, etc.
I base everything about the guard off of the ricasso. I blacken the face of the guard plate and put it onto the blade snug and tight. Then I put the template on the face and but it against the ricasso and spine. I can use only one end of the template for both branches (equal length) or use the whole template to create branches of differing lengths. I scribe a line around the template.
Then I flip the template over, butt it against the other side of the ricasso, and scribe the template again.
The result is a clear profile I need to cut away the excess and grind to the line.
This is the rough profiled guard, edges are at 220 grit.
Joshua States
www.dosgatosforge.com
https://www.youtube.com/channel/UCdJMFMqnbLYqv965xd64vYg
https://www.facebook.com/dos.gatos.71
Also on Instagram and Facebook as J.States Bladesmith
“So I'm lightin' out for the territory, ahead of the scared and the weak and the mean spirited, because Aunt Sally is fixin’ to adopt me and civilize me, and I can't stand it. I've been there before.â€
Looking at the back side, I can see where it may be a little off from one side to the other and trim a bit here and there. The true test, is to see it in reference to the spacer package. So I put the newly shaped guard back on the knife, and blacken the back side. Now I put the handle and spacer package onto the knife and get it all snugged up tight.
I scribe the outline of the spacer package onto the back of the spacer. This will easily show me where it is off from one side to the other.
Now I can trim it down and do the final profile grind until both sides are the same in reference to the spacer.
Joshua States
www.dosgatosforge.com
https://www.youtube.com/channel/UCdJMFMqnbLYqv965xd64vYg
https://www.facebook.com/dos.gatos.71
Also on Instagram and Facebook as J.States Bladesmith
“So I'm lightin' out for the territory, ahead of the scared and the weak and the mean spirited, because Aunt Sally is fixin’ to adopt me and civilize me, and I can't stand it. I've been there before.â€
This is now ready for the frame and spacers to get file work. The final thinning and shaping of the guard will happen last.
Joshua States
www.dosgatosforge.com
https://www.youtube.com/channel/UCdJMFMqnbLYqv965xd64vYg
https://www.facebook.com/dos.gatos.71
Also on Instagram and Facebook as J.States Bladesmith
“So I'm lightin' out for the territory, ahead of the scared and the weak and the mean spirited, because Aunt Sally is fixin’ to adopt me and civilize me, and I can't stand it. I've been there before.â€
I want to apply some file work to the frame on this handle. I would typically do a rope file pattern like the one in this set. I want to put something different in this handle.
I am trying to decide between a modified rope.
Or a geometric "tribal" pattern
Any preference among the viewers?
Joshua States
www.dosgatosforge.com
https://www.youtube.com/channel/UCdJMFMqnbLYqv965xd64vYg
https://www.facebook.com/dos.gatos.71
Also on Instagram and Facebook as J.States Bladesmith
“So I'm lightin' out for the territory, ahead of the scared and the weak and the mean spirited, because Aunt Sally is fixin’ to adopt me and civilize me, and I can't stand it. I've been there before.â€


