Thanks for posting all this Brion. It's GREAT!
Are there any tricks to accomplishing the fit of the butt cap?
I'm assuming it will be epoxied in place and you finish up the fit once it is?
Mahalo (thanks) and aloha, Phil
How is she lookin' now, Brion?
Karl B. Andersen
Journeyman Smith
Update to come later on Karl. It got done yesterday. I like it, big and beefy.
Brion
Brion Tomberlin
Anvil Top Custom Knives
ABS Mastersmith
This is the final installment on the bowie. I spent yesterday working on assembling the knife then detailing the buttcap and finishing the handle. In answer to Phil's question, yes there are tricks to making sure you have a good fit on the buttcap to the stag. One is if you are using the setup I am where the tang is threaded, make sure that the threaded part is drawn back to soft. This will allow you some adjustment room by being able to slightly bend the threaded area. Also make sure your stag bottom is dead flat. A surface plate and sandpaper will do this. Also make sure your drawing is good and the stag is fitted to those specifications. There will be minor adjustments made in fitting and getting the angle of the stag correct. Just takes time. Another option is to use a threaded rod or all thread. Flatten one end and pin it to the tang. This is a clevis arrangement and allows movement of the threaded portion to match the stag angle. Still have to get it flat though, no unsightly gaps. I use both methods.
One thing I forgot to mention in the last segment was the spacer assembly. It was shaped and cleaned up. All mating surfaces were made flat with the surface plate. It has two alignment pins to make sure everything fits the same way all the time. The outer pieces were left polished and the thicker inner piece was hammer peened with a jewelers chasing hammer, very carefully. Of course after peening you must flatten again. Here is the finished assembly.
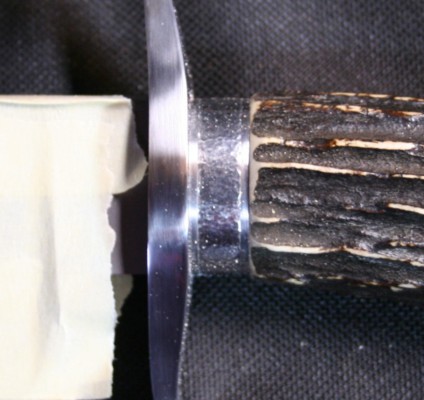
At this point the stag handle has been fitted to the spacer and bullnosed. Also notice that there are no gaps showing. Surface plate again. I also went ahead and finished the stag to 600 grit, so the handle is mostly done, except for the buttcap. One thing I do is tape everything up that is polished, like the blade and guard. I do not want any stray scratches showing up.
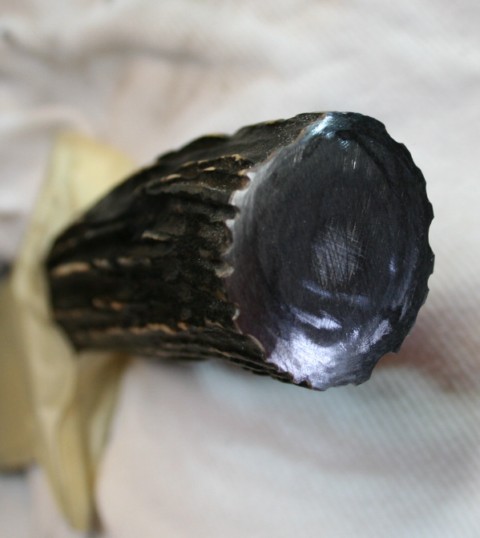
Now on to the buttcap. I do the major shaping and get the size close before assembly. This is done with a grinder and a 120 grit belt moving slow. I grind to the traced line you saw in the past segment. I also slightly dome the cap. Then it is time for assembly. The stag has already been bedded to fit the tang and I will go ahead and put more epoxy in to almost fill it completely. This is not a take down knife, when it is together it is together. I can do all my test fitting and adjustment before final assembly. Once it is epoxied up then I finish the cap.
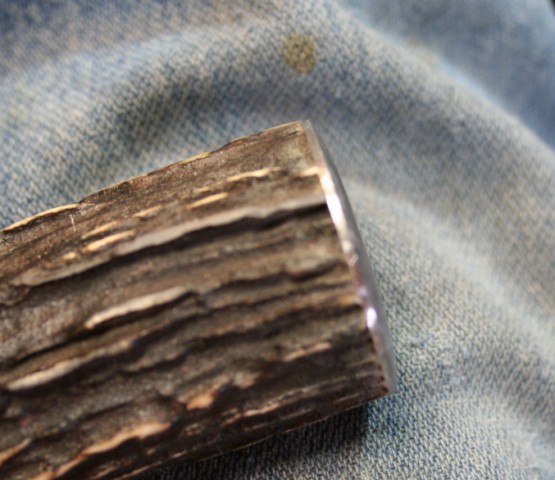
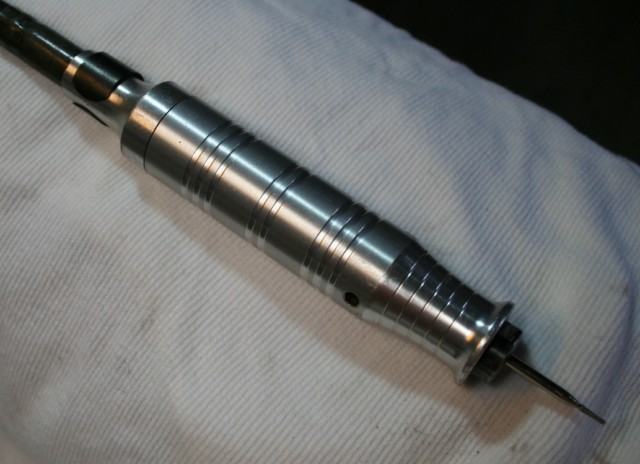
Here is the cap in place and lightly ground to the high contours of the stag. Again 120 grit. I will then go to 320 and also 320 on the domed area. No more grinder after this. So now I can match the stag contours. You can do this with hand files, takes a while, and you use needle files. Or you can use this.
This is a foredom tool. Variable speed and very handy, also reversible. I use this on almost every knife. A dremel will work just as well, just make sure it is variable speed. Here is the other part.
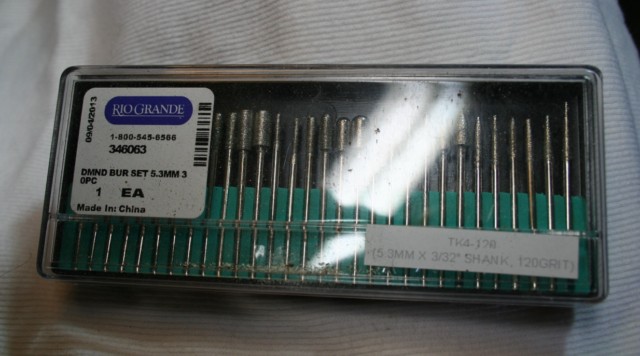
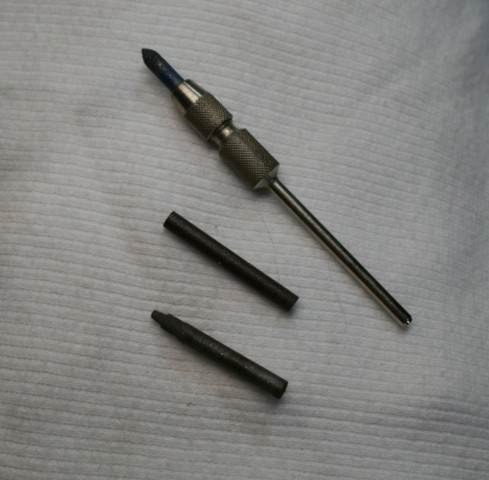
These are diamond burrs from Riogrande of course. With these I can get in very small areas and contour the buttcap to match the stag. Just go slow and take it easy. Works great.
Of course then you have to polish the areas. Again you can do it with files and paper, but I have the foredom and a Riogrande catalog. So here you go.
These are polishing sticks for jewelry. They come in different compounds from hard to soft. You can shape them to fit any area. Very handy for this.
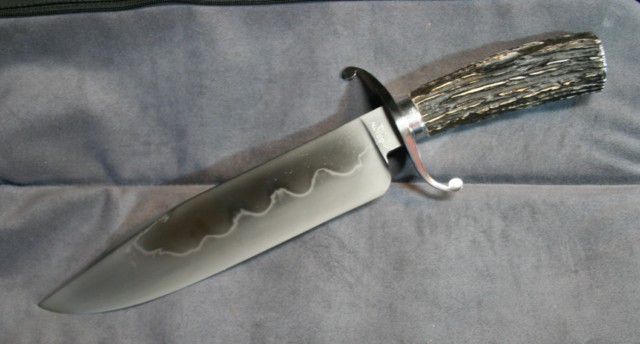
After the contouring is done then I will polish the face of the buttcap to 1500 grit and give it a light buff. The sides where the cap meets the stag are also polished to 1500. The completed handle is given a light rubbing with a white scotchbrite piece for polishing. You can get this at auto body shop supply stores. Then a coat of wax for the handle. So the bowie is done.
I like it. The balance point is about 3/4" of an inch in front of the guard and it feels good in the hand. Thank you all for following along.
Brion
Brion Tomberlin
Anvil Top Custom Knives
ABS Mastersmith
THANKS Brion!
Beautifully done, Brion. I'm sure that everyone in the ABS appreciates your time & effort.
Thanks for sharing.
Gary
Awesome.
Jeremy
Jeremy Lindley, Apprentice Smith
Brion,
Great WIP! Love the knife, and thanks for sharing all the great techniques and tools you used during this build. The close-ups of the guard, and how you laid it all out is really helpful. Your source of tools and the types used are straight forward. I especially like the peened spacer. I used that on bolsters I put on two bruts I made for clients last year, and they really like the look. I still haven't got the file work thing down yet, so that is a great idea for spacers, too!
Thanks Again!
Bob
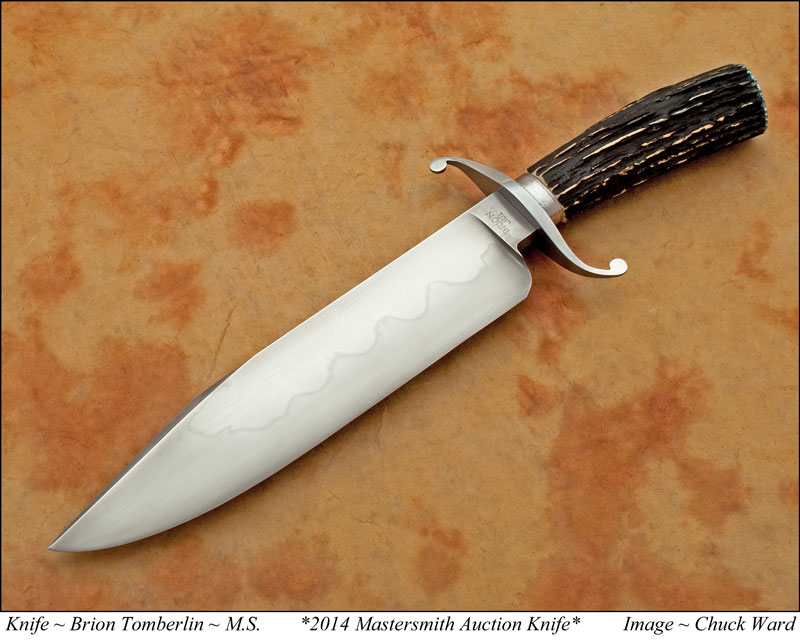
This is the photo taken by professional photographer Chuck Ward of Brion Tomberlin's outstanding Master Smith Knife of the Year for 2014.
Dan Cassidy
Journeyman Smith
Send an email to Dan

I had the privilege of handling that knife at Little Rock.
It feels way good!!!
Mike
Mike Williams
Master Smith
What a fantastic thread Brion!!! <img src=' http://www.americanbladesmith.com/ipboard/public/style_emoticons//cool.gi f' class='bbc_emoticon' alt='B)' />
I'm sure sorry to see the first two blades didn't work-out. <img src=' http://www.americanbladesmith.com/ipboard/public/style_emoticons//sad.gi f' class='bbc_emoticon' alt=':(' />
Thank you for sharing this Brion!!! <img src=' http://www.americanbladesmith.com/ipboard/public/style_emoticons//smile.gi f' class='bbc_emoticon' alt=':)' />
The knife is outstanding. Thanks for putting this thread together Brion!
One thing I did forget to mention with everything that has been going on so far this year. I just want to say a big THANK YOU! to everybody that followed along and gave the great comments. Yes it takes time to do these WIP's, but the comments make it more than worth it, along with the honor of making something that will benefit the ABS. The ABS has given so much to us, I feel if you get the chance return it.
Thank you all again.
Respectfully,
Brion
Brion Tomberlin
Anvil Top Custom Knives
ABS Mastersmith

