Dale,
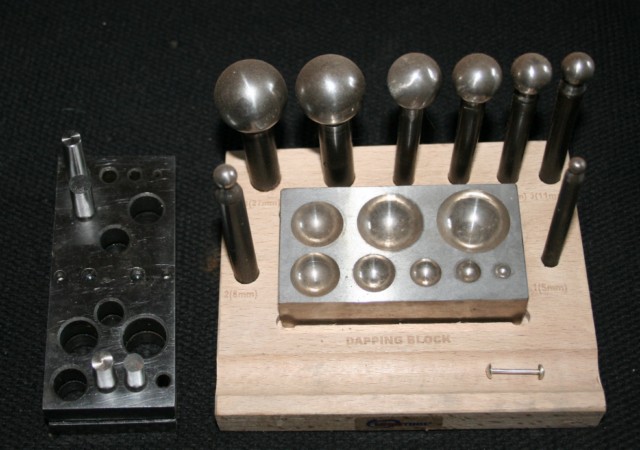
Some good questions I was sort of expecting. The stages get progressively smaller, as you might think. Mine started with the disc as .240, then using the doming punch, push it down into a hole in the block (with a domed/cupped bottom)of about .230. This same hole is where you would punch the pin hole in the dome/cup. If you are not going to punch a hole in the Silver dome, dont hit it too hard or it will leave a halo on top. You can have a seperate hole in the block with no center hole. But the center hole is handy in the event the dome gets stuck and you want to be able to push it out from the other side.
It doesn't matter the actual size just so the set up produces the sized domes that you need for the particular knife. I can imagine needing two set ups for different sized knives.
If you are expecting to make a lot of these, you might consider using an arbor press to hold your punches. But it's not difficult to use this manually.
Oh, the stock is .020 for the cups and my pin stock is .082 I keep a numbered drill (slightly larger) dedicated for this set up in my kit. Your kit might be different according to your available stock but the results will be so close it would be hard to tell any difference.
Thank you Lin. This is a subject that I've wondered about for some time. I have seen some beautiful knives with dommed pins and always wondered just exactly how they were made. Reading your post on Bowie No. 1 brought the subject back to my mind and gave me the opportunity to ask how they were done. I will be making a set of tools as soon as I can and will give them a try. I am sure some others will appreciate this information as much as I do. If anyone else has another way of making them I would be interested is knowing about it also.
Dale
Dale Huckabee
Journeyman Smith
dalehuckabeeknives.weebly.com
Dale, I would be interested in what you find on the subject. The way I am showing is just one way. If I were to specialize in this style knife, I would be more concerned about refining the system, but this works for now. I cant imagine James Black having a very elaborate set up either.
I do it basically the same way as Lin. I did not make my disc cutter but it does the same thing. I use a dapping set for doming the discs. These can be found at any good jewelry supply place.
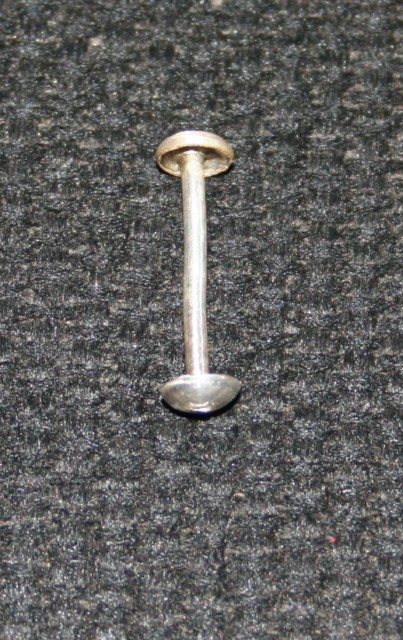
The finshed product ready for installing in the handle.
Brion
Brion Tomberlin
Anvil Top Custom Knives
ABS Mastersmith
Hey Brion and Lin,
Very interesting info from both of you...thanks. I will have to try this because it looks "challenging" <img src=' http://www.americanbladesmith.com/ipboard/public/style_emoticons//wink.gi f' class='bbc_emoticon' alt=';)' /> I am curious about a tool I saw while looking on a certain knifemaking suppliers website. It's called a "headspinner", and apparently will round the head of a pin on stock up to 1/8". Clearly this tool is meant for another purpose as it is not a mechanical fastener, but when would someone need to use it?
Ed C.
Great tutorial Lin! Just one or two questions if you don't mind. How are you securing the pin stock to the cup? Solder? Or hammering it down and polishing it? And you also mentioned that some makers don't punch holes in the cups and use solder to secure them. What I don't understand is how they would have access to solder the second cup on once it has been push thru a handle. Am I thinking right that one side has to be punched so the cup sits flush in the relief?
I think you're right Barry. They would have to drill one side and pein it. That's what I would do anyway. I would be glad to hear other ways though.
Lin,
That is a really nice tool for making pin domes!
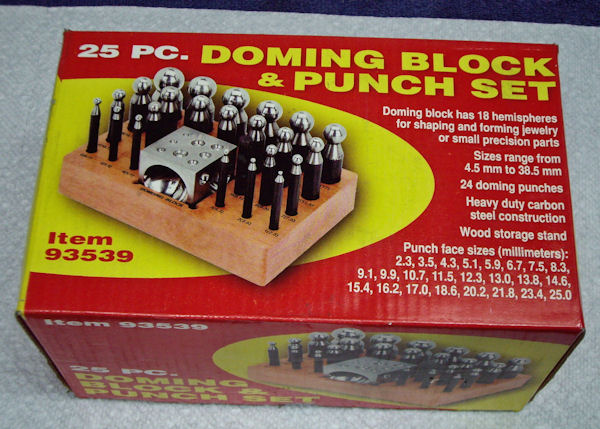
Like Brion, I use a dapping block to make domes. I bought this set from Harbor Freight. HF calls it a doming block and punch set. The current price is $40.
Below is a lnk to a tutorial that I put together on making pin domes. I prefer to use fairly thick material for the domes, because it makes it easier to flatten the bottom of the dome. The dome in this tutorial was made from .032" nickel-silver. I leave the extra material around the dome and set it on a piece of wood for drilling the pin hole. This helps to keep it from spinning.
Holding the dome in a pin vice makes it easy to handle for grinding and buffing.
The dome for the other side of the handle is made in the same way, except the pin hole is counter-sunk to allow for peining over the pin. Once you have the pin peined, you only have to buff the top of the dome, since the rest of the dome has already been polished. If I need to protect the handle material from the buffing wheel, I cut a hole the size of the dome in a piece of painter's tape and place it over the handle material.
Thanks Steve, Lin and Brion. I don't think I would have ever figured out that was the way to make the pins. I appreciat yall taking the time to post the tutorials.
Dale
Dale Huckabee
Journeyman Smith
dalehuckabeeknives.weebly.com


