The Topic of the Month for April is "Bladesmithing Tools". We want to discuss small bladesmithing tools that are useful and essential shop tools and tips on their proper use. It could include hammers, tongs, files, broaches, vises, leather tools, silver wire inlay tools, and shop made tools. Show us the tools that you have built and/or use for doing specific knifemaking tasks.
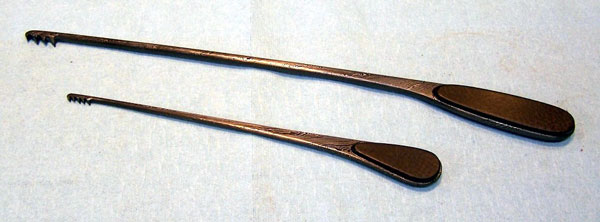
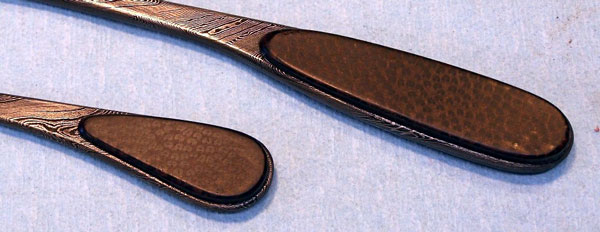
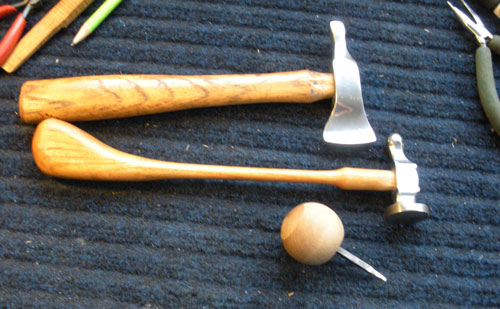
One of my favorite tools are the "broaches" I use for hidden tang handles. I suppose you could also call them "scrapers". These were made my Michael Rader, MS.
Once you have a hole in a block of handle material, it's a super simple matter to fit a tang with these tools!
I've got a few other "goodies" that I'll share when I get some good pics of the items.
Ed Caffrey, ABS MS
"The Montana Bladesmith"
www.CaffreyKnives.net
Silver Wire Inlay Tools
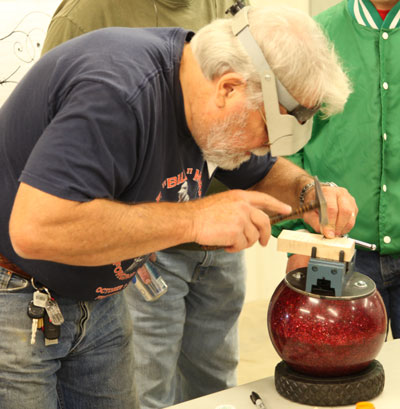
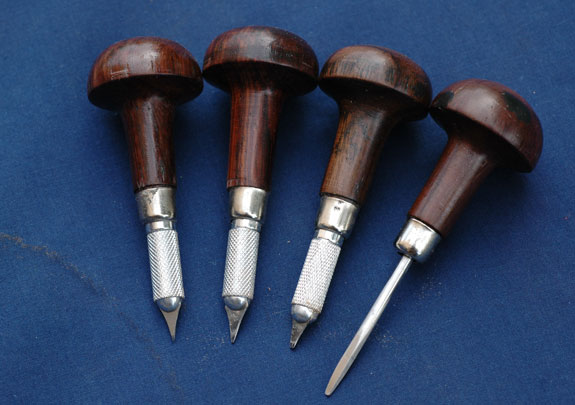
Many of us have had the opportunity to attend the silver wire inlay classes that Master Smith Joe Keeslar has conducted at American Bladesmith Society Hammer-Ins around the country and seen his techniques and outstanding work. These are some photos of the tools that Joe makes and uses for his silver wire inlay work.
_______________________________________________________________________________________________________
_______________________________________________________________________________________________________
_______________________________________________________________________________________________________
____________________________
____________________________
Dan Cassidy
Journeyman Smith
Send an email to Dan

I like the bowling ball vice!!! That's about the prettiest one that I have seen. But, no surprise from Joe.
No kidding. That is a slick vise. I see one in my shops future. Now just have to find a bowling ball, preferrably an orange swirl one. I can see all sorts of uses for that. My wire inlay tools do not look nearly that good.
Brion
Brion Tomberlin
Anvil Top Custom Knives
ABS Mastersmith
Plunge Block
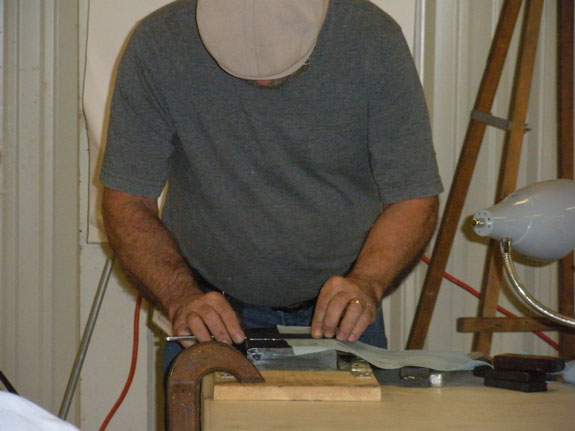
A tool I've found indispensible is an inverted sanding block which I made for truing up plunge cuts.
It consists of a 1 1/4 " X 5" X 9" Micarta block mounted on a 1 X 12, lengthwise, front to rear. A yoke is hinged at the rear, is pulled down over the front and latched in place. The yoke's purpose is to draw a standard size piece of sandpaper taut, over the block. The right and left edges are different radii; one for plunge cuts, and the other for the front and back of integral bolsters.
The blade is placed on the sandpaper (starting at 150 X), and pushed, then drawn, with a plunge cut held against a radius.
A paper towel over part of the sand paper will protect portions of the blade which I don't yet want sanded.
The paper is repositioned, an inch or so at a time, as needed.
Russ Andrews
I attended the presentation by Master Smith Russ Andrews on "Hand Finishing a Blade" at the 2010 ABS Mid America Hammer-In in Troy, Ohio. Russ did an outstanding job and made many very helpful points during his presentation which were skilfully captured on video by Kent Hepworth for the ABS. The DVD of Russ's presentation is available in the ABS Store at, CLICK: "Hand Finishing" .
Thank you Russ!
Dan Cassidy
Journeyman Smith
Send an email to Dan

Hello Everyone
I thought I woudl share a tool that I use in leather work. When doing an inlay in a sheath, it is always best to stitch along the inlay to have a nicer look and make everything more secure. This stitching looks better when done with a finer thread and tighter stitching. Since many of us do not have leather sewing machines, our only option is to sew by hand which can be quite a task as there ar so many more holes when stitching at the 10 - 12 stitches per inch.
The Tool I use to do the inlay stitching and the method that follows makes this process very quick and easy in fact even large and complicated inlays can be stitched in a matter of 5 or 10 minutes.

The above is a Singer treadle sewing machine and is the tool that I use to do inlay stitching. I picked this machine up at a local auction for about $20. The sewing machine does not have to be a treadle type but does need to be the old heavy steel type with the large flywheel on the end.

Place your sheath inlay under the foot. The needle on my foot is offset which allows me to run the edge of the foot right next to the edge of the inlay. The above photo is for demo purposes only and is obviously not an actual inlay but has all the components of an inlay. The top and bottom leather in the photo are 8/9 oz leather with the inlay between ( I typically do not use this thick of leather when doing inlays). The total thickness of the 3 pieces is .300". The only limitation that I have found is that I can t sew it if it wont fit under the foot, but if it will fit, I can sew it. I use the flywheel to run the machine doing one stitch at a time at a rate of close to 1 stitch per second. I am using heavy coat and button thread in the machine.

This is what the stitching looks like, very smooth and even. Even better is it quick and easy to do as no lines need to be drawn and no holes need to be punched or drilled. If you get one of these machines, clean it up and oil all linkages. You may have to get some help on how to thread it and set tension from someone who knows how to sew. My wife tells me that the threading and tension setting is very similar on modern machines. I just dont mess with it once I got it set which took some trial and error on scrap leather.
 This is a finished product of an inlay / overlay with stitching around the inlay window.
Brian
There are several tools I use in my shop that I find indispensable. The three primary “bench†tools I use are all made by John Perry, MS. John is not only a talented Bladesmith but also a top-notch machinist. The tools John makes not only perform in an exemplary manner but they are well made and pleasing. You can “see†the quality. Like a fine knife they will last indefinitely if cared for.
Broaches:
Like Mr. Caffrey, I have some broaches without which I would be lost. (John Perry made mine.) For years I struggled with a way to “square up†the hole/s I drilled in solid blocks to install on narrow tang knives. These are definitely the way to go.
Shoulder/ file jig:
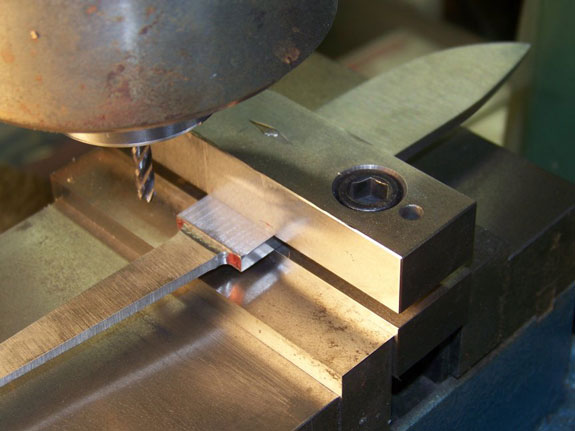
I think we have all struggled with finding a way to make square and even shoulders on the ricasso so the guard will fit properly. In order to get consistent results with any parallel fixture for mill set up or filing the ricasso must be flat and parallel. If the ricasso is not flat and parallel there is no good way to hold it between two parallel planes. (You can surface grind it or you can do it on a flat platen using dial calipers to get it very close.) Once your blade is ready to have the shoulders done it needs to be located in the fixture. The beauty of this fixture is that it can be used for either filing or milling.
For filing simply affix the blade in the fixture with the layout line of where you want the shoulders flush with the surface of the fixture, secure it and file till flush.
For milling set the blade up with the shoulder line set parallel and away from the edge of the fixture. This leaves room for the cutter and spindle. From here you can simply cut the shoulders top and bottom with one set up. (See the mill method set up photos.)
The beauty of this fixture is that John makes it equal and symmetrical. Soooo if you wanted to not only cut the shoulders but ALSO cut a .0010 shoulder on both sides of the ricasso; you simply turn the fixture over leaving the blade installed and it mirrors the side you just cut. (The mill has to be set up correctly and sometimes you have to go back and check the other side again.)
Guard press:
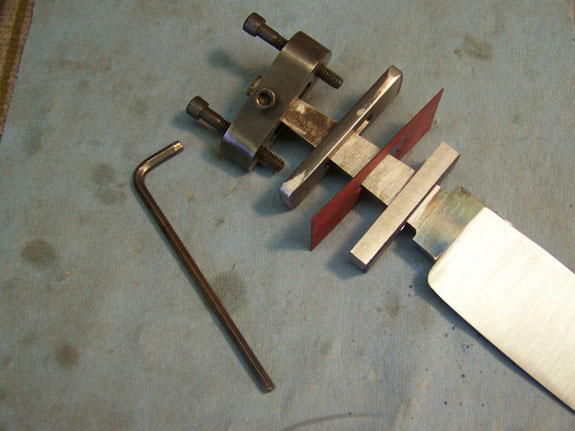
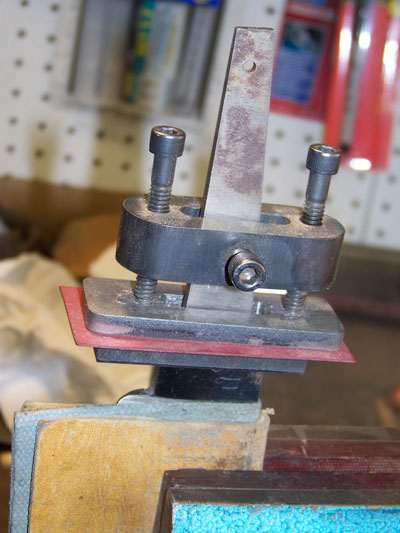
John also makes a very high quality “Guard pressâ€. This is a fixture that you can secure to the narrow tang via socked head cap screws. Then using other screws located at right angle to “press†a metal plate behind the guard moving it and the guard into place behind the shoulders. I use a piece of spacer material between the metal plate and the guard to keep from marring the guard; the metal plate distributes the load and helps to keep the pressure even. Once the guard is “pressed on†you can affix it however you like. (Solder, JB weld, Super glue, etc,) But I do not know anyone who still solders though.
Hey Brion, Steve and anyone else interested in a bowling ball vise,
With a little scrounging I managed to put one together for just $15.00. I'll see if I can recreate the making of the setup and put a tutorial on here tomorrow.
If you are interested in building one, call the local bowling alleys and ask if they have any junk balls that they would consider selling. In my case, they asked "what for" and when I told them they were happy to let me take my pick of several that they had stored in the back and wouldn't let me pay anything for it. I ended up with a real pretty "swirly" green 12 pound ball. I haven't used a lighter one but from what I can tell, the heavier ball is the way to go. Next I went to harbor freight and picked up a $12.00 machinist vise. Then there was a trip to the local small engine repair and again I asked if they would sell me a junk tire from a lawn mower. Once again, after I explained what it was for, they gave it to me and wouldn't let me pay. Lastly, I took a trip to Lowes and picked up some 1/4" plastic tubing to cover my vice pins. I decided to pick up some 1/4" surgical tubing while I was at it just in case ($3.00 for both pieces of tubing). Since I already had some lag bolts and 1/4" rod, the rest was just about one hour of work cutting the ball and attaching the vise. I'll post some pic's tomorrow.
For an additional $5.00 or $6.00 I purchased 2 exact-o knives and built two walnut handled tools for incising the wood for the wire.
My intention was to begin playing around with wire inlay but haven't gotten to it yet. I have however, used the vise for several other small, detail oriented projects and it is now one one of my "invaluable" tools that I don't know how I ever did without. For around a $20.00 investment, I highly recommend that anyone interested put one together.
Rick
Jim,
That guard press is awesome! I've got to get/make me one of those! Thanks for posting!
Brian,
Does the treadle sewing machine handle general sheath stitching as well or just the inlay? I've seen a few of those machines at the local thrift store and passed them by. I'd sure like a better way of stitching sheaths... so far I've done them all by hand and it's been pretty difficult to get the stitches consistent in length and perpendicular to the edge of the sheath. In other words, they look pretty good from the front of the sheath but the stitching on the back side doesn't quite look as nice. Thanks for posting!
Rick
Rick
The sewing machine will only sew about .300". I use 8/9 oz leather for sheaths which makes sewing the sides with a welt not possible (too thick). Also, I use much heavier thead for the main stitching which the sewing machine would not handls as is. That is not so say that modifications could not be made to make it work, but I haven't done that.
As far as getting your holes straight and even, I use a stitch wheel to mark my hole spacings and then clamp a block of wood in my drill press vice and use the drill press to put the holes in the leather. If you punch the holes with an awe. you can still use the drill press, just dont turn it on.
Hope this helps.
Brian
Thanks Brian! I thought it might be too good to be true.
I've been using the drill press and a stitching wheel which is why the front of the sheath looks good. My problem has been getting the holes to go straight through the leather and not cant off to the side. It's getting better for me with practice.
Thanks again for posting and for all of your suggestions. It's truly appreciated!
Rick
Rick
A couple of things that may help with getting the holes straight:
Use a piece of wood under your sheath that is as large as your sheath.
The drill bit only needs to stick out far enough to get through the leather. Keeping things short and stout is a good practice with most practices like drilling, milling, and lathe work.
Move your drill press table up close to the bit. ( short and stout )
I typically use a 1/16" drill bit for my holes. If I leave the drill bit sticking out of the chuck an inch and a half, I can flex the drill bit quite a ways, but it I set it up in the chuck so only 1/2" protrudes, it is much more stout and less likely to create problems. Keeping the table close to the chuck will also help compensate for wear in your spindle.
Hope this helps.
Brian
Hi Brian,
Sorry I haven't gotten back to you on your most recent post. Me and the family are moving and I've been completely out of the knife making loop for the last week or so.
I think your suggestions in your last post will solve all of my problems. You touched on basically everything that I have been doing wrong. Short and stout definitely sums it up. My table has been too far away and my bit was too long. It will probably be a while before I can try your suggestions but I will definitely let you know how it turns out. Thank you for the coaching! And for that matter, thank you ALL for the suggestions, coaching and contributions. It definitely helps that I'm a creative person but with all of the help that everyone contributes on here it definitely shortens the learning/figuring curve!
Now I just need to find a little time to put together the bowling ball vise tutorial that I talked about. I apologize that I haven't been able to put anything together yet.

