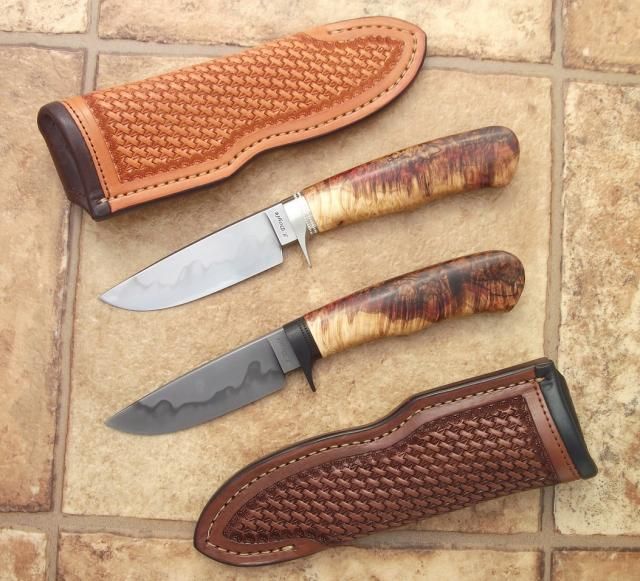
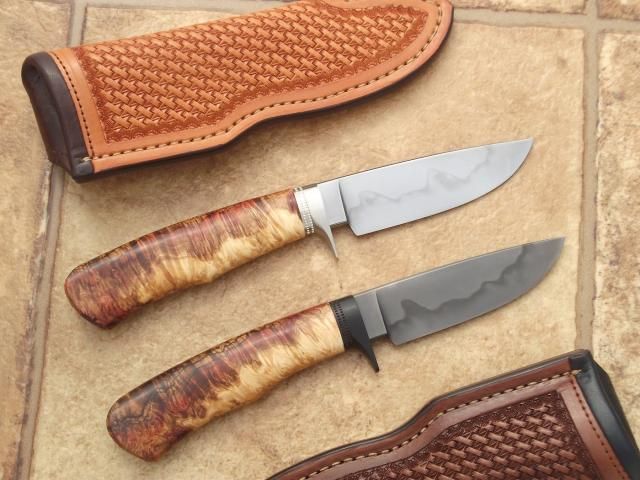
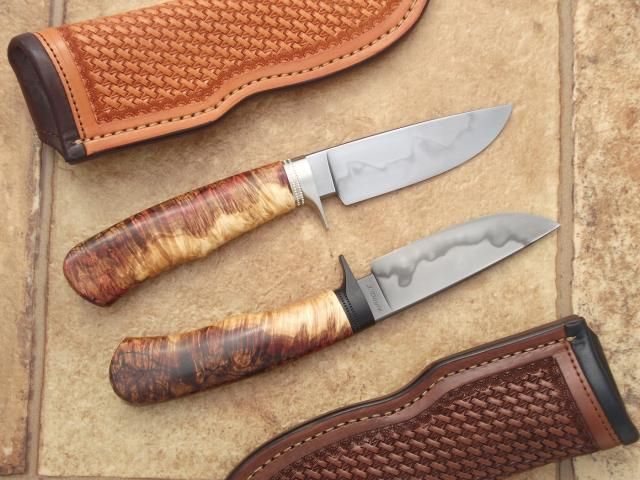
Here's a set I just completed for a local collector. He's picking them up tomorrow and I hope he likes them. I'd been mulling over the idea of a matched set of sorts for a while. I had these two blocks of wood that were so nearly identical that they had to go together. This wood has it all burl, curl, spalt and even three tone! (I know the three tone won't be everyone's favorite <img src=' http://www.americanbladesmith.com/ipboard/public/style_emoticons//wink.gi f' class='bbc_emoticon' alt=';)' /> )
So when my collector called and asked about a set, he picked the wood out and instead of doing an exact match, we settled on the matching but with a yin/yang theme idea. One is dark etched with black fittings and hamon the other a polished hamon with silver fittings. The only thing not in theme is the 'bolts' on the butt end. He requested both of those be an engravable material as he wants to get initials engraved on both pieces.
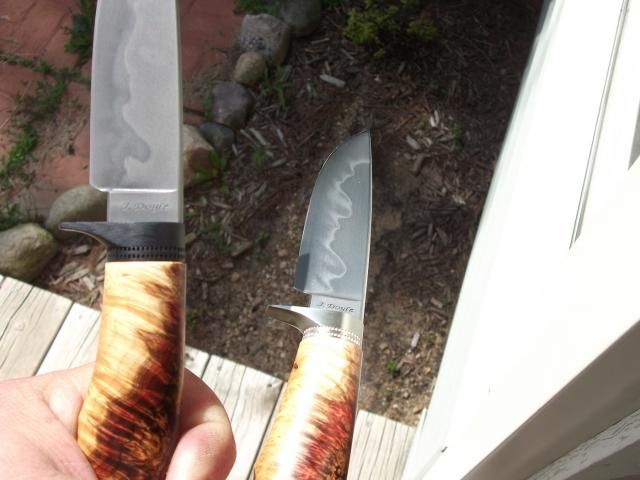
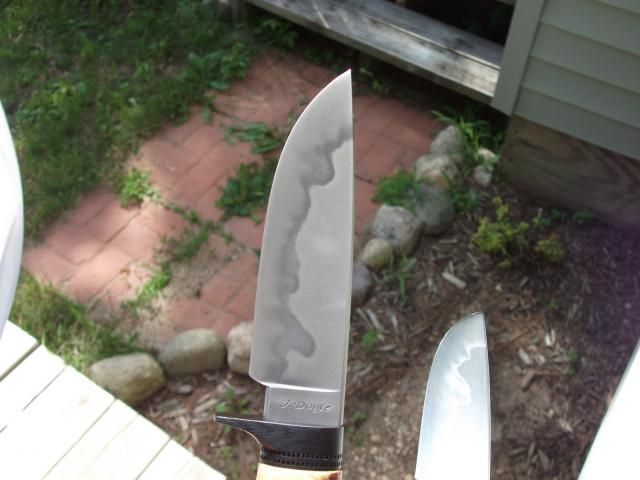
I matched sizes, shapes and everything else as close as I could, right down to even getting a decent match on the hamons.
Claude Scott did a fantastic job on the leather, right down to matching the theme with the light/dark leather.
Specs of the knives:
Hand forged from 1075 steel, clay quenched for hamon on both
8" overall, 3 5/8" blades, .190" thick at the ricasso with sharp distal taper
Rounded spines and ricasso edges for comfort
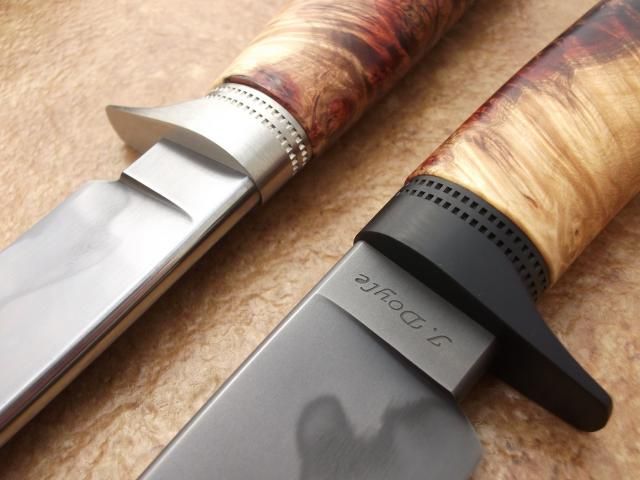
Black g-10 fittings one one, german silver fittings on the other. Both with fileworked spacers of the same materials
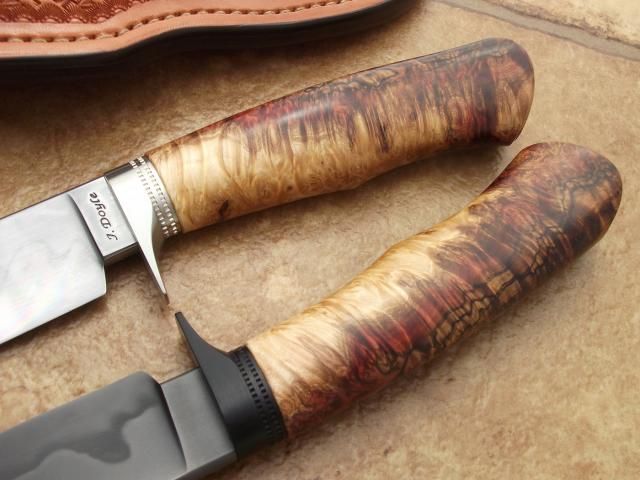
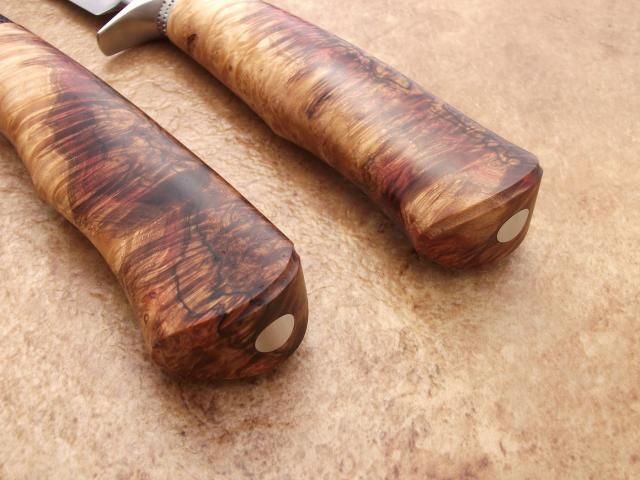
Stabilized box elder burl, curl, spalt...etc handles. All natural, no dye.
Handles are nicely contoured for comfort and slim and light
File fullered butt ends with german silver engraving buttons.
All comments and discussion welcome good, bad, or otherwise.
A couple quick pics showing the hamon activity better:
John, very nice work. Clean and straight. I love the temper lines. That is why I love Aldo's 1075 and use it for most of my knives. Great job, thanks for the great photos.
John, they both look great! Super clean and very well balanced aesthetically. But between the two I think I'm ever so slightly partial to the yang. I'm sure your customer will be pleased
Excellent job! Nice fittings too.
Very nice John. I really like them. I am betting your collector will love them.
Brion
Brion Tomberlin
Anvil Top Custom Knives
ABS Mastersmith
Thank you guys. I sure appreciate the comments.
Happy to report he picked them up yesterday and loved them, knives and sheaths.
Thanks again.
Beautiful job!
I'm curious, how did you get those little, square perforations in the guards? It's a really cool effect.
Jordan
|quoted:
Beautiful job!
I'm curious, how did you get those little, square perforations in the guards? It's a really cool effect.
Jordan
Thanks Jordan. There are actually 4 separate thin spacers behind the guard, made of the same material as the guard. Once I have them all shaped together, I take two of them out and filework the edges all the way around and put them back into the stack to get the look that you see here.
Hope that helps, thanks for the comment.
|quoted:
Thanks Jordan. There are actually 4 separate thin spacers behind the guard, made of the same material as the guard. Once I have them all shaped together, I take two of them out and filework the edges all the way around and put them back into the stack to get the look that you see here.
Hope that helps, thanks for the comment.
That's clever! I hadn't thought of that!

