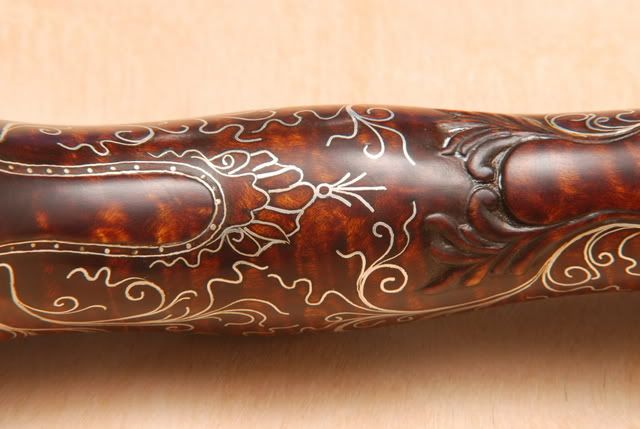
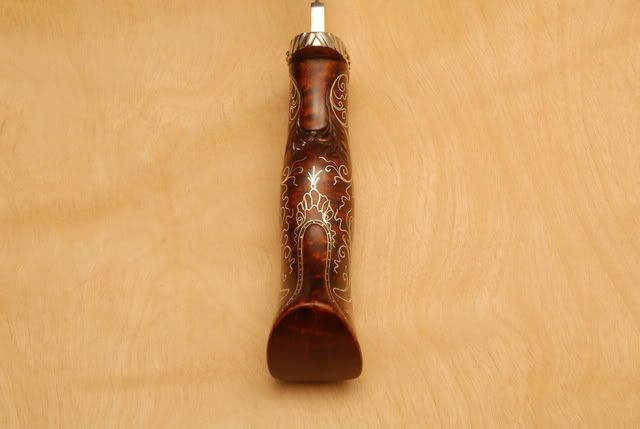
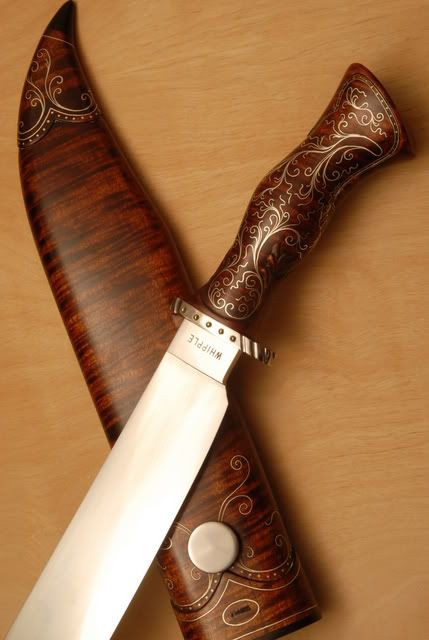
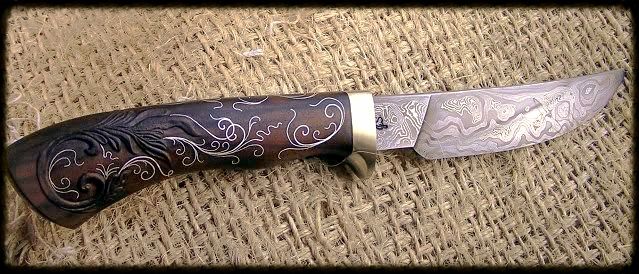
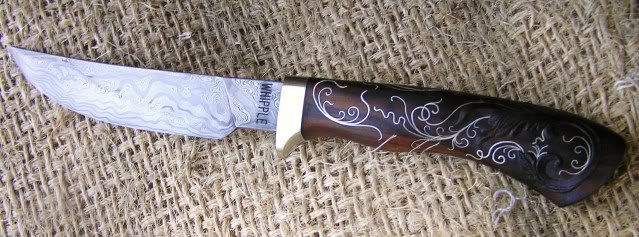
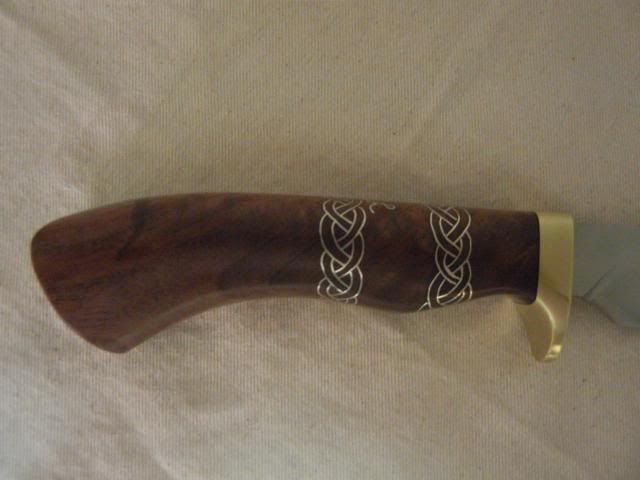
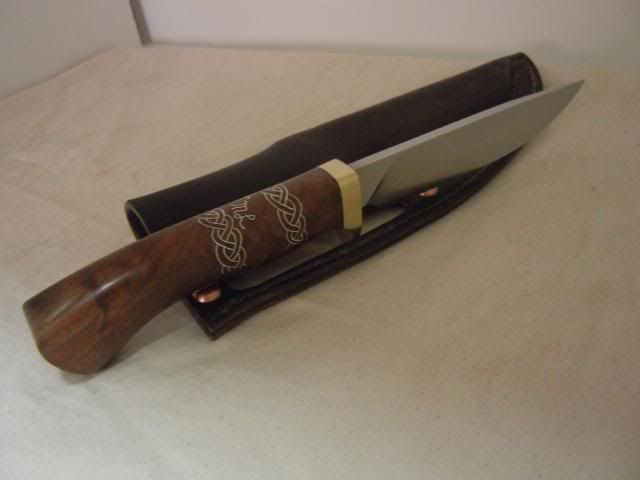
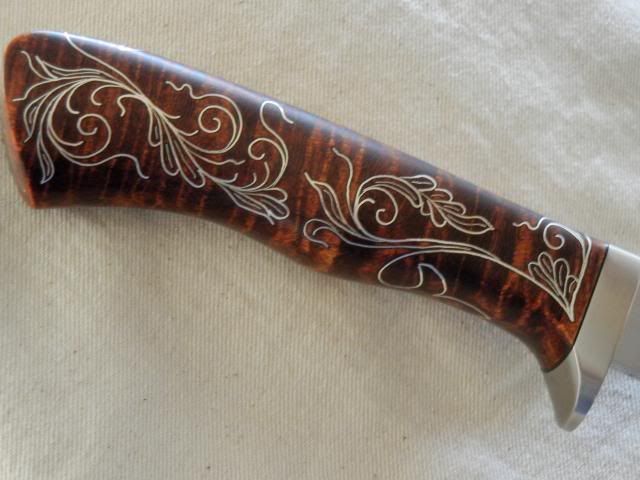
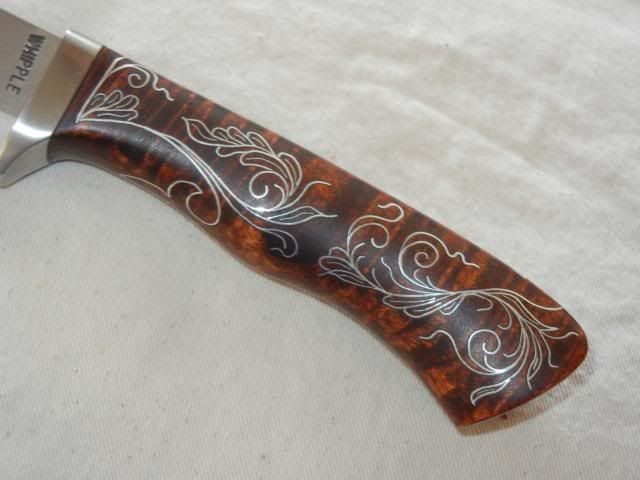
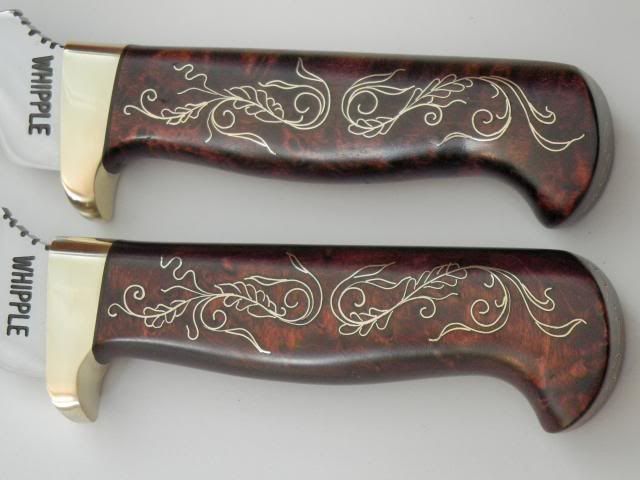
I just finished this one as my last for this year. It was a struggle, and a joy, to work on. It gets boxed up and sent out to it's new owner in the morning. The blade is 1084, the guard is N/S, and the handle is a very nice figured walnut, with relief carving and fine silver wire. These photo's are on a flicker acct, and I have a dickens of a time getting them transferred over so I apologize if it just offers a link.
Very nice Wes. Some serious patience and planning involved there. The customer will be very happy. Great work.
Brion
Brion Tomberlin
Anvil Top Custom Knives
ABS Mastersmith
Great job Wes! As Brion mentioned, the time spent planning is obvious. And it takes lots of time to inlay all that wire!
Keep up the great work!!
That is a LOT of work. My hat is off to you sir. Well done.
Wow Wes,
Holy smokes! My brain started to hurt looking at all the details and imagining the work and skill to succeed at such an undertaking. Well done!
Did you preconceive the handle in its entirety, or did it evolve as you carved the swirls and went along? Was it all your inspiration or did the pending owner give you some indications to work from?
The butt end of the handle is what really blows me away. I just can't hardly wrap my head around the doing of that basket weave detail. How did you go about it? Long parallel runs all in one direction then itsy-bitsy pieces the other direction? Or did you perhaps start at one "corner" and sort of ray out from there alternating in directions? Whatever the case, you are one amazingly steadfast craftsman.
I believe most all of the silver work I've seen has been done in maple. How does it go doing it in walnut? Do you have to do anything differently?
Gee, I hope you don't mind me grilling you with questions.
At first I wondered why you called the photos of such a dazzling spectacle of a gentleman's looker "wildernessknife," but then I realized that is your flicker account name. I also saw (when looking you up on the ABS website to see where you hail from) that is your email handle (no pun intended) as well.
I wonder if there's something in Wyoming's air or water or ground that breeds fantastically radical knife makers?
Thanks for sharing this on the forum. Awesome!
Aloha, Phil
Thanks Phil, and to all others! The carving and inlaying concepts were done in sections, and each idea and execution lead to the next design Idea. It was just way to much to plan out completely for me anyway, I can't envision in three dimension and put it all down on a flat piece of paper like most can, my handicap! the customer saw this knife I did a few years ago,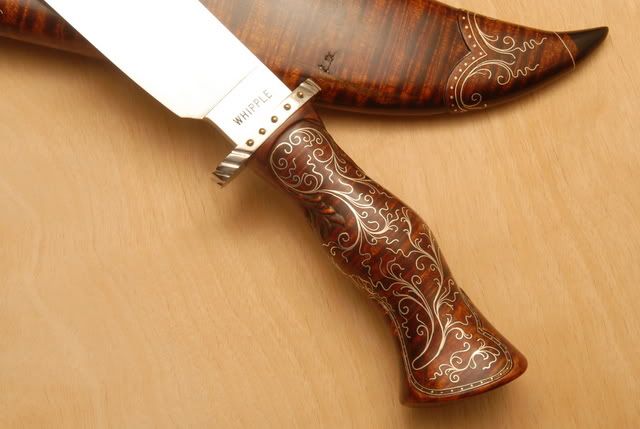 and asked me to just do whatever I chose, (of course I always end up doing more than intended). Most of the walnuts I select for knife handle come from custom gunstock scraps and I select them for the same qualities a gunstocker does, so these walnuts are usually harder than sugar or hard rock maples, but they hold the fine carving and checkering much better. Conversely, they are harder to inlay and they do not swell back up around the wire as well as maple does, so my tools need to be fashioned much closer to the dimensions of the wire which makes it harder because I have a small basic jewelers rolling mill that I use to vary my wire thickness's too. I like using hardened auto feeler gauges for making my inlaying tools as they are already made to graduating thickness's and all I have to do is put a mic on the wire and pick the gauge to match. I just recently did some celtic knotting on a handle of french walnut that was so hard I thought I'd never pull it off. Broke so many tools I thought I'd never get done. I also insist on using fine silver wire as I can get it much softer than sterling since I taper almost every piece into the next and I can form it to the inlay groove around almost any circumference, which is needed on knife handles as there's very little flat surfaces on my handles.
The checkering on the butt of the knife took me a day and a half( I'm slow), and after I did the border and laid out all the lines in one direction I laid in the wire, and then measured and cut and squared each little cross wire before inlaying those. As you can see it's not perfect and at one point I almost decided to grind it all off and start over. The wire pins were more of a pain than anything as I had to draw it all down in a draw plate to the size needed. Hope this answered most of you questions, if not I'd be glad to share more info. Wes
PS some the better inlay designs on the above Bowie are on the to and bottom and I can down load those if wanted.
Hi Wes,
Thanks for explaining your design and work processes. I noticed how your flat and round wire graduated in sizes. I've been on the look out for an affordable small jeweler's mill. I miss working with one. I enjoy drawing wire and showing my high school metalworking students the process. A mill would be great!
What a great idea to use feeler gauges to make your inlay knives/chisels out of. I'll remember that one.
I'd love seeing the other angles of the bowie if your up to posting them. Would LOVE to see ones of the Celtic knot too!
All the best for a fine new year!
Aloha, Phil
Cool stuff Wes!
You must have the patience of Job, not to mention the hands of a surgeon. My mind reels at the endurance, perseverance and skill needed to pull that stuff off. Thanks so much for sharing the images. If I ever make it out to Wyoming I'd love to study with you. Don't worry though. The likelihood of me storming your shop is about zilch...or less.
Aloha, Phil
You would be welcome anytime Phil!

