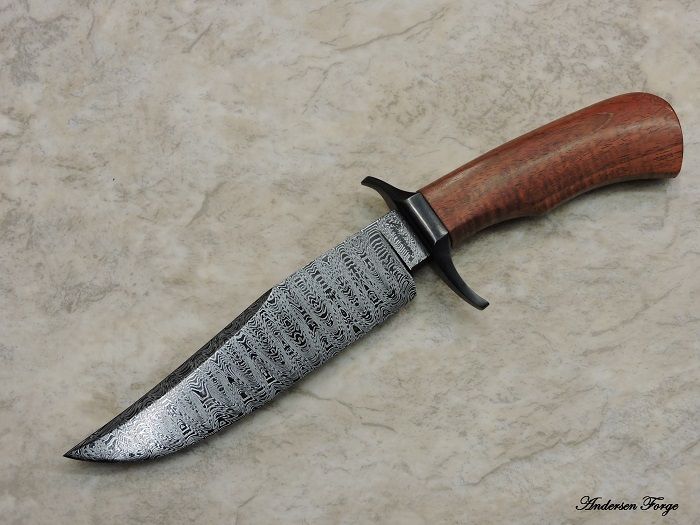
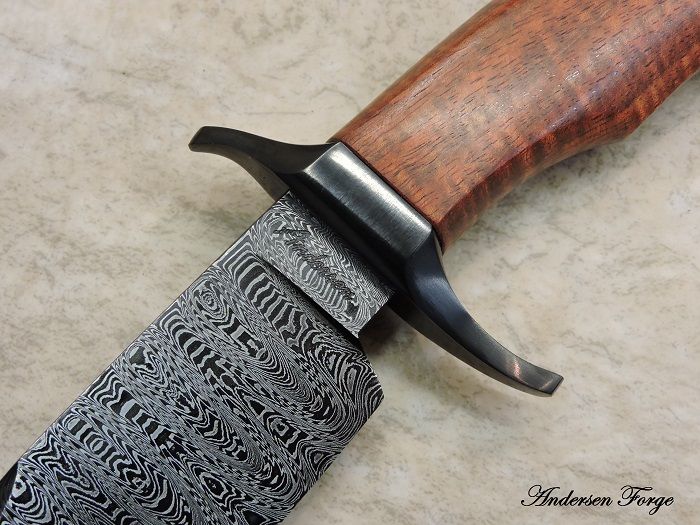
Over the weekend I made a damascus bar of W's and decided to use the Texas Wind dies to put a pattern into my bar. I have Uncle Al's Press. This was the first time I used the dies. I waited until the bar thickness was approximately 1/2" thick and then put the pattern in. I then put the bar in vermiculite over night. Today I ground the high spots down and am at a bar thickness of 3/8". I was shooting for 1/4".
Any feedback on what I should do to reduce the bar thickness without screwing the Texas wind pattern up. I am assuming that if I reheat and press to the desired thickness I will flatten out the pattern. I am also afraid that when I grind out the knife the pattern will be washed out or non existant by the time I get to the knife edge.
Scott,
It sounds as if you didn't press the dies completely into the billet if you went from 1/2" to 3/8". I would suggest that you grind one edge of your billet smooth and etch to see if the Damascus layers are fully laddered. This should tell you what to do next.
Gary
Thanks Gary. They are ground smooth and I can see the Texas Wind pattern pretty clear even without etching.
In theory, that pattern should go all the way through the billet.
That said, you can't press the dies in any deeper than the height of the pattern in the dies.
Reverse engineer this and add the two depths of the die "bites" to you desired end thickness and this will tell you when you need to press them in.
Always have some sort of stops available that will only allow your press to squeeze so far.
All of this stuff is a learning process.
Having done this once now, and seeing what you end up with will tell you a lot about what you need to do next time.
Karl B. Andersen
Journeyman Smith
Thanks Karl for your insight. Yes you are correct this is all a learning process. I am glad I only pressed one of the 3 billets I made and will get better on the next 2. As for the first billet, I plan to draw the billet out until I get it to 1/4". I am not worried about the W's and we will see how the pressed Texas Wind pattern ends up.
For example. I have some dies that will allow me to press rather deep.
I want to press in .100" each side and end up with about .280" so I have plenty of meat after grinding off the ridges and surface grinding the final blade material.
I don't do any forging after pressing in the pattern, so I forge my blade shape first at full thickness.
From the above dimensions, you'll see that I need my billet to be .480" when I press in my ladder.
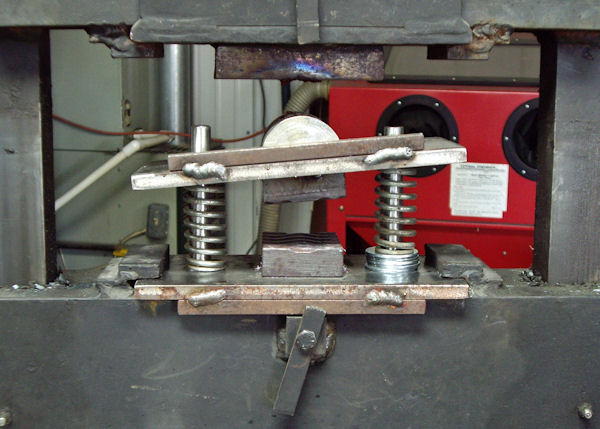
That gives me a display like this:
Th WTW dies I have from Uncle Al do not bit as deeply before the pattern bottoms out, so I calculate accordingly.
I know you know what I mean.
I just thought I'd toss in a visual here for the conversation.
I hope you show us what your pattern turns into!
Karl B. Andersen
Journeyman Smith
Karl your knives are amazing and I started this billet build based on your resent postings on Instagram and ABS. I love the laddered look of W's.
I expected that the WTW dies would have bit deeper. The impressions at the top of the billet were well rounded after the press so I don't think I could have gone much deeper. I am now sitting at .380" and just trying to figure out what to do next. The options I have thought about include: 1) drawing the billet out till I hit 1/4" (will widen out the ladders by approx 50%), 2) Keep the .380 thickness at the Ricasso and make an integral design, or 3) use the billet for make finger guards.
Karl’s instructions are correct. Decide the finished thickness of your ricasso, add the depth of your dies and that will be your starting thickness of your stock before pressing.
I have ground my dies to be about .080†deep and rounded the edges of the die ridges. I forge my stock to 7/16†thick, then draw out the edge bevels to 1/4" before pressing. I’ve modified my dies to align with the angle of the bevels. Being able to press after drawing out the bevels reduces the amount of stock removal that has to be done at the edge and helps to preserve the full pattern all the way to the edge.
Everybody should have one of those!
Karl B. Andersen
Journeyman Smith
Steve thanks for your feedback. I agree with both you and Karl. I am in a learning process right now. Love the dies you created. Pretty cool!
|quoted:
For example. I have some dies that will allow me to press rather deep.
I want to press in .100" each side and end up with about .280" so I have plenty of meat after grinding off the ridges and surface grinding the final blade material.
I don't do any forging after pressing in the pattern, so I forge my blade shape first at full thickness.
From the above dimensions, you'll see that I need my billet to be .480" when I press in my ladder.
That gives me a display like this:
Th WTW dies I have from Uncle Al do not bit as deeply before the pattern bottoms out, so I calculate accordingly.
I know you know what I mean.
I just thought I'd toss in a visual here for the conversation.
I hope you show us what your pattern turns into!
Do you by chance have a picture of the dies you are using?


