This month's topic is a discussion of techniques for etching and finishing damascus.
Questions to be answered are:
What etchant chemical do you use and what strength is your etchant.
What is your etching process; how long in the etchant, etc.
How do you finish your damascus after etching; sand it, blue it, polish it……..
This is gonna be a good one!
I'm real interested to hear about bluing, parkerizing, etc.. Still haven't tried it.
I use a solution of one part ferric, four parts distilled white vinegar. It *seems* etch a bit different than ferric and water. Credit for this solution goes to my damascus mentor Zoe Crist. I used to take my blades up to a 400 grit hand finish before etching, although Mr. James Rodebaugh clued me in at the Handles & Guards class, that you can get grit lines distorting your pattern this way. Now I'm finishing with a 600 or 800 rubbed finish for some patterns.
I etch usually in 45-60 second increments, just slow counting in my head, and then rub the oxides off with 1200, 1600, 2000 grit, or #0000 steel wool, depending. I haven't figured out which yet for which patterns, but it does create a different finish. I'll repeat this 4 or 5 or 10 times as necessary, which seems to depend on the shop temp, and the pattern. I don't usually neutralize until I'm done with the etching cycles. I used to use windex with ammonia, but found it unreliable. Then I used water saturated with Sodium Bicarbonate, which is what I keep in my slack tubs anyway, and it's very effective, but will loose it's alkalinity over time. Now I keep real ammonia in a PVC tube next to the one with the ferric solution. This method is pretty foolproof IMHO.
After all that, if I'm satisfied with the etch, I'll wash in soapy water, and dry thoroughly. Apply some wax or oil or something to protect it and move on.. I haven't figure out what I like yet for this step, I haven't tried Ren Wax yet. I like Boeshield T9, I know some use paste or carnauba wax maybe? I'm curious about this.
So for those bluing or parkerizing, how does that play into other etching regimes? I thought they were exclusive of ferric etching at first, but then was told otherwise.. I know a *lot* of us are curious about this stuff, can't wait to hear the responses from the pros.
Thanks!
I like to do a pretty deep etch.
I use 3:1 ratio of distilled water an FeCl.
I normally etch 15 minutes, four times, cleaning off the oxides between each time period with 0000 steel wool.
And almost every single blade gets hot blued.
The hot-bluing, or gun barrel bluing, turns both the tool steel and the nickel bearing steel black.
Then, with 3000 grit W/D, I sand off the the bluing from the taller nickel bearing steel.
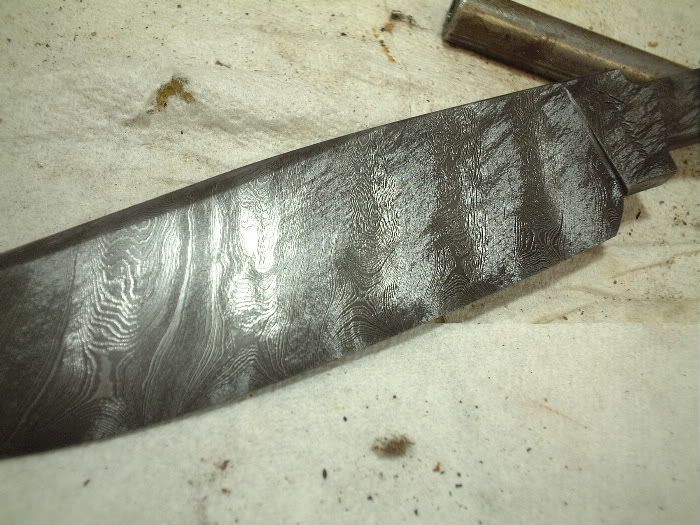
A good before and after:
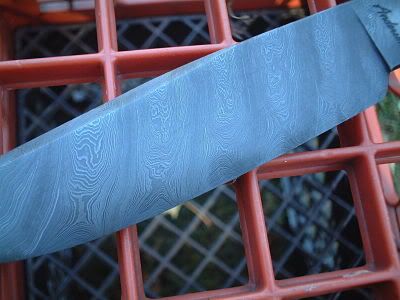
(I will also point out that this Damascus was twisted inside the forge and had the most activity I've ever created with only steel "movement".)
Karl B. Andersen
Journeyman Smith
My way of going about it is pretty much the standard; I think. 4/1 ferric to distilled water with about a 10 minute soak time; however many times that piece requires on that day. I use a piece of superfine scotchbrite soaked in the ferric to scrub the blade clean after each etch. When deep enough I kill it off with a soak in an ammonia/water bath and water rinse. Oil it up and let it set for a day. I believe this lets the oxides set up and give me a much darker contrast with out trying to blue it or such.
Then sand off the tops with 1500 glued to a stick, and for a final finish mothers wheel polish rubbed into a stick and carefully giving it one last go over.
Mike
Mike Williams
Master Smith
Nice process, Mike.
I know there are other methods that folks could share if they'd only take a minute.
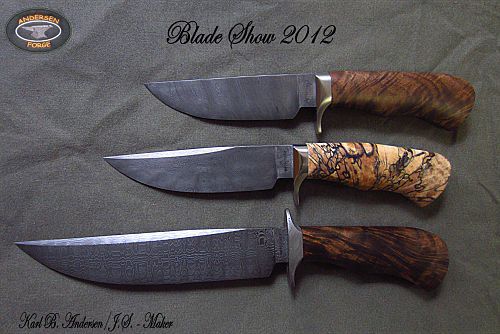
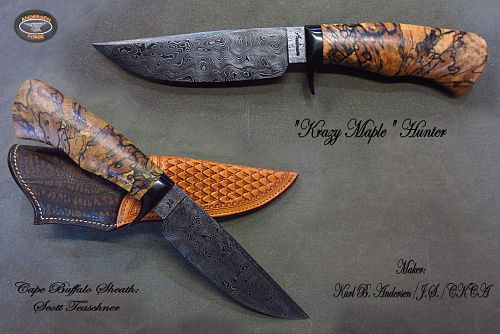
I came across a photo I had of three knives I took to Atlanta last year before I blued them. Funny how many pictures we take.
Before bluing:
After bluing:

Karl B. Andersen
Journeyman Smith
Here's a pic of one I made last year, with the usually methods.
This one actually got ruined by a leak in my shop when I was gluing up the handle, so I came back to it sitting in a pool of water and covered in rust.. I pickled it to get the rust off, but haven't resanded or made a new guard.. I may try hot bluing.. Karl what materials do you use, and what salts for bluing (if that's the right nomenclature)? I'd like to order the requisites but not sure what all I'll need?

Basically I use the same method as Mike does. However I am trying a cold black phosphate solution from Caswell Platings. This is done after the etch and cleaning. You let the blade soak in it for five minutes then rinse and apply a oil sealant, then let it sit overnight. So far the results are mixed and I will keep experimenting with it. I came up with this after talking to
Rodrigo Sfreddo about his method of the phosphate finish. I figured this may provide a solution to the issue of hardened and non hardened damascus. Such as for fittings.
Brion
Brion Tomberlin
Anvil Top Custom Knives
ABS Mastersmith
Hey Gang!
I saw this month's topic, and will try to take an exert from my damascus videos on etching.....and either post it up, or at least try to get a link to youtube. Might be a few days.....I have to stumble my way through editing video! <img src=' http://www.americanbladesmith.com/ipboard/public/style_emoticons//smile.gi f' class='bbc_emoticon' alt=':)' />
Ed Caffrey, ABS MS
"The Montana Bladesmith"
www.CaffreyKnives.net
Javan - here ya' go:
[media] http://www.youtube.c...h?v=AX6E_K_DMxg [/media]
Karl B. Andersen
Journeyman Smith
Great video Karl, thanks for that. Unfortunately, it's one more big pile of stuff I don't have room for. Can those salts be stored easily in that tank without concern?
Yep - just make a cover for it.
|quoted:
Great video Karl, thanks for that. Unfortunately, it's one more big pile of stuff I don't have room for. Can those salts be stored easily in that tank without concern?
Karl B. Andersen
Journeyman Smith
Just wanted to say thanks again Karl, lots of food for thought.
Can anybody comment on parkerizing? Does anybody do it? How does it stack up versus hot bluing like Karl does? I've read (online; caveat emptor) that parkerizing is more rust resistant than hot bluing?
Great vidio Karl!
Thanks!
Russell
Thanks to my Darling Daughter, who helped me clip and render, I finally have some input on this month's subject...... This is an exert from my Basic Damascus Video. Down the road I'm hoping to do some "short" videos on specific processes.
[media] http://www.youtube.c...h?v=7NknW9Z7_pI [/media]
Ed Caffrey, ABS MS
"The Montana Bladesmith"
www.CaffreyKnives.net
I have to admit, that even after 25 years of making Damascus, I am still experimenting with etches. I have used most of the methods mentioned, and more, and still look for other ways.
For finishing- I keep a tablet of graph paper in front of me at my bench. Great for notes, designing parts, etc.. After I have etched, neutralized in tsp, and dryed the piece(I do not clean the blade yet, as the crap in the low spots will help to keep from shining up those low spots as I polish the high spots)I impregnate(just rubbing the compound on) the bottom few of inches of my graph paper pad(get the edge good) with white buffing compound,wiping off any excess. Then I rub the blade on the paper. It takes a while, and I have to work my way around a couple pieces of paper. This works really well for finishing the ricasso blade junction, as the edge of the pad will comform to the shape of the confluence. Then I clean the remaining crap in the low spots off with wd40 and paper towel, then acetone, and wax/oil. I have never been satisfied with a finish that I used any kind of sandpaper on after the etch. Very few that I liked that saw a buffer either. I am only talking about my knives, not others.

