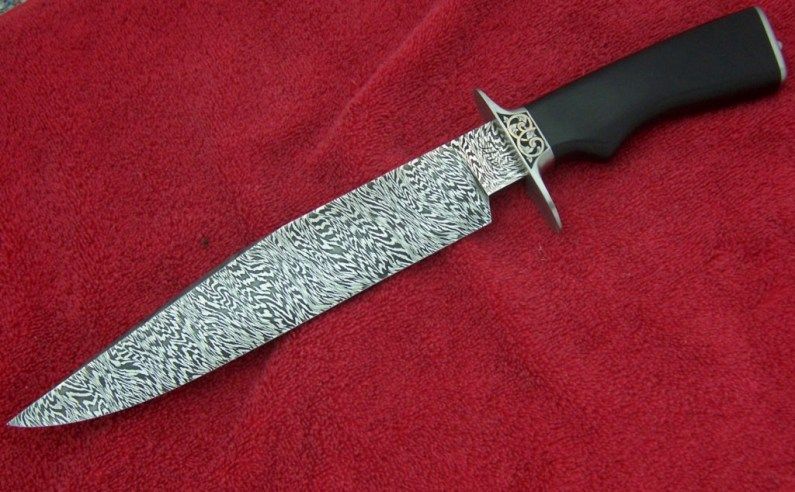
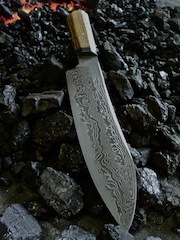
Drama over for the time being, but we must be vigilant with the weather being as it is. Thank you Dan for your thoughts. Looks like the temperature is going to hover around 100 + degrees for at least the next couple of weeks. Oh well it is summer here. Now where were we. The last photo I put up is the 4 billets re stacked and ready to weld into 2 billets, once this is welded I draw out the billet to 3/4" square with the corners rounded slighty to reduce tearing in the twisting process.

Once I have a welding heat on the bar I put it in the twistie maker! 2 clockwise, 2 anti clockwise

Here they are all twisted up.

If you look closely at the 3rd bar from the left you will see that it started to shear, bugger, got a bit greedy <img src=' http://www.americanbladesmith.com/ipboard/public/style_emoticons//ohmy.gi f' class='bbc_emoticon' alt=':o' /> It worked out ok, I used that bar for fittings. Grind off the mating edges, tack weld together and into the fire.

When its welded I normalise and anneal, then onto the milling machine with a fly cutter I take off 5 mm on both sides to reveal more of the axis of the twist.

Once this is done I can start to forge the blade to shape. I do not forge the bevels in on this one as I do not want to upset the pattern and stock remove, or as we call it down here a bit of cattle carting.


Once it ground, heat treated and cycles in the magic revealo juice time to finish it out.
 I use ferric chloride at a 4-1 mix and soak the blade for a minute or 2 and clean off the oxides with 0000 steel wool under the garden tap. If you keep the blade wet you do not have to degrease it. I keep doing this process until I'm happy with the depth of the etch. Just going backward here, I use borax as a flux. Have not tried kero as yet but will do on the next one.
Cheers Keith
Great demo, Keith, Thanks for sharing!
Russell
|quoted:
Great demo, Keith, Thanks for sharing!
Russell
Cheers Russell, hope I have been of help with this. And as always looking for some tips to make it better/ easier ( if thats possible ) <img src=' http://www.americanbladesmith.com/ipboard/public/style_emoticons//wink.gi f' class='bbc_emoticon' alt=';)' />
Cheers Keith
Lin & Keith - I really appreciate the WIP photos and notes! Thanks!
Keith,
How many heat cycles does it take on your twisting machine, (looks like a pipe threading machine), to get the best results? I think some bring it up to heat then use an acetylene torch to help maintain the heat once you start the twist.
How many revolutions per inch,or M.M, do you shoot for? Or, is this like tightening a bolt, you stop one quarter turn before you twist it off?
Russell
Here is a more detailed look how I do things.

Clamp tight and weld pieces together and also weld on a handle.

Soak in kerosene

Forge down billet and start pattern developement. Continue to forge into a square bar.

Cut off ends of bar and cut bar into 4 pieces. Etch ends of bar for pattern orientation.

Grind mating surfaces clean and then clamp bars together keeping patter orientation correct. I mig weld the seams and then grind off the welds so as to not distort the pattern. Weld a handle on and back into the forge.

The billet in the forge. Notice the mig welds ground down so as to not influence the pattern.

When final pattern is reached on the end of the billet, the billet is tile cut, all the tiles are turned to bring the pattern that was on the end of the bilet to the side. The tiles are then mig welded or tig welded together and forge welded together and drawn out.

The final product. bigger picture
|quoted:
Keith,
How many heat cycles does it take on your twisting machine, (looks like a pipe threading machine), to get the best results? I think some bring it up to heat then use an acetylene torch to help maintain the heat once you start the twist.
How many revolutions per inch,or M.M, do you shoot for? Or, is this like tightening a bolt, you stop one quarter turn before you twist it off?
Russell
Hi Russell, You're right on the money there, I forgot to add that info in my original post, oops, sorry. I use a torch to maintain the heat once its in the pipe threader. I am trying to get the twist as tight as possible, and from my limited experience, I can get 5-6 twists per inch, more than that it starts to shear and it seems that it does not matter what the dimension of the bar is. So backing off that last quarter turn sounds like good insurance building.
Cheers Keith
Hi Brian,
That sure is a very nice blade, great pattern and contrast! When you tile do you use a sacrificial flat bar underneath it ?
Cheers Keith
Keith
When you look closely at the photo of all the tiles clamped to the angle iron, you will see very small chamfers between the tiles on the top (and bottom, but you can't see that)but not on the sides. When I made this billet, I MIG welded all of the seams shut -- all the way around and then ground the welds down to the surface on the 2 sides the pattern is on to keep the weld beads from distorting the pattern. The small chamfers helps ensure I had enough weld strength after grinding to hold up to the forces of the press when forge welding the tiles together.
After the initial forge weld, I would grind the mig welds off the sides of the billet and then draw out as with any blade.
My methods seem to be continually changing as I continue searching for methods to give even better results and I am currently TIG welding all the seams shut on the tiles.
Although dry welding neeeds extra steps, it gives me the best and most consistant and predictable results. I also have a lot of experience with welding so I am very comfortable using this process.
Brian
Keith
By the way, great little turorial you put together and great Damascus!
This is a picture of a tile billet with all the seams welded shut and the faces ground flat, ready to go into the forge.

A tile welded W pattern

Thanks for the comments Brian. I see now that the tig weld would hold it all together, so obviously no need for the sacrificial bar. As you can probably tell by the pics I posted I'm not going to have a career at welding any time soon <img src=' http://www.americanbladesmith.com/ipboard/public/style_emoticons//unsure.gi f' class='bbc_emoticon' alt=':unsure:' /> Have just bought a mig and will try that soon. Any tips on how to limit the penetration of the weld into the billet? That tiled W's is sweet, sweet, sweet, mate.
Cheers Keith
Thanks for the comments on the tile W Keith.
As far as keeping the MIG from penetrating too much, it is a combination of heat, wire size, wire speed, and travel speed.
Unfortunatly, I have welded so so much in a previous job that all of this is automatic to me a lot of what I use to gage the weld is from what I see, feel, and hear. I will try to describe my process that hopefully makes sense.
For Mig welding pieces together, I grind tiny little "V" bevels on the seams. This is so I can grind the weld off and still have a seam that is sealed. When I say tiny, the "V" is around 1/32" wide at the top. The size of the "V" is up to you based on the level of risk you are comfortable with. The bigger the "V" the stronger the weld, but the smaller "V" means less loss of material in the final billet as the surface of the final billet needs to be ground down to remove the Mig weld material. With the "V" I use, must of the MIG weld is lost ot scale and much of the rest of it is ground off during normal grinding operations. I always do a quick etch to make sure no MIG weld remains in my blade before I get too far along.
I use a small cheap 120V welder. It just has a hi and low setting and I run it on Hi. The wire speed setting has no numbers on it so I cann ot tell you how fast I run it. I am using solid wire with a 75% CO2/ 25%Argon gas mix. The wire size is .023". I am using what I would call a normal condition for heat and wire speed for any welding but I have a travel speed that is just a bit faster than I would normally use. You want the weld bead to to be a small arc that the sides touch the base material. If the sides tuck underneith, you probably have too little heat, too much wire speed, too much travel speed, or a combination.
I would encourage you to find what you are comfortable with using some mild steel before you try it on a billet.
I appologize if this does not make sense -- I can see it in my head but am having a hard time putting it into words. Please ask questions if you need clarification.
Brian
Hey Guys,
My latest pattern welding obsession had been 3 color mixes with 25% 15n20, 25% 1095 and 50% wrought iron. You get a really ghostly almost 3D effect and three distinct tones. I really like the wrought because I feel like I am putting pieces of our metalworking heritage in every blade. I am working through a huge pile of gorgeous wrought chain found on a beach in downeast Maine by Acadia National Park.
Of course, you have to weld in an edge of some sort, but I think it's worth it.
Great stuff fellas!
I can see it in my head but am having a hard time putting it into words. Please ask questions if you need clarification.
Brian
Brian, I know exactly what you meen here, thanks for the heads up. I will have to do some experimenting.
Cheers Keith


