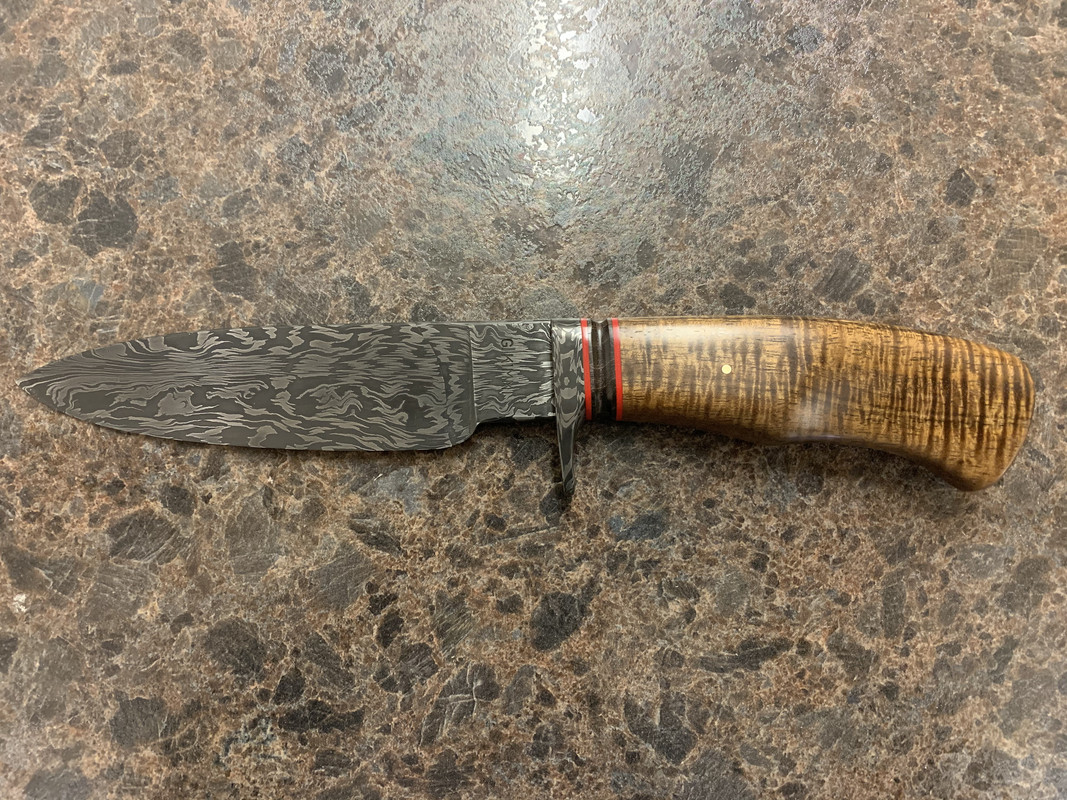
I finished this knife up a week or so ago and have a question on one of the welds.
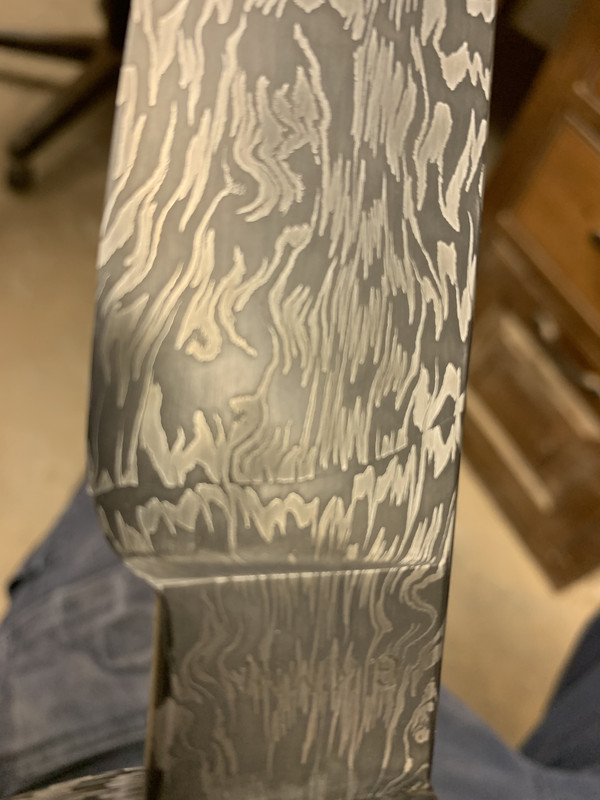
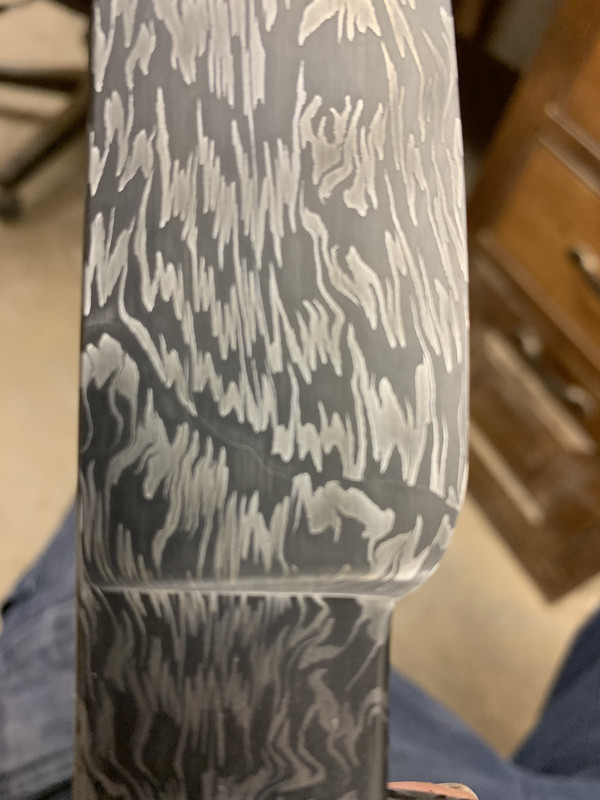
I started with 2 cubes of crushed w's that were 1" x 1" x 3/4". They were stacked on top of each other and forge welded together in 2 heats, squeezing them 2-3 times each heat in my press. Then the billet was laid down and forged out to make the knife. Once the knife was etched, the initial weld of the 2 cubes can be seen. In the 2nd picture you can see a silver line where the weld is.
The question is, what causes this? Is it a weak weld?
I think the answer to not have it happen again is to ferry flip the tiles so that all forging pressure would be contributing to a better forge weld.
Other than this weld, the knife turned out pretty good, but will stay with me because of this issue.
Did you use flux to weld?
Karl B. Andersen
Journeyman Smith
Looks like decarb along the weld line or possibly flux inclusion. If the former I wouldn't worry about it it isn't indicative of a bad weld. If the latter could be an issue.
I did use flux when welding this up. If a flux inclusion, would it break easily?
I have tried bending it over my knee and it has taken everything I can give it. I may stick it in a vice and see if it will take more pressure.
Also, the weld line cannot be felt with the point of a razor blade, if that means anything.
More a visual issue. Just tiny amount of flux in the world line causing it to etch differently. Should be solid in My experience as long as the line wasn't visible before etching.
I do not think there is a weld flaw here, but without holding the blade and looking under some magnification, it's difficult to be certain.
I think there are two issues causing this weld line to appear so prominent.
1. The dramatic change in the pattern at the weld. There is a definite continuous black area across the blade surface that is unbroken by any silver bits. This could have been avoided by doing a very mild test etch before the final weld. Then you can hold the mating surfaces against each other and see what the pattern looks like. You want silver bits touching other silver bits across the joint. This will give the illusion that they continue through the joint.
2. The white line is decarb at the weld joint. This can be eliminated in two ways. Unfortunately, neither will work at this point. They both have to be done during the forging/HT processes. The first fix is to spray the mating surfaces with pure graphite spray before assembling for the forge weld. I do this on most of my multi-bar blades when I do the final stack. Hancock taught me that. The second is multiple normalizing heats around critical temp after the final welding is done. This enables enough carbon migration across the joint to remove the decarb line. Gary Mulkey taught me that.
I just remembered a third method, which combines the first two. I effectively used this method on a multi-bar pattern that I forgot to spray with graphite. I sprayed the blade with graphite, wrapped it up in tissue paper and stainless steel foil. Then I stuck it in the oven at 1350 for an hour. The white lines disappeared.
Joshua States
www.dosgatosforge.com
https://www.youtube.com/channel/UCdJMFMqnbLYqv965xd64vYg
https://www.facebook.com/dos.gatos.71
Also on Instagram and Facebook as J.States Bladesmith
“So I'm lightin' out for the territory, ahead of the scared and the weak and the mean spirited, because Aunt Sally is fixin’ to adopt me and civilize me, and I can't stand it. I've been there before.â€
|quoted:
2. The white line is decarb at the weld joint.
When welding mosaics and multi bar blades I have found that sometimes just by letting the blade soak a while in the forge and by taking my time during reduction - which allows more TIME at forging temps - the lines virtually disappear after some carbon migration.
But yep, it's too late now.
Karl B. Andersen
Journeyman Smith
Thank you all for all the great information. I have enough left of this billet to make one more blade. I will put the information given to use on it. Thanks again!


