Tutorial "Knifemaker Blackboard - Customer Signature"
This picture Tutorial will an idea that will help you offer your customer a chance to sign his new knife.
This method will also allow you to personally sign every knife you make. It will help you date every knife.
You could sign the inside of a folder you made.
~K I T~
The "KNIFEMAKER BLACKBOARD" will enable you to artistically etch your custom made knife. It will allow you to have a customer write his name on the blade and you will be able to etch it into the steel. It will allow you personally to ...SIGN...the blade you just made with your signature...every durn time. It will allow you to date the knife...every durn time.
It will offer you a chance to scrimshaw a tree into the blade. This method is not acid etching. It is Electrolyte etching, the same thing you do to etchyour Logo into your blade.
THE OPTIONS ARE UNLIMITED !!!

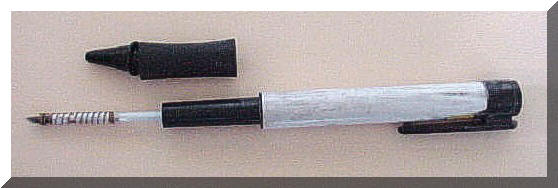
Above are the start tools for cutting the KnifeMaker BlackBoard. The picture on the left is the modified Micro-Engraver. The one on the right is amodified Pen.
The Micro-Engraver is not a needed pen. It will help. Just buy one and have it standing-by. The is a Micro Engraver made by Chicago Electric Power Tools. Buy a round HSS burl .4mm bit. Reduce it down to about 1/2" in length. Insert it in the Micro Engraver. Put the batteries in and.... reverse..... their polarity.
The BlackBoard writing pen on the right is made from a regular ball point pen. Take it apart and remove the tip and blow the ink out. Take a 3/32" drill bit and reduce the length to about 1 inch by grinding away the cutting tip. Don't grind it all off leave about 1/4". Taper the tip of the drill bit and insert into the ink supply tube. In the rear end of the ink tube fit a toothpick to slightly increase the tube diameter. This will help hold the tip in place. Grind the tip. Deburr the grind...one shot on the deburring shop wheel or use fine sandpaper. Then write with the round portion down. Writing does not require a lot of pressure.


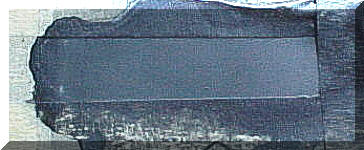
Pick the area you want to use for the person to sign the knife. Clean it of any oil or wax. Use the surface cleaner listed in the supplies below. Put some masking tape around the area. Add the "BlackBoard" solution. Make sure it is black and the steel does not show through it. Pull the tape off. This will give the person signing a border to sign into. The marking pen should be used with the round portion down. Explain the usage of your marking pen. The person can sign the covered area with minor speed and pressure. Make sure that the letters are clean and all you see is steel. Then etch the signature into the blade. The "BlackBoard" solution can then be removed easily with Acetone. Because of the Acetone usage writing his name at the Show and you etching the signature creates Hazard problems. This may be an out of Show only option.
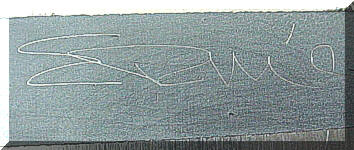
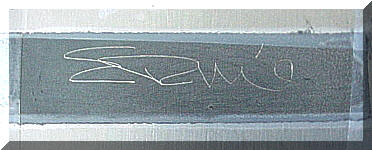
The bottom image is my scribble using my modified pen. It was a flash signature.
The solution is made with one part lacquer primer with 3 parts acetone. The solution can be easily be modified to suit you by increasing or reducing the acetone used.
Supplies: The supplies are 5 Star Extreme Autobody products. The cleaner is #5902 Final Wipe Wax and Grease Remover. The "BlackBoard" is Hot Rod Black Acrylic Lacquer Primer # 5403.
In Orlando, Florida the Supplier is Ben's Paint Supply 1- 407-428-0140
This is very new....but experiment with it
My email address is Email me
Ernie Grospitch
I love stuff like this. Thanks for posting it, Ernie... =]
Mike
As a person insists they have a right to deny others their individual freedoms, they acknowledge those others have the right to deny them theirs...

