The topic for March 2014, is installing pins and/or bolts in knife handles. Show your method for drilling holes, installing and finishing the heads of pins or fittings like Corby bolts in knife handles.
At what point in your construction do you drill holes for pins or bolts? How do you keep pin holes aligned with the knife? How do you finish domed pin heads? Show any jigs or tools that you use to install pins and handle bolts.
Good topic, Steve.
I don't always make take-downs, and when I do I like to make fixed assembly mortised handles.
I'm a stickler on not having any stresses on handle material.
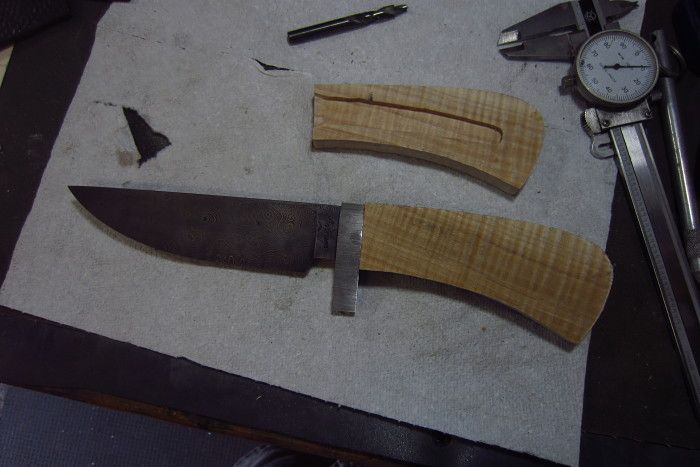
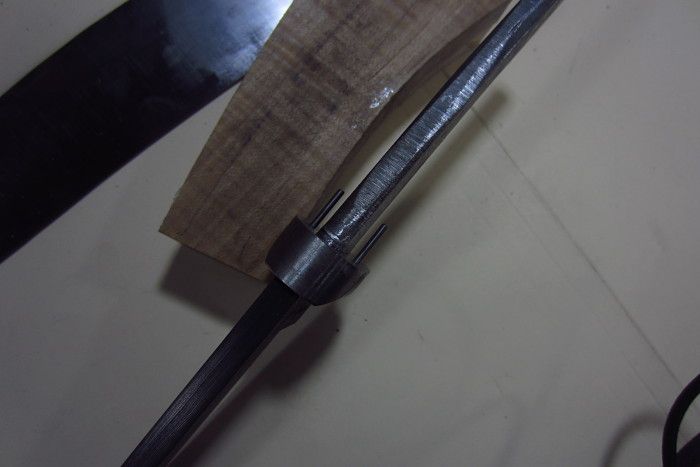
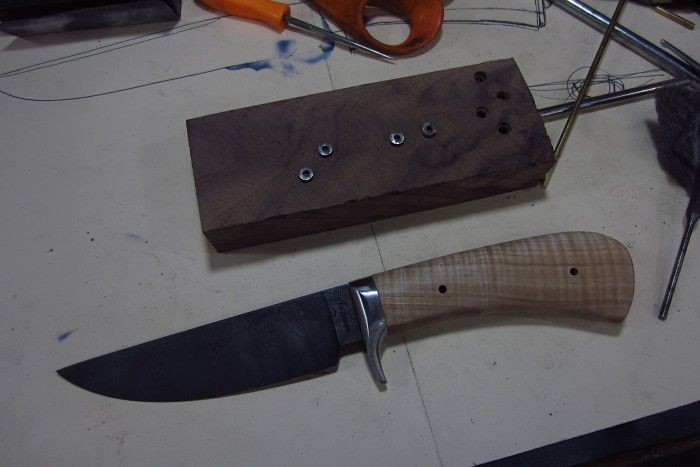
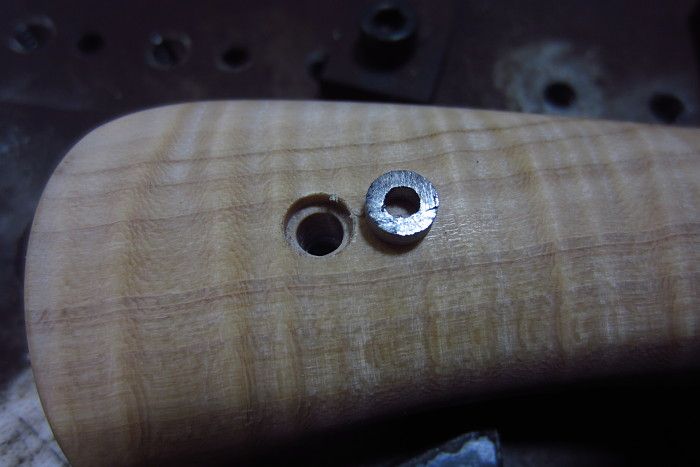
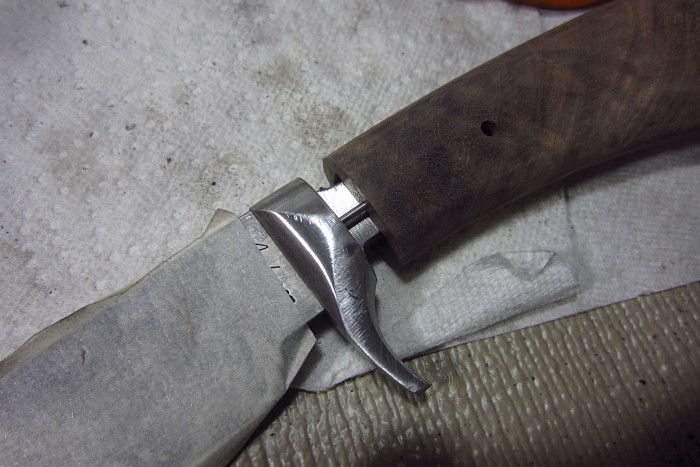
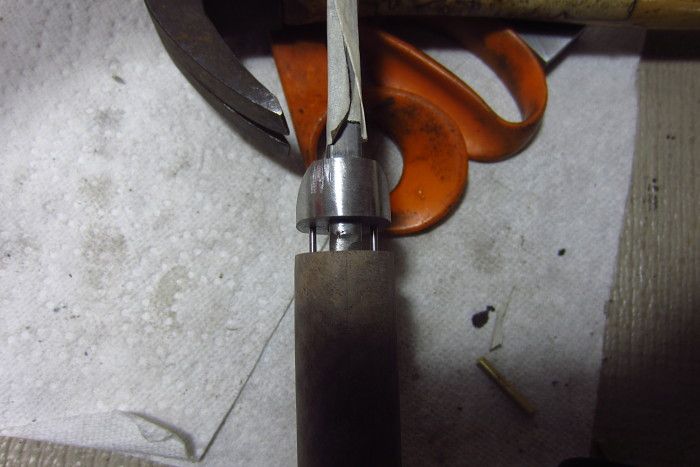
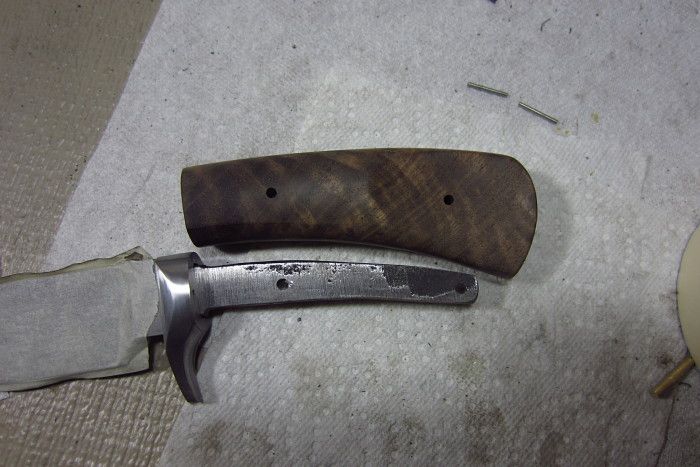
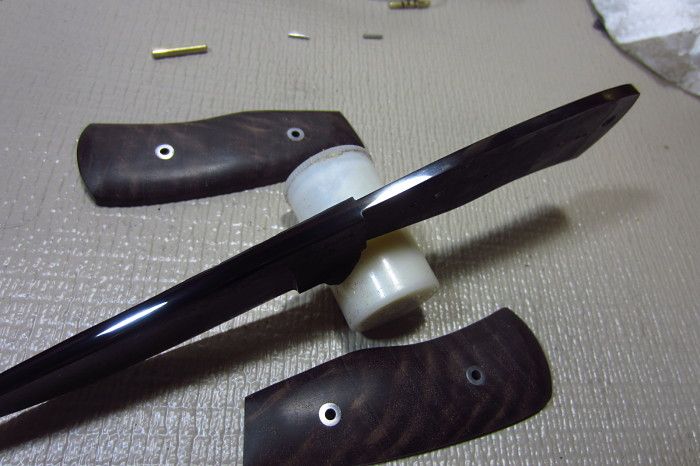
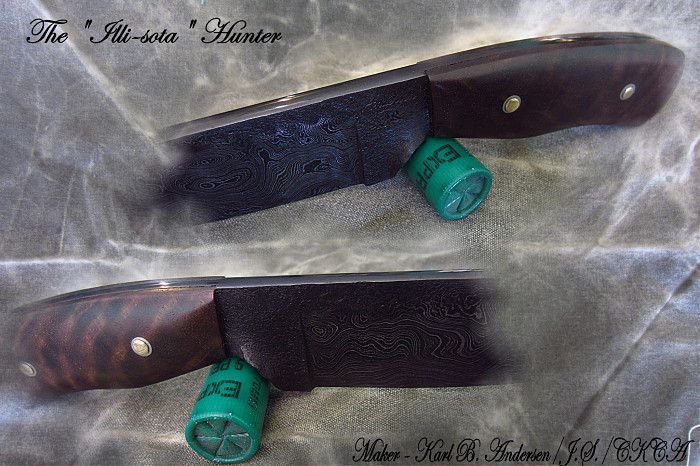
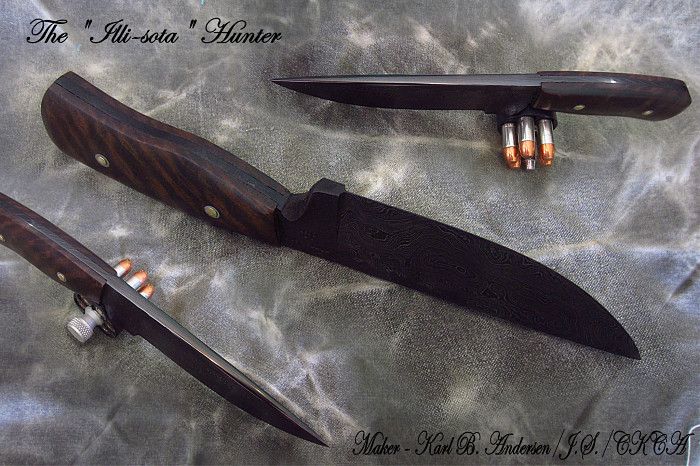
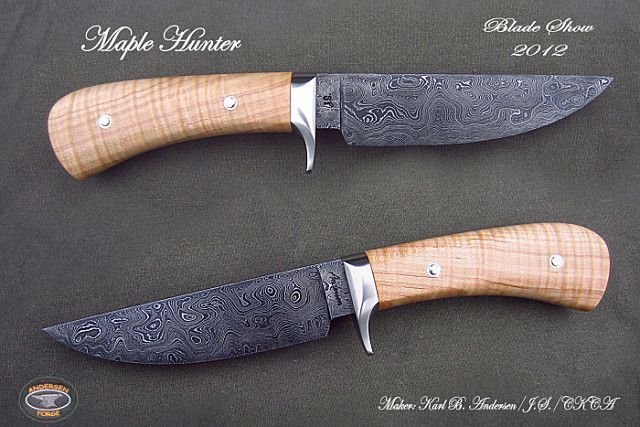
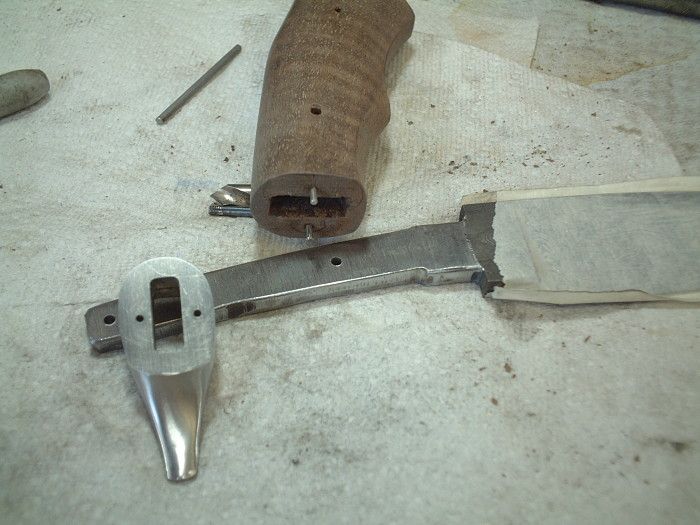
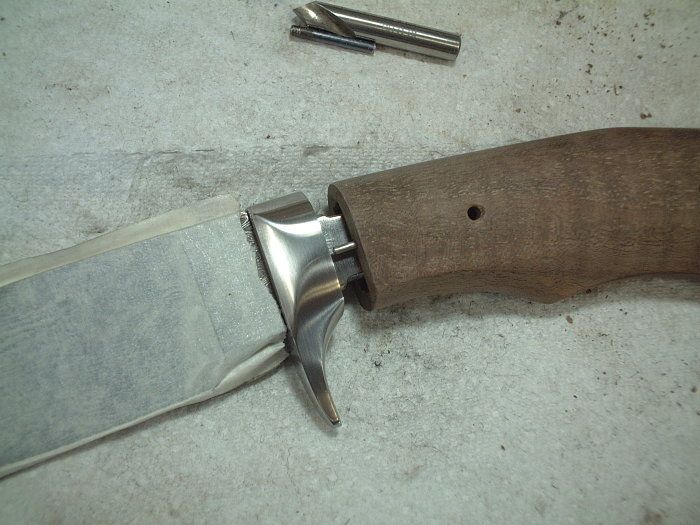
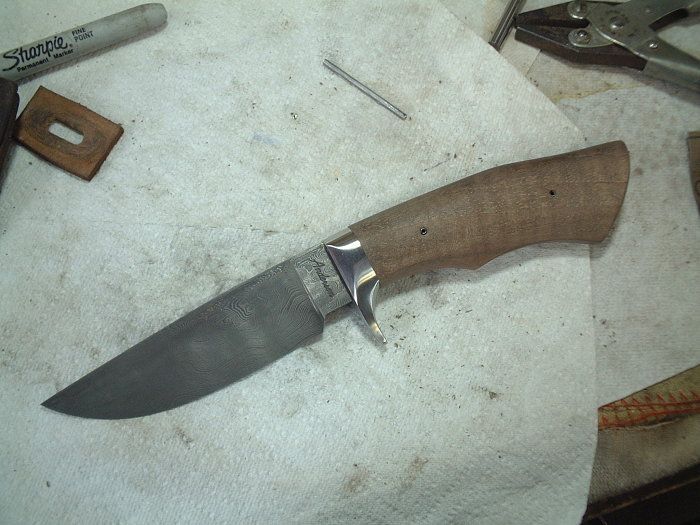
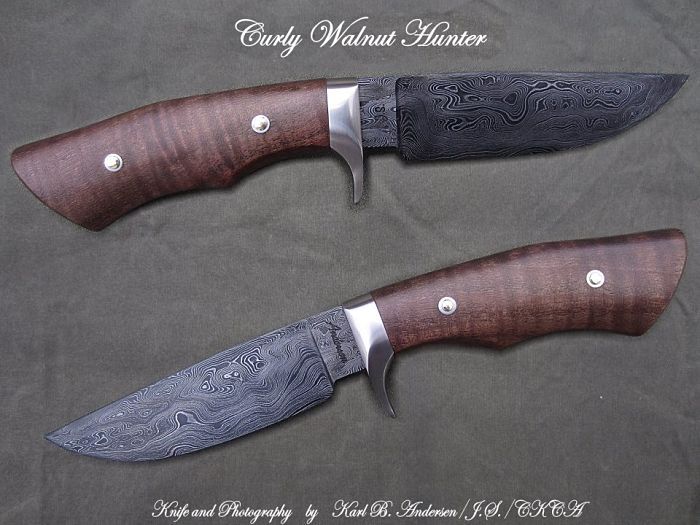
I sort of created my own process of setting pin "sockets" into the handle for the pins to be peened into. That way, I still get the maximum holding strength of the pin, yet all of the lateral stress goes against a piece of steel rather than the handle material, which can result in cracks down the road.
I'm sicker than a dog right now, so I'm not going into a long winded dissertation on this process, but a person should be able to figure out what I'm doing here.
I still pin the handle material to my guard for removal during the knife making process, and in case I need to do some etching of damascus or hot-bluing at some point.
Plus, in the mortised handle assembly, I think it's good insurance against the scales pulling apart. <img src=' http://www.americanbladesmith.com/ipboard/public/style_emoticons//wink.gi f' class='bbc_emoticon' alt=';)' />
Karl B. Andersen
Journeyman Smith
Karl
Your photo tutorial is very well done. Thank you for taking the time to share your techniques!
Dan Cassidy
Journeyman Smith
Send an email to Dan

indeed , thanks Karl for taking the time , hope you feel better soon !!
[font="Comic Sans MS"]'Never Quit On Improving'[/font]
Wow! I missed this thread with one day of activity. Would have missed it completely if not having just read about it in the monthly ABS emailed newsletter.
|quoted:
And when I'm setting up the knife in the beginning, I use the guard/handle pins and scale roll pins to hold things in place while I'm shaping the knife like I want it.
Then I can take it apart and do hot-bluing and such.
Karl,
I'm hoping you healed up.
I can't see how you get the pin holes in the back of the guard and front of the handle lined up. I've been flipping from picture to picture off and on for days now. If you can make time, would you get me lined out on how the drilling set up goes, please?
Mike
As a person insists they have a right to deny others their individual freedoms, they acknowledge those others have the right to deny them theirs...
Hi folks- <img src=' http://www.americanbladesmith.com/ipboard/public/style_emoticons//smile.gi f' class='bbc_emoticon' alt=':)' />
This is late... <img src=' http://www.americanbladesmith.com/ipboard/public/style_emoticons//huh.gi f' class='bbc_emoticon' alt=':huh:' /> Steve messaged me quite awhile back about this thread and I told him I wanted to do a video about domed pins.
It took awhile for me to fit it into the shop time schedule... and it took 4 videos to get it done. <img src=' http://www.americanbladesmith.com/ipboard/public/style_emoticons//blink.gi f' class='bbc_emoticon' alt=':blink:' /> LOL
Hopefully this stuff can help some newer makers out. <img src=' http://www.americanbladesmith.com/ipboard/public/style_emoticons//smile.gi f' class='bbc_emoticon' alt=':)' />
*edited to add* okay, I can't get the videos to embed... not sure what I'm doing wrong, sorry. <img src=' http://www.americanbladesmith.com/ipboard/public/style_emoticons//huh.gi f' class='bbc_emoticon' alt=':huh:' />
Nick
Thank you for taking the time to film and post these outstanding videos. Let me give you a hand embedding your videos.
This domed pin video tutorial is in four (4) separate videos below. Click on the videos below to play.
Part 1
[media] http://www.youtube.c...h?v=ULWxdqEZqDg [/media]
Part 2
[media] http://www.youtube.c...h?v=X0A_63OwdVM [/media]
Part 3
[media] http://www.youtube.c...h?v=7YRZjM7ZqAM [/media]
Part 4 below in next reply post after Brion's reply...(the Forum application only allows 3 videos per post)
Dan Cassidy
Journeyman Smith
Send an email to Dan

Thank you Nick and Dan. Great tutorial Nick.
Brion
Brion Tomberlin
Anvil Top Custom Knives
ABS Mastersmith
...and video Part 4 below.
[media] http://www.youtube.c...h?v=oQwcTroKL2U [/media]
Thank you Nick! Well done!
Dan Cassidy
Journeyman Smith
Send an email to Dan

Wow! Karl, Nick, thank you both for those terrific tutorials. By the way Nick, the production quality of those videos is outstanding. Please thank your videographer, editor, director, boom operator, and everyone else on the production team for their hard work on this.
Thank you Dan! Are regular 'ol forum members like me allowed to embed videos here, or is that an administrative thing? I'm only curious because I used the same tags here that work on other forums to embed videos. Or did I just do it wrong? <img src=' http://www.americanbladesmith.com/ipboard/public/style_emoticons//huh.gi f' class='bbc_emoticon' alt=':huh:' /> LOL <img src=' http://www.americanbladesmith.com/ipboard/public/style_emoticons//biggrin.gi f' class='bbc_emoticon' alt=':D' />
Derrick- Thanks buddy! It's been a long time--- I sure hope you're doing well and not locked up in a German prison. <img src=' http://www.americanbladesmith.com/ipboard/public/style_emoticons//tongue.gi f' class='bbc_emoticon' alt=':P' /> <img src=' http://www.americanbladesmith.com/ipboard/public/style_emoticons//biggrin.gi f' class='bbc_emoticon' alt=':D' />
Oh, and I'll tell my secretary to send a note to the production team. <img src=' http://www.americanbladesmith.com/ipboard/public/style_emoticons//wink.gi f' class='bbc_emoticon' alt=';)' /> LMAO
Thanks guys! <img src=' http://www.americanbladesmith.com/ipboard/public/style_emoticons//smile.gi f' class='bbc_emoticon' alt=':)' />
-Nick-
Nick,
Outstanding tutorial that will be used by many! More jigs to make, lol 🙂
Thanks for taking the time to share your knowledge!
Bob


