Hey all,
I am finding that when I am assembling my hidden tang knives, there is often times a little bit of play in the handles and spacers. Usually, I just glue it all together and sand the transitions to smooth them out, but I was wondering if I could eliminate that step using alignment pins? It would be really nice to be able to take the knife apart before gluing it in order to finish the wood, dye spacers, etc. and then glue it with minimal clean up.
Do any of you have suggestions for how to do these? Drilling blind holes seems tricky.
Thanks,
Jordan
Jordan, I deal with this issue in a couple of situations- building a take-down knife and certain handle materials like stag where the pithy marrow part needs to be reamed out and the fit is then very sloppy. In both cases it can be dealt with in a couple of ways, the first is indeed the blind alignment pin. How I do it is to drill the holes in the seated fitting (e.g. the guard) first and then I do one of two things to located the precise holes on the handle material. If the material is dense and smooth so that it will show very light markings I just set it against the guard and give it a light tap with a wooden mallet and the burr at the top of drilled holes will give me my marks. But if it is harder to see on some materials I will make pins that only set up above the drilled holes enough to get a toe-hold with hemostats and have been pointed, then I will perform the same tapping method to create my center punched dimples.
The second method I more often employ with loose fitting handle material is to coat the tang with a release agent, often a grease, and then fill the first ¼†of the handle with Accraglass, or epoxy if you prefer, and let it set. The next day I slide it off and have an absolute precision fit on one end to work with and can easily adjust just a bit since it is only ¼†of the handle. If the knife is going to be a take-down, I combine both methods, with the entire handle precision fit to the tang with Accraglass and alignment pins to help guide customer with reassembly. This allows me to make a butt cap with a sleeve nut attached that precisely fits into the handle but the spinning cap also locks down onto blind pins to bring it back to exactly the same seated position every time.
"One test is worth 1000 'expert' opinions" Riehle Testing Machines Co.
Jordan, always try to do the best you can with the fit of your hardware. Do not depend too much on the pins to take up slop, but rather to add precision insurance for consistent repeatability.
Think of it this way - if you have one piece that is sloppy and pin it to another piece, you now have two pieces that are loose.
Pins do also add greatly to the shear strength of parts. Far as I'm concerned, pins double the lateral strength of a knife, whether take-down, or not.
Karl B. Andersen
Journeyman Smith
Here is another variation of pin hole alignment.
I'm sure, at this time, I have made well over 350 take-downs from hunters to fighters, to multi-part bowies, integrals, frame handles, etc.
This is the method that has worked nearly flawlessly for me from day one.
After I have all the knife components fitted and tight to the handle, I determine my pin placement.
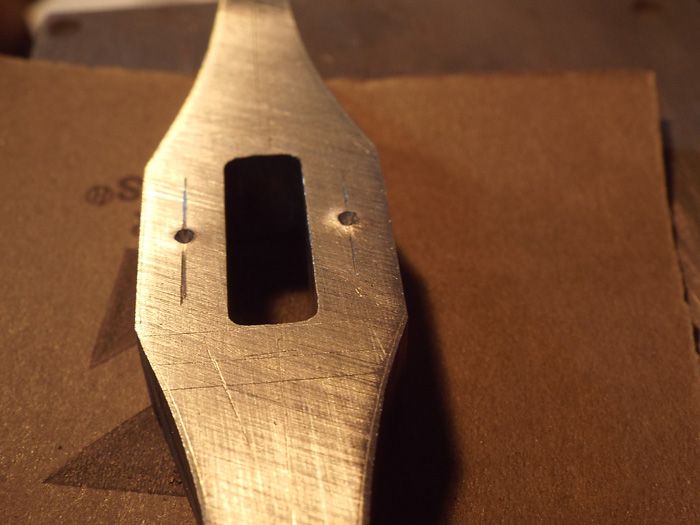
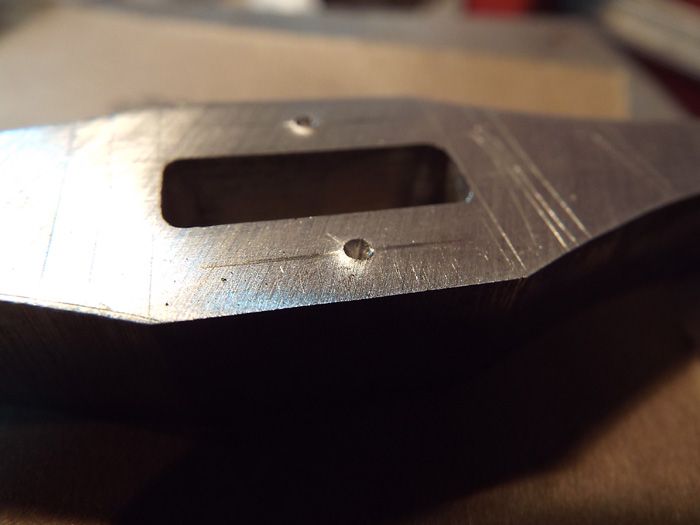
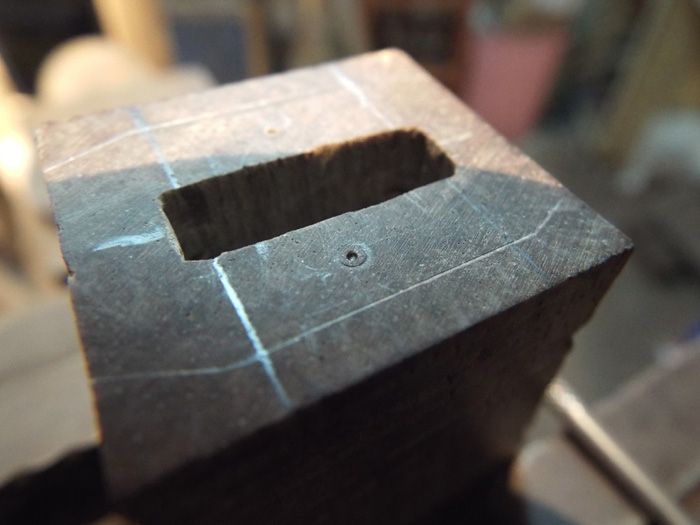
I do this with a round point punch and locate a hole with the punch.
When doing so, this creates a bit of a "volcano" standing up a few thousandths from the material surface.
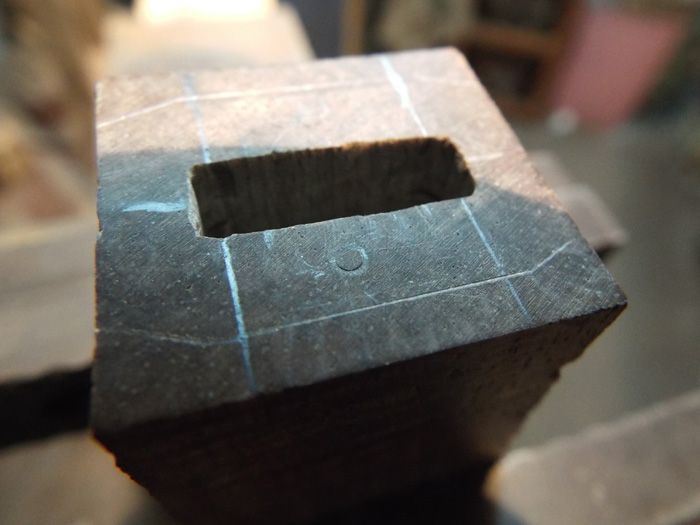
Assemble the parts and squeeze them all together, or like Kevin said, tap them together. I use threaded tangs, so I screw my knife together tightly, to create little bulls eyes in the EXACT location they belong.
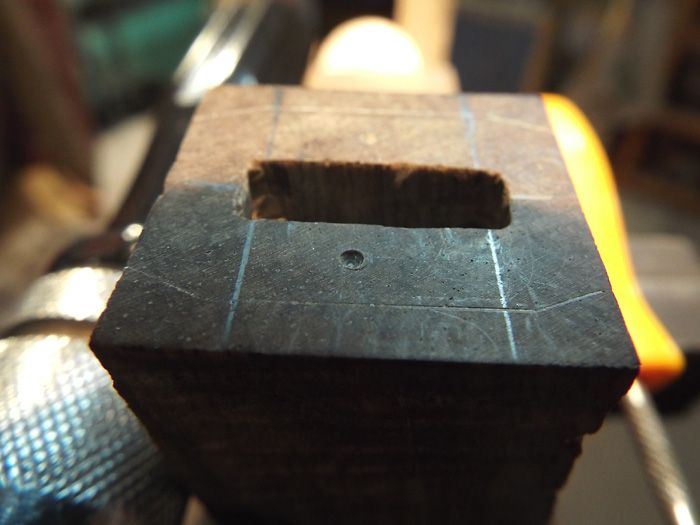
I use a little pin punch to center the hole:
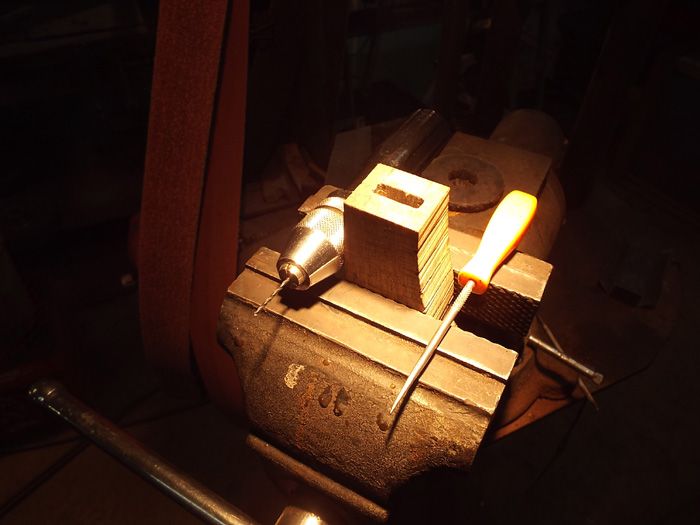
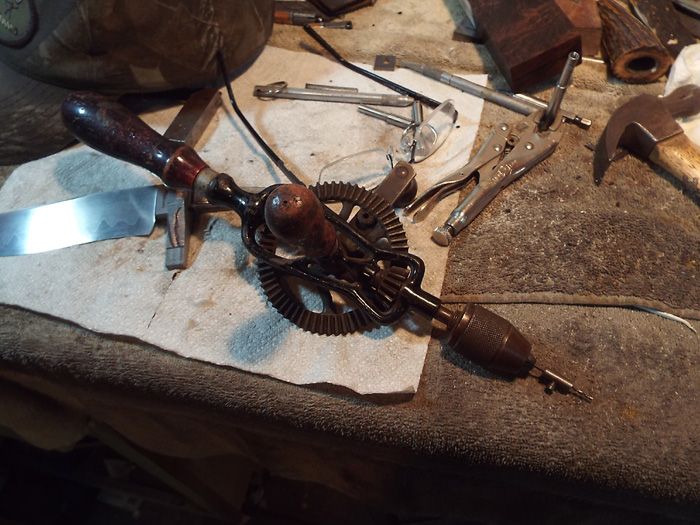
I'll even use a little hand pin vise or egg-beater drill to start the hole to finish in my small bench top mill:
The egg beater drill - Ebay/20 bucks - can even be used to drill the pin holes.
I normally use 1/16 or 3/32 stainless dowel pins, but both of those dimensions are also available in spring/roll pins, which work well in some cases.
Ask me 10 times and I'll answer it the same every time - this is the easiest way to build a hidden tang knife.
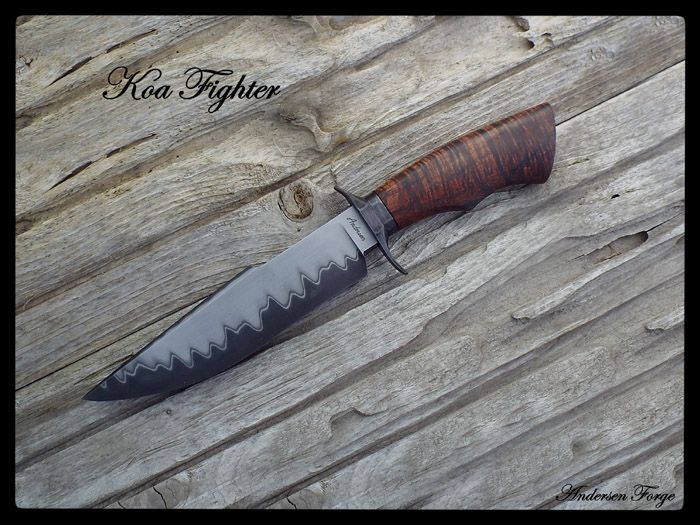
This is that knife:
Karl B. Andersen
Journeyman Smith
This is a good subject.
I will often just use a thin spacer by drilling it first for pin holes and using it as a template to drill both directions. I super glue it first to the guard so I can heat it to tap it off after being drilled, then clean it up and stick it to the wood or antler and drill back through into that.
Good idea! Lin.
Russell
|quoted:
This is a good subject.
I will often just use a thin spacer by drilling it first for pin holes and using it as a template to drill both directions. I super glue it first to the guard so I can heat it to tap it off after being drilled, then clean it up and stick it to the wood or antler and drill back through into that.
I do the same but I have a hardened piece of 52100 that has three slot sizes with separate pin layouts. This template works 80% of the time and the rest I do exactly the same as you
Thank you Kevin, Karl, and Lin! Great advice and techniques.
Dan Cassidy
Journeyman Smith
Send an email to Dan

I build almost all of my knives this way and use the exact same method that Lin mentioned. Usually my knives all have a spacer of some sort besides the guard so you have an available template piece already. If you had a guard and handle only, you would have to make a temporary template.
Wow, this is all great advice.
Thank you all so much.
I am curious, how tight fitting do you all make your pins usually? Do you have to tap them in? Or do they go in easily? I know can be difficult to get really accurate diameters in such small holes, particularly with softer handle materials.
Guys
We could use a short video on these techniques for the ABS YouTube Channel. Contact me if you are willing take this task on. I would be willing to produce the video for the ABS which means that after you create video clips and photos, I will use Final Cut Pro x software and other professional software to edit and produce the video and then upload it to the ABS YouTube Channel.
Dan Cassidy
Journeyman Smith
Send an email to Dan

|quoted:
Wow, this is all great advice.
Thank you all so much.
I am curious, how tight fitting do you all make your pins usually? Do you have to tap them in? Or do they go in easily? I know can be difficult to get really accurate diameters in such small holes, particularly with softer handle materials.
My pins push into the handle material with a slight bit of friction. I use 1/6" dowel pins and drill the holes with a #52 bit.
For roll pins I use a #51.
There are two levels of this application.
Some guys use the pin assembly only during the production of the piece for reassembly purposes. Then, when everything is complete, they epoxy the whole mess up and seal it tight - forever.
Then there is the level of building the knife so that it comes apart for the life of the knife. Keeping in mind that each piece, and its fit to the mating piece, must be made so precisely that it is basically environment proof with no epoxy or sealant. To step up to this level takes a considerable amount of care and planning.
In fact, don't use this method as an excuse to leave things sloppy. Don't depend upon the pins to correct improper fit for you.
The knife should actually go together tightly without the use of the pins at all.
And always leave the pins free-floating. Don't glue them in place. You can always replace one that falls out. But if you bend one, you have a real problem.
Karl B. Andersen
Journeyman Smith
Dan, I did a real-time pin locating and drilling demo in Ohio last year. And I showed how it could be done by hand in the handle material.
I wonder if that was filmed?
However, I do have a new Go Pro, but my old wooden computer with windows XP can't handle hardly any movie editing any more. It just crashes.
I could transfer the file to a flash drive and send it to you for you to do your magic.
Karl B. Andersen
Journeyman Smith
|quoted:
My pins push into the handle material with a slight bit of friction. I use 1/6" dowel pins and drill the holes with a #52 bit.
For roll pins I use a #51.
There are two levels of this application.
Some guys use the pin assembly only during the production of the piece for reassembly purposes. Then, when everything is complete, they epoxy the whole mess up and seal it tight - forever.
Then there is the level of building the knife so that it comes apart for the life of the knife. Keeping in mind that each piece, and its fit to the mating piece, must be made so precisely that it is basically environment proof with no epoxy or sealant. To step up to this level takes a considerable amount of care and planning.
In fact, don't use this method as an excuse to leave things sloppy. Don't depend upon the pins to correct improper fit for you.
The knife should actually go together tightly without the use of the pins at all.
And always leave the pins free-floating. Don't glue them in place. You can always replace one that falls out. But if you bend one, you have a real problem.
Thanks Karl.
I will definitely work on the tolerances of my fittings and handles. I think I just have to slow down and take a little more time for fitting them.
Jordan
I have always used 1/16 inch alignment pins, but have often found that either they deform, or the drill bit bends during drilling leaving me with a crooked hole. Very frustrating. I have recently changed tactics and gone up one size to 5/64. ACE hardware sells something they call "music wire" in a variety of thicknesses. I buy the one that measures out at .0785 and dress it down with a piece of 220 grit paper by chucking it in my bench top mill and squeezing the pins with the paper while it spins. The music wire is HC steel (not sure what grade) but it has been hardened and tempered to use as springs. I originally bought fatter rods to use in my hardie tools, like guillotine fullers when I want the top half to rebound from the strike. So far the change has worked well for me.
Joshua States
www.dosgatosforge.com
https://www.youtube.com/channel/UCdJMFMqnbLYqv965xd64vYg
https://www.facebook.com/dos.gatos.71
Also on Instagram and Facebook as J.States Bladesmith
“So I'm lightin' out for the territory, ahead of the scared and the weak and the mean spirited, because Aunt Sally is fixin’ to adopt me and civilize me, and I can't stand it. I've been there before.â€

