The topic for January 2014, is creating design sketches to plan a knife build. Some makers use pencil, paper and french curves. Others use a computer to create sketches of their knife design. What tools and techniques do you use to create a sketch of a knife design that you plan to build? How do you use your sketch in the shop to build the knife?
Steve, my process is not all that complex.
I buy manila folders.
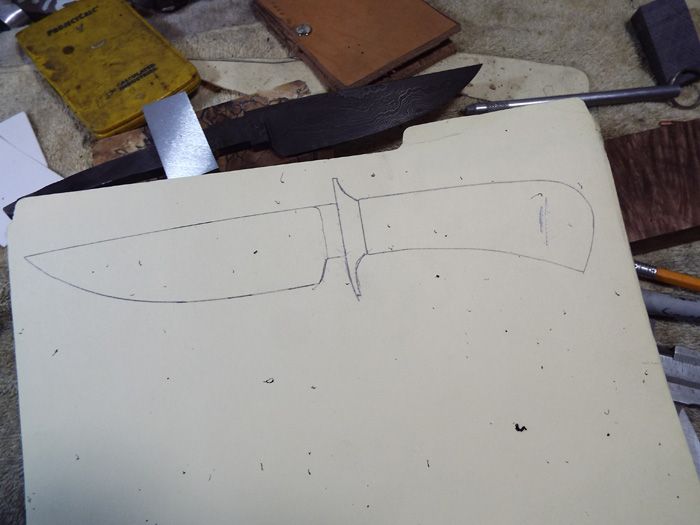
On each knife I make, I will do a drawing/profile of the blade after I have refined it.
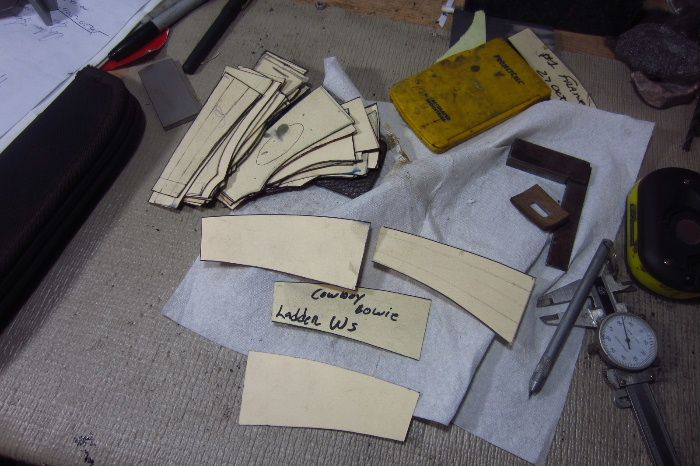
I keep all of the handle profile cut-outs from each previous drawing. (I have HUNDREDS!)
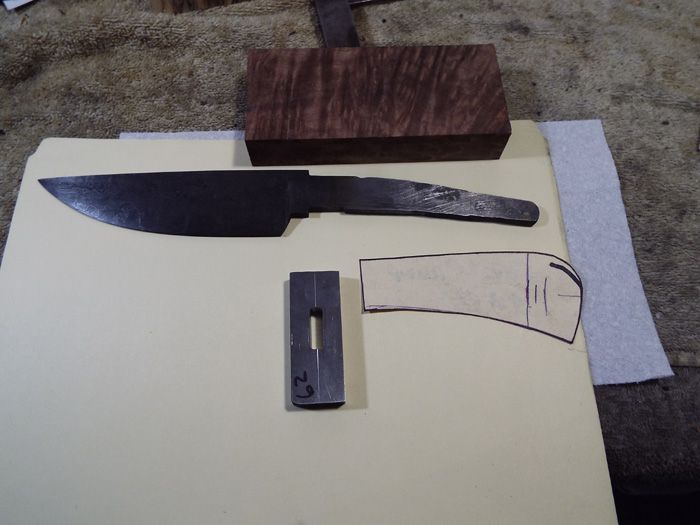
Here you can just barely see a San Mai blade up in the top corner.
If you look at the two drawings, the handles drop a bit differently, and I've sketched in a different length on the top one.
The guards are different.
But I have to have this vision in my head as to where I am going with each knife.
I have to have a direction - a destination - with each knife.
Here's one I just finished where I take a handle profile from a previous knife and make a sketch:
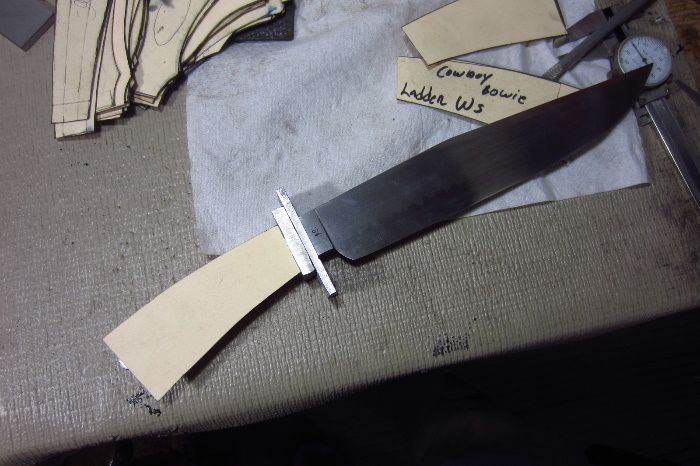
And here's another one of a different style knife with a selection of Bowie handle profiles I keep.
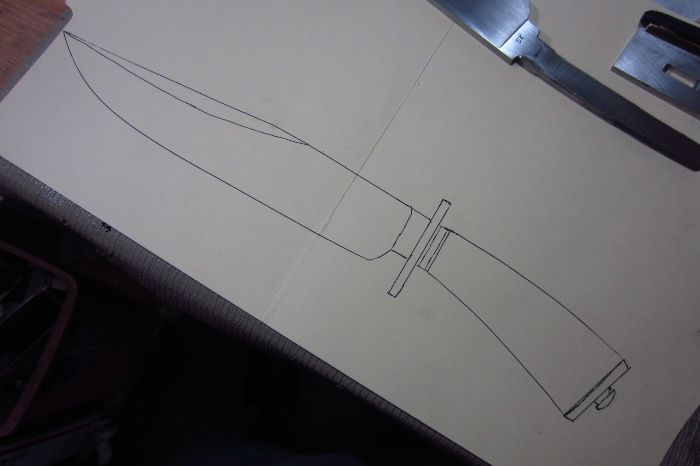
I'll choose a profile I like and make a drawing:
If I like the way it looks, I'll cut it out and try it on the blade: (Final note at bottom.)
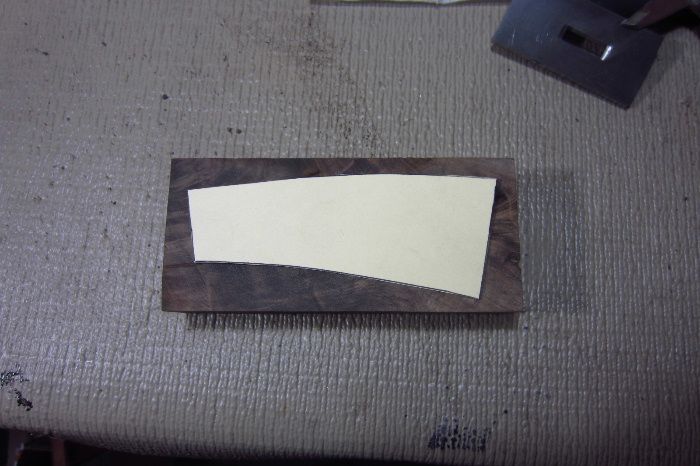
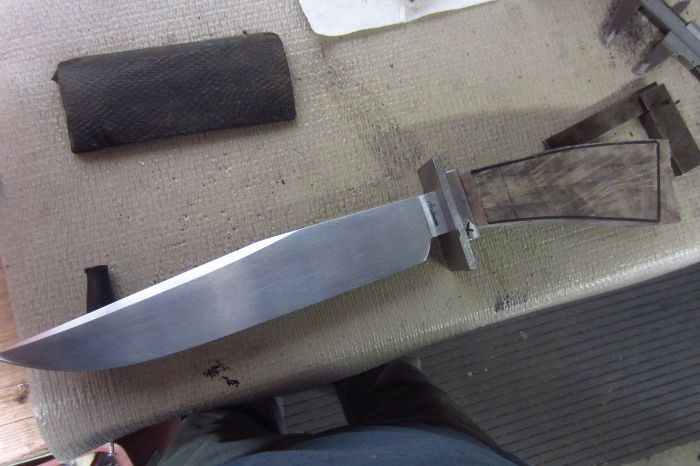
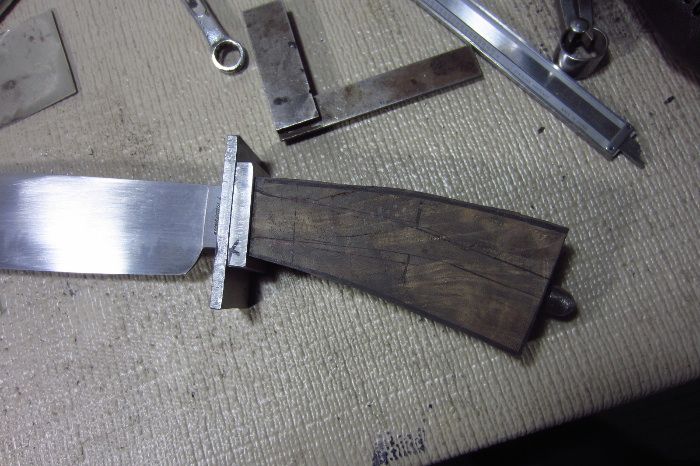
If I like where I'm going, I'll transfer that to a handle block and cut it out and proceed.
I then generally write the name of the knife on the handle profile and file it away with the rest of my collection. This allows me to refer back to particular knives and shapes. Often, a customer will see a knife on my web site and say that want one that looks just like that one!!
All I have to do it dig into my drawing file and I have exactly what I need.
And, I can alter and change the profile as need to accommodate other blade shapes and configurations.
I like making things easy.
Karl B. Andersen
Journeyman Smith
In this video on the ABS YouTube Channel Master Smith Joe Keeslar describes his steps for designing and planning a forged blade project.
[media] http://www.youtube.com/watch?v=XkjJ4APmnJg [/media]
Dan Cassidy
Journeyman Smith
Send an email to Dan

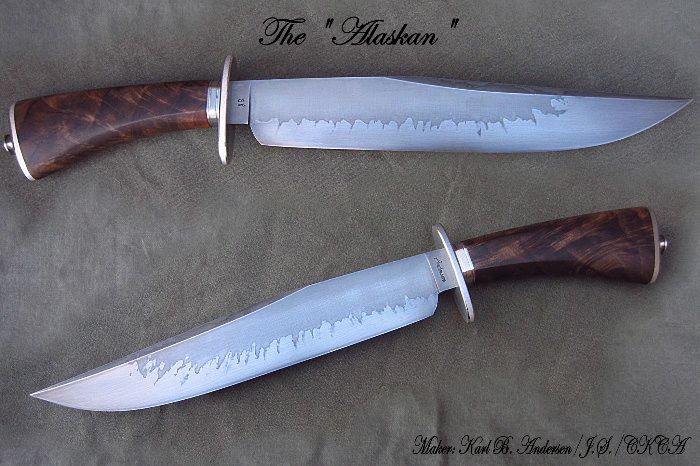
Sorry for the side note. Karl-I LOVE the Alaskan..... I think I may try to sketch that one, but betting it won't come out nearly so nice <img src=' http://www.americanbladesmith.com/ipboard/public/style_emoticons//wink.gi f' class='bbc_emoticon' alt=';)' />.
Jeremy
Jeremy Lindley, Apprentice Smith
I do it pretty much the same as Karl. 'Cept instead of manila folders I just open up a cereal box for each knife. The initial complete design is at the top, pencil drawn with a BIG eraser. Underneath that is traced the forged blade. Next down is a tracing of the rough ground and profiled blade.
Any adjustments to the blade design is now recorded; because what you have is not always what you wanted; or is maybe even better, or exactly as planned.
By doing this on each blade I am able to see how my forging is following my design and allows me over time to get better at forging to my plan. Any future forging/grinding changes are noted in red.
All handle changes and dimensions are laid out and recorded next down on the sheet with the finished ground blade along with heat treat information.
Next down the sheet the finished knife is traced with all dimensions and material noted. Any possible future changes are noted in red. All customer info is recorded and sheet is placed in file cabinet.
All history of that knife is avail. by pulling the sheet.
As Karl noted; by having this record I can duplicate "that knife you made in '02 for my brother-in-law".
Mike
Mike Williams
Master Smith
I like your process, Mike. It follows the entire history of the knife's evolution and remains accessible for future reference.
Great idea.
Karl B. Andersen
Journeyman Smith
Maybe I'm just old school or just different but I do all of my designing in my head. I will have a mental image of what I want to achieve before starting but unless I'm doing a reproduction knife of something historical (or something that I have been really impressed with) I rarely put it to paper. Often the knife will "talk" to me as I proceed saying "why don't you do this".
I threw away all of my patterns a dozen years ago and haven't kept one since. When I start with a pattern now it is a mental one rather than physical.
I guess that I simply enjoy designing as I go. <img src=' http://www.americanbladesmith.com/ipboard/public/style_emoticons//smile.gi f' class='bbc_emoticon' alt=':)' /> Maybe that's why all of my knives are one-offs.
Gary
I really appreciate the advice about keeping sketches of the knife's progression in an individual file. It would be good to figure out a similar system electronically--perhaps make a sketch with a drawing program, take photos along the way, and then snip the photos and paste them into one electronic document so that one can see the progression. This document/file might be a good thing to give to a customer with the knife, if the drawing and the final product match, that is...
Has anyone tried the "Weber Knife Designer App" or anything else that is knife specific? I know some folks use drawing software--lots of options out there. Any suggestions? I'm planning to get a couple apps (SketchBook Pro, Paper, etc.) for the family over the holidays...I'll report back.
Right now I have the following process:
1) Make a sketch on graph paper with french curves, rulers, and sometimes even a print-out of a knife I like.
2) Cut out the paper knife (sometimes in cardboard) and then trace it onto a metal-topped table near my anvil--I use it as a reference during forging.
3) Trace the final forged piece onto a piece of grid paper and redraw the knife with french curves (I have to do this because my forging doesn't match my drawing yet--in the future I hope to just use the original drawing in the next step).
4) Paste the new cut-out onto the knife and spray-paint the profile.
5) Then (and this is a new step since reading the posts above), I will keep the original drawing, the tracing of the forged knife, and the spray-painted profile in a file folder, along with a photo and data sheet of the finished knife.
Oh, and I have to add--"The Alaskan" is a well executed knife. Beautiful work, Karl.
As many of you know, I'm one of the computer guys. I've never been happy with my pen and paper drawings. I always wind up with a sheet full eraser marks and spend too much time flipping a french curve around trying to find just the right area of it to use. I've also found that the plastic oval and circle templates are not always perfectly concentric, adding to my frustration.
I use Corel Draw to create sketches of my knife designs. I use this software, just because it was installed on a computer that I bought years ago. I'm certain that there are many other drawing programs that can do the same thing, or any decent CAD software might even be better. I just haven't used anything else. I started a thread on using Corel Draw some time ago. I intended to go back and add more information to it. Should do that some day…… Below is the link to it.
What I really like about using a computer for design work, is the precision that the drawings can be done in. Measurements are down to a thousands of an inch. The computer generated lines can be printed much thinner than a pencil line, so accuracy of the drawings is much better. I use the printed drawings as patterns to make the parts for my knives. I can Super Glue a paper pattern to a piece of steel and shape it on the belt grinder it to within a few thousands of an inch of perfection.
One thing that I really appreciate about using the computer, is the ability to create drawings for knife parts that must be perfectly symmetrical side to side, like guards for quillon daggers. This is easily done by drawing one side of the part and then duplicating it. The duplicated half is flipped to a mirror image and then positioned beside the first half. I have even made dagger blades by this process.
Drawing software is also great for designing folding knives. The blade can be rotated on the screen for designing the handle and back-spring.
The computer drawings can be colorized and/or textured to make the project into something more like a photo, rather than just a line sketch.
Once the drawing is completed, it can be saved as a PDF file and emailed to the customer. This makes working with the customer on the design and approval much easier.
If a project being designed is larger than a sheet of typing paper, Corel Draw has a solution for printing it. I suspect that other drawing software has similar capabilities. In Corel Draw, you can change the size of the on-screen work area to any size that you want, so your project will fit on it. When you are ready to print your project, Draw will print it on multiple sheets of paper. Each sheet has reference marks on the corners to align it with the other sheets. You just put the sheets together as you would a puzzle, matching up the alignment marks and taping them together. My wife does stained glass artwork. I have done her design drawings for large windows in Corel Draw. A few of the window designs were printed on 15 sheets of paper.
I was going to add some photos to this thread, but I see that they are already included in the earlier thread that I posted on computer designing. Check that thread out and let me know if you have any questions.
I use a simple CAD program called cadstd.exe It is easy to use and it is free. It is available at http://www.cadstd.com/. They have a pro version but it is not necessary. You can print the file or you you can export it to several file types.
Steve, drawing a knife by computer program might make a great demo at your next symposium!!
Karl B. Andersen
Journeyman Smith
Steve:
Which version of Corel Draw do you use? I checked it out on Amazon and there are lots of versions...
Thanks!
Steve, drawing a knife by computer program might make a great demo at your next symposium!!
Karl,
I did a demo on computer knife designing at the ABS Expo a couple of years ago. It was pretty well attended. I've thought about doing it for the Heartland Symposium.
Which version of Corel Draw do you use?
Steve,
I'm using the Draw X4 version right now. Corel updates the software about once a year. They are on version X6 now. I purchase an update every few years. But, I have used versions of Draw for at least the last 10 years. All of them would work for knife designing.
Draw cannot be purchased separately; at least not from Corel. Draw is part of a suite of graphics software. But, the other stuff that comes with Draw is pretty cool too.
Just a word of caution. Draw isn’t cheap and there is a learning curve. Draw is capable of so much, that it can take some time to learn how to use it. There are things it can do that I still have not learned how to use efficiently. But if any of you buy it, or have it, don't hesitate to ask me if you need help. I'm pretty danged good with it.
I forgot to mention in my earlier post; I also do the artwork for my engraving with Draw. I did this art for English scroll engraving this morning. The picture of this scroll artwork, I pulled from my computer monitor screen with the "Capture" software that comes in the Draw suite.

I NEVER use a pattern....I spent close to 50 years in precision sheet metal fabrication working with other peoples prints with as little as .020 tolerances.....Now I'm retired and beating a piece of metal with a big hammer is a pure joy !....To paraphrase:"I don't need no stinkin' prints." [just a joke]
I may have something to contribute to this conversation. Lately, I have been using geometrical drawing to establish frameworks for my designs. I'll explain how it works shortly, but first I should give credit where credit is due.
I never would have thought to use this technique to design blades if it had not been for the work of Swedish swordsmith Peter Johnsson. He specializes in medieval swords and has done a lot of research on originals to develop his theory on medieval sword design. If you are not familiar with his work I strongly encourage you to visit his website. I won't go into his theory, it is his after all, but I will share some of what I have learned from it.
Basically, geometric drawing involves using a compas and straightedge to create a variety of shapes, which in turn provide proportions, lines, starting, and stopping points for elements of a design. I have not yet finished a piece using this design technique, but I am working on several at the moment.

This is a bowie knife designed within five intersecting circles with a pentagon establishing various portions of the transition area from handle to blade.

This was a preliminary design for a chef's knife, but the blade was too short. It would still make a nice knife though.

I later added two circles to the previous design to get the proper length of blade, 8 inches in this case. I am about ready to heat treat this blade. The beauty of these geometrical structures is that they can be easily scaled up or down by simply changing the size of the circles.

This is a rough sketch of a sword which I am currently working on. I made some adjustments to it when I drew the full size however.

Here is another sword hilt. (This could be a nice quillon dagger too.)

This is, obviously, not a blade. The square inscribed within a square helps to establish proportions of some these designs. The longest length across the center of a square (from corner to corner) is equivalent to the side of that square times the square root of two. It just so happens that this ratio is very close to the Golden Ratio which is found naturally pleasing to most people. Each square in the diagram above gives a ratio relative to each other square. These ratios alternate from irrational, proportional by the square root of two, to rational, with every other square being one half the width of the previous, parallel, square.

This drawing gives a better explanation of the golden mean and it's closeness to the square root of 2.
I really enjoy using this technique to draw blades. I have a hard time eye-balling things and don't consider myself the artsy, go-with-the-flow type so this technique has really helped me create things that are both beautiful and precise without fancy tools. The geometries themselves are quite pleasing too; it's fun to see the different shapes you can make just playing with a compass and straight edge, however, some shapes are hard to make (or even impossible with just those tools) and it can take a while to finish a drawing, but I like the challenge.
I hope this is helpful.


