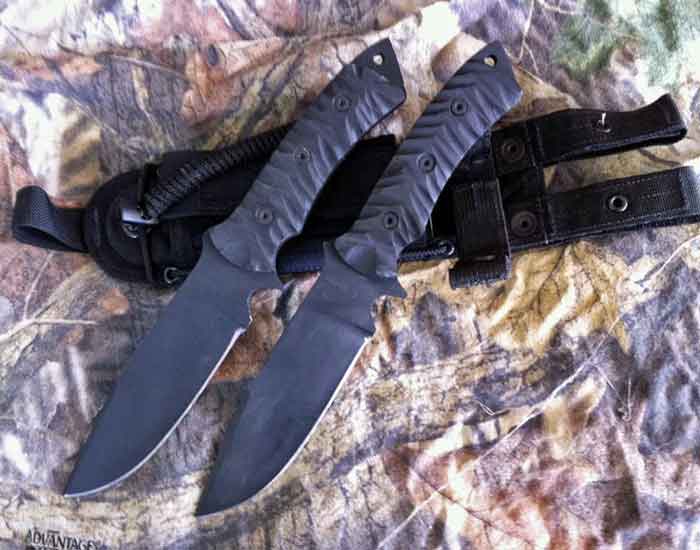
The topic for October 2013, is how to create colors on steel. This can include bluing, browning, phosphating, heat coloring and any other methods to impart color to steel or damascus fittings and blades. What are your techniques? What chemicals, or products do you use?
Steve, I do a lot of caustic hot-bluing.
I like the visual contrast and the physical protection I get on my Damascus and steel parts, including deeply etched wrought iron.
I find quite appealing in many ways.
I also have a hot-bluing video on the ABS channel.
Karl B. Andersen
Journeyman Smith
The only thing that I have used much of is Brownell's NitreBlue salt. If you use it below 500 degrees it will give you a straw color and above 500 degrees a blue (the higher the temp--the darker the blue color until it reaches almost black).
I have used it a few times where I stopped it halfway between (490 degrees) for a combination of straw & blue which gives an interesting effect.
Gary
I've been "practicing" with various ways to introduce color into my work for a number of years. Seems like as with everything associated with knifemaking, there are pluses and minuses to each methdology.
Probably the only constant is that the "coloring", whatever that might be, is generally in the "finish work".
As many do, I started out with cold blues, then started jumping all over the map trying different things. As far as "hot" solutions, my favorite is Nitre-Blue...by varying time and temp you can achieve many different colors, and various shades within each color. With Nitre-Blue, surface prep is everything....bead blasted or matte finishes prior to coloring will result in pastel looking colors, hand finishes into the 800-1200 grit range will yeild satin type colors, and polished finishes will achieve the brightest/deepest colors.
Another area that I've gotten into is using products such as Gun-Kote and baking lacquers. You can get either in just about any color of the rainbow, and when correctly applied, it's surprisingly durable and long lasting.
I've also mixed the above two methods....using Gun-Kote after etching damascus, baking it on, then lightly sanding the high topography and going to the Nitre-Blue.....
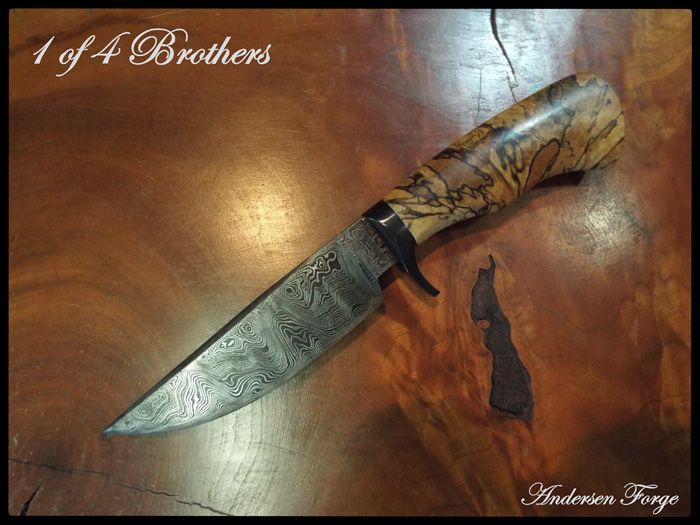
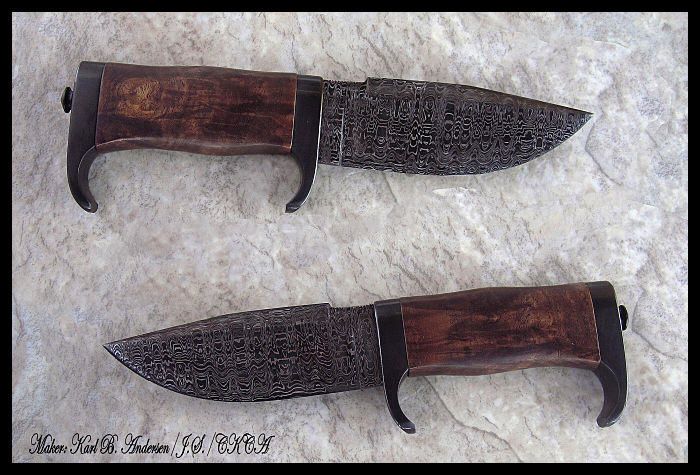
Here's and example of how gloss black Gun-Kote can greatly enhance the contrast on damascus...
Just etch the damascus until you can feel the topography with your fingertip, clean by scrubbing with #0000 steel wool and acetone, the apply the Gun-Kote with an airbrush. After baking and cooling, LIGHTLY sand with 600-800 grit with a hard sanding stick. The object is to remove the black from the highs in the topography, and leave it in the low areas....this always works better with a finer, tighter damascus pattern.
Here's a folder that I made over 10 years ago....which I used a combination of Gun-Kote and "bluing" to create some wild coloring.....
Finally, I've recently started using a combination of Gun-Kote, and carving/texturing, to give some of my folders a "different" look.
OH! and one thing more to add....Gun-Kote also comes in a satin clear....that works really well for coating damascus blades...seals, protects, and unless you know what to look for, most folks don't even know that the blade(s) have been "coated". <img src=' http://www.americanbladesmith.com/ipboard/public/style_emoticons//wink.gi f' class='bbc_emoticon' alt=';)' />
Ed Caffrey, ABS MS
"The Montana Bladesmith"
www.CaffreyKnives.net
Thanks to Gary, Karl and Ed for the posts so far. Great information!!
Ed,
The colors on your knives are awesome! I have a question about Gun-Kote. Am I reading this correct, that Gun-Kote can withstand the temperatures of niter bluing? I knew it was okay in hot caustic bluing temperatures. Just didn't expect that it could withstand 500 degrees.
I can't wait until more replies come out- coincidentally, this is a topic of curiousity and confusion for me recently, so this is going to be great!! Great answers so far- keep up the good work!!
After a deep etch in ferric I buff the blade and do another etch in very strong instant coffe for a stronger black and white effect.
|quoted:
After a deep etch in ferric I buff the blade and do another etch in very strong instant coffee for a stronger black and white effect.
I have heard of taking the damascus out of a deep FeCl etch, not cleaning it at all, and packing it in baking soda or boiling it in a baking soda/water solution to "fix" the carbon on the blade. I haven't tried this yet but I am in process on a dagger and plan to give it a try.
Joshua States
www.dosgatosforge.com
https://www.youtube.com/channel/UCdJMFMqnbLYqv965xd64vYg
https://www.facebook.com/dos.gatos.71
Also on Instagram and Facebook as J.States Bladesmith
“So I'm lightin' out for the territory, ahead of the scared and the weak and the mean spirited, because Aunt Sally is fixin’ to adopt me and civilize me, and I can't stand it. I've been there before.â€
Karl says:
I also have a hot-bluing video on the ABS channel.
Is this the Youtube ABS channel? Because I cannot find your video there by searching the terms "hot bluing" or using your name. The only hit I get is your hydraulic press vid.
Joshua States
www.dosgatosforge.com
https://www.youtube.com/channel/UCdJMFMqnbLYqv965xd64vYg
https://www.facebook.com/dos.gatos.71
Also on Instagram and Facebook as J.States Bladesmith
“So I'm lightin' out for the territory, ahead of the scared and the weak and the mean spirited, because Aunt Sally is fixin’ to adopt me and civilize me, and I can't stand it. I've been there before.â€
The only coloring I have used on a knife is Birchwood Casey's Plum Brown applied to a blade heated to 200 degrees. Here is a photo of a knife I made for my nephew when he graduated USMC combat training.
Joshua States
www.dosgatosforge.com
https://www.youtube.com/channel/UCdJMFMqnbLYqv965xd64vYg
https://www.facebook.com/dos.gatos.71
Also on Instagram and Facebook as J.States Bladesmith
“So I'm lightin' out for the territory, ahead of the scared and the weak and the mean spirited, because Aunt Sally is fixin’ to adopt me and civilize me, and I can't stand it. I've been there before.â€
coming in late here, but that is the story of my life. Hour late and a dollar short.
About the only coloring I use is Oxnate 7 for a deep glossy black on fittings; or heat coloring for steel parts out of wear areas.
I do a lot of heat coloring of stainless in the gold thru blue range depending on the effect I want; again out of wear areas. I have worked with color casing some fittings but the results were spotty and it ended up being a bottomless labor pit.
so many techniques, so little time!!!!
Mike
Mike Williams
Master Smith
Steve asked:
The colors on your knives are awesome! I have a question about Gun-Kote. Am I reading this correct, that Gun-Kote can withstand the temperatures of niter bluing? I knew it was okay in hot caustic bluing temperatures. Just didn't expect that it could withstand 500 degrees.
Well I went to Brownell's website and retrieved this bit of info: "Prepare, clean and pre-heat your part to 100°, spray on Brownells GUN-KOTE and allow the part to dry. Bake the part in an oven at 300°" and later in the paragraph "In fact, once it’s applied, the only way to remove Brownells GUN-KOTE is to abrasive blast the part. It is resistant to all known gun solvents and thinners."
So, the question I have is does it chip off when you sharpen the knife? If someone were to take the knife and lay into a steel or stone, do you run the risk of chipping off the color?
Joshua States
www.dosgatosforge.com
https://www.youtube.com/channel/UCdJMFMqnbLYqv965xd64vYg
https://www.facebook.com/dos.gatos.71
Also on Instagram and Facebook as J.States Bladesmith
“So I'm lightin' out for the territory, ahead of the scared and the weak and the mean spirited, because Aunt Sally is fixin’ to adopt me and civilize me, and I can't stand it. I've been there before.â€
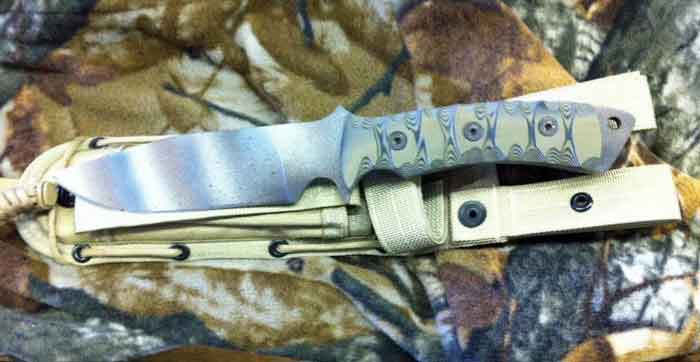
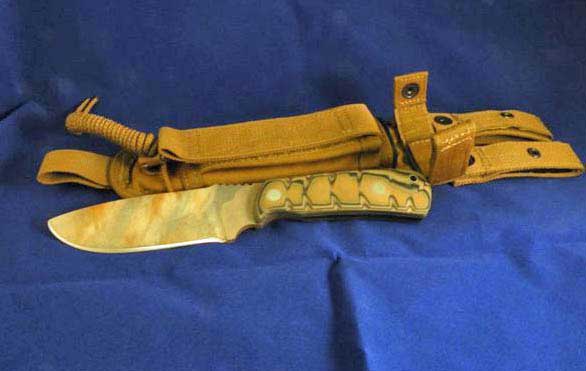
I started painting blades out of necessity. My wife has two nephews that were in the military and I wanted them to have knives but I didn't want the knives to shine and maybe give away their location.
I decided to use Dura-coat to paint the blades. It would have been better to have sand blasted the blades but did not have a sand blaster. Instead, I left the blades sanded at 220 grit to help hold the paint. Dura-coat is a two part mix that doesn't have to be heated to cure. It is best applied with an airbrush, which is what I used. You must use a respirator when applying Dura-coat. It can actually seal off the inside of your lungs. Not a good thing if you want oxygen in your blood.
The boys were in the army so I decided a desert camo would be fit in with their clothing and equipment. I first applied a base coat of black and then started applying other colors starting with dark to light. I used tape to mask off areas and cardboard shields. I even used some leaves on one of the knives. Some of the blades I just kind of free hand striped them. Kind of like the Vietnam Tiger stripe only in desert colors.
Later I made a knife for a friend in the Special Forces. He wanted the blade and the handle solid black. Some of his friends liked the knives and I made knives for them too.

