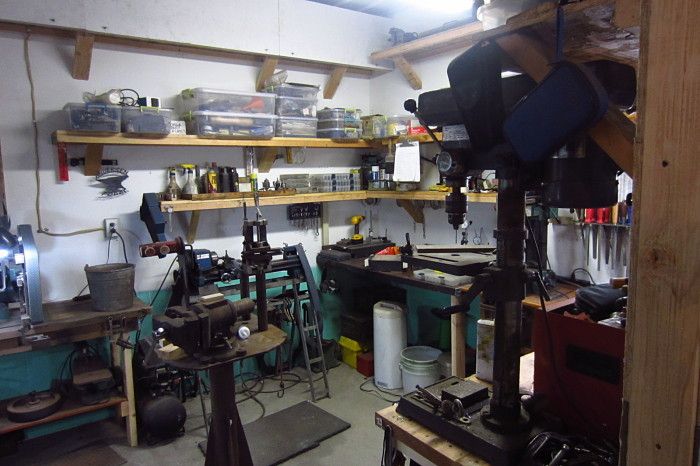
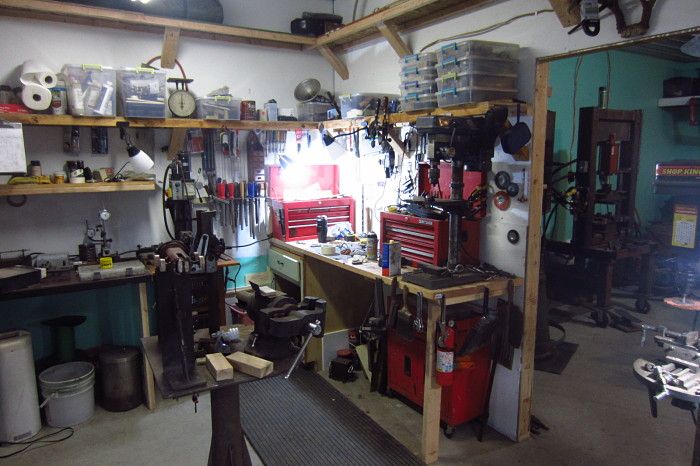
April's Topic of the Month is basic bladesmithing set up. What type of tools do you need? What do you need for shop space? Things such as anvils, forges, hammers, tongs, workbenches, etc. What we are looking for is our new members to ask questions on setting up your shop and the more experienced members can offer advice and recommendations.
I will start with a couple of questions.
1. What is the minimum size anvil you would recommend?
2. What do you consider is a minimum size for a shop?
I look forward to a good discussion.
Brion
Brion Tomberlin
Anvil Top Custom Knives
ABS Mastersmith
I look forward to hearing what others have to say. As for me, I'm a hobby maker and I think that can definitely play a role in what is considered more or less "necessary".
To answer the first question posed, I remember hearing the advice of a 75 lb anvil being about the smallest a guy would want. Mine is an old ACME anvil that weighs in at just over a 100lbs. Honestly, I don't think I'd like to do a whole lot of hard forging on an anvil much any smaller than what I have. Matter of fact, I'd LOVE a bigger anvil. Having forged on friend's anvils varying in size up to I think 300+lbs, bigger can certainly be seen as better (IMHO). I think a good rule of thumb for someone wanting to start forging is get whatever size anvil you can afford and accommodate in terms of space.
Which comes to the second question. I don't have a good answer, but as I consider it-I feel in the same way as the anvil answer. As big a space as someone can make, build, borrow, or find <img src=' http://www.americanbladesmith.com/ipboard/public/style_emoticons//smile.gi f' class='bbc_emoticon' alt=':)' />. When I started out, I had a gas forge on a roller cart that I made and it was tucked away. When I wanted to forge, I backed the car out of the garage, moved the cart and my anvil into the space and started forging. I already had a bench for some other shop type work in the garage against a wall that had my vise on it. That's where I used my angle grinder to help finish off the profile and draw file from there. So in terms of overall space-I didn't have much of any. Since then, I converted a portion if our 3 car garage into an enclosed shop area. I've gotten far more in the way of tools: metal bandsaw, 2x42 grinder, drill presses, post vise, metal rolling table, welder, etc. I still have a small area by many standards, but it's a LOT better than when I started. So, as big as a guy can reasonably have is my suggestion. I would love to get a mill someday and a surface grinder, but those would be pretty tough with the room I have. The tools that have helped me most I think are my grinder, a quality drill press, and a metal bandsaw. More would be great, but those have made a significant impact in how I do things.
Again, these are based off of a hobbyist perspective. For someone trying to make his living at this-the tooling and space would be that much more important.
Jeremy
Jeremy Lindley, Apprentice Smith
I went through this a few years back when building a new forging shop. As far as size goes I think the majority of shops are garage sized. Much smaller than this can be used but may be inconvenient as you may have to be moving tools as you use them. If I were to build one I don't believe that I would want anything much smaller.
Anvil size is often dictated by what is available or affordable. There is an old adage that your anvil should weigh 40 times what your largest hammer does. One can use smaller than this which simply means more work as a light anvil doesn't move the steel as quickly. Mine weighs 144 lbs and has worked pretty well for me. I would love having one that was heavier but I don't feel it necessary as I do most of the heavy work these days with a press.
A couple of thoughts for those who are planning to build their shop is that you can never have too many electrical outlets or windows. I put both 110 & 220 outlets every 8" in the walls of my shop. I am also a big fan of natural light and used as many windows as was practical in the walls of the shop that I built. There are only a couple that I open and the remainder are solely for light. Also, plan to make the doorway large enough for bringing large tools in or out.
Another thing that I put into mine was a two foot exhaust fan in the wall next to the forge. This is solely for removing fumes and could also be done with a hood above the forge with a fan built into it. I use a gas forge and ALWAYS have the fan running with the door open when forging. SAFETY FIRST!
If you are planning on building your first shop remember to plan ahead as you will most certainly add additional tools is the future and it is nice to have the room and electrical service to handle them (including 220v service). I don't have three phase 220 which would be nice but not critical to have.
When planning a new shop I would also plan to have plenty of lighting both natural & electric. It's much easier to build this originally then to have to add more later. Before building a shop it will help you tremendously to do extra planning preemptively. Try to visualize working in it and every contingency that might pop up as far as tools needed, utilities, work space & lighting. Visit as many existing shops as you can. See what you like & dislike about them.
Most of us will have a limited budget so plan what is critical to start with and what you would like to add when the funds permit. <img src=' http://www.americanbladesmith.com/ipboard/public/style_emoticons//smile.gi f' class='bbc_emoticon' alt=':)' /> If you are like the majority of us there will always be another tool that you will eventually want to add to the shop.
Building a new shop is an exciting time and I envy anyone who is going through it.
Gary
^^^Some great advice given there. I don't have 220 available and it would certainly be nice. I also had to add in light since I walled off a portion of my garage-several lamps all over. And put my metal table with the forge on big wheels to roll outside after I melted my blinds.... No room for a hood because of a garage door, so outside it goes when time to fire it up.
If you are able to plan a space rather than retro fit a current one, I envy you. Mr. Mulkey gives lots of good advice.
Jeremy
Jeremy Lindley, Apprentice Smith
Been wondering if a shop divided into smaller rooms works better. One room for the dirty stuff, grinding, forging, etc. Another room for the cleaner stuff, finishing etc. Maybe even climate controlled. Those of you that have been at this awhile, what do you have and what do you wish you have?
I agree about the separate spaces for forging and finishing. I'm setting up my shop this summer in Alaska, and my plan is to have all the forging and heat-treating in a detached shop/shed. I'm going to do the finish work in the heated garage, which is attached to the house. For some reason I like the idea of having the forge and heat treating separate from the house...
The only issue I can think of is the belt grinder--it will be nice to grind in the warm garage, but it makes a mess. My 220 outlet is right next to a window, so I'm going to set up the grinder with a bucket of water under it and an exhaust fan behind it going out the window (maybe get some kind of hood going)--that should help, but I'm sure it will still make a mess of the rest of the garage.
Does anyone out there enclose their grinding space in a little room, all for itself? I've seen people have separate rooms (with big exhaust fans) for use with angle grinders, but I've never seen anyone have a separate room for their belt grinder. Maybe some kind of tent...ideas?
The minimum shop could be pretty small. Currently, my entire shop (including a charcoal forge) is under a roof that is less than 50 square feet--I'll measure it tonight. You'd just need room for:
Forge (small propane forges take little room)
Bucket of water
Quench Bucket/Pan (quenching oil)
Anvil (this could be a makeshift anvil--maybe a piece of square steel set in a bucket of concrete)
Small workbench with a vise and some elbow room for filing and hand finishing.
As already mentioned, the issue is that knife making is so fun and rewarding that most people will not be happy with the minimum. They'd eventually want a belt grinder, and then a press, drill press, welder, band saw, surface grinder, disc grinder, mill, a "heat treat forge" of some kind, maybe HT salts, an oven, etc. Not in that order, necessarily. But all that stuff takes room and outlets.
I would like to mention a few of things that I used to get started. In my house money is tight and finding money for a "hobby" certainly wasn't/isn't easy. It took me about a year and a half to get a good grinder and quite a bit longer to get a proper anvil.
First essential is the forge, they are easy to build and for a decent gas forge you can get it done for around $100-150. There is tons of info out there on building them, Ron Reil's site is a good place to start. A coal forge can probably be built for less but I prefer gas.
Of course a forge isn't much good without an anvil, this can be much harder to find on a tight budget. Even used they can go for several dollars a pound. I found mine on craigslist, 100lb for $200. It took me several years to find it though, (some places it might be easier, but north Idaho isn't one of them) in the meantime any good sized hunk of steel with a flat surface will work. The best makeshift anvil I came up with was a piece of railroad track a couple feet long stood on end. It only gives a couple square inches of work space but as long as it's bigger than the face of your hammer it will work. As a bonus putting most of the mass of the track directly under the work surface gives the feel of a much heavier anvil.
A hammer is the next essential, hardware stores and pawn shops are a good place to start. If your budget allows it a real blacksmithing hammer from any of the online blacksmithing shops is very nice to have.
A grinder is the next big piece of equipment, but running at least a grand for a decent grinder can be tough. I got away with using a small 3"by18" belt sander held in a vise. It was certainly not ideal, but it got the job done for about a year and a half. Best part was I already had the sander so it was free.
A drill will also be needed at some point. A drill press is nice, but if just starting out the drill you already have will work.
The last essential is probably a vise. The old post vises are what you want but again can be hard to find and expensive. Really any solid vise will do for most work, just keep your eyes peeled for a good deal on a post vise. I finally found one at a garage sale for $75.
My current equipment list is still pretty small,
I have two forges, a horizontal venturi and a blown vertical
a KMG grinder
a 100lb anvil
a small drill press
a post vise
a hydraulic press
various hand tools, most of which I already had.
So anyway it is certainly possible to start bladesmithing on a tight budget, I think I was around $200-300 into it before I started forging. To those starting out, don't let the giant list of expensive equipment stop you. Just start with the basics and then build on that as you need/can afford it.
I just have a minute here so toss in some ideas.
Seems like this topic could almost be broken down into several month's topics.
Tongs alone could be a topic for one month.
Or work spaces, etc.
The "rule" I heard early on was not much different than Gary's. I heard 50 pounds of anvil for every pound of hammer.
Of course, when we forge, we need to realize we're hitting the work piece on both sides - the hammer DOWN and and anvil UP!. Too light of an anvil, and the energy from the hammer blow just travels on through to China.
We need the energy returned to the work piece. This takes place by way of MASS.
So, if you find yourself frequently forging with a 3 pound hammer, you'll need 150 pounds of anvil. And so on.
I will also mention a thought about having exhaust fans and such sucking/blowing outside.
Every cubic foot of air you blow outside needs to be replaced. If you go to a lot of effort to heat your shop, you will be working overtime to heat it if you blow the warm room air outside!
I have a friend up here in Minnesota who simply sucks air from under the ginder and runs it though a box with a furnace filter on each side and just returns the air right back to the same room. No extreme heat loss.
Karl B. Andersen
Journeyman Smith
I had heard the 50lb of anvil for every pound of hammer also. As Gary knows I have that covered even if I use a six pound hammer. I started with two smaller peter wrights, 121 and 117 pounds. They worked fine and I still use one for demos. Then at the Branson show a few years ago I was able to get a 300 or so pounder. Big difference! This probably cut my forging time by a third. I would suggest getting the best and heaviest anvil you can afford, but probably at least 100 pounds.
Ventilation is a definite with a forge and I also have a vent fan. As Gary says, a lot of light is good, especially above your work benches. This helps considerably with scratches and sanding on your blades. I would love to have seperate areas for dirty work and clean work, just not workable at the moment.
Just some thoughts for right now. I will chime in with more.
Brion
Brion Tomberlin
Anvil Top Custom Knives
ABS Mastersmith
I set up a couple of years ago with a 100# anvil, a couple of blacksmithing hammers, and a small gas forge Bill Wiggins helped me get. At the antique tractor auction in Ashville, NC I brought a post vise for $90. I use the back porch as my shop area (8x9'). I have added a couple of drill presses, a clone 2x72 grinder, a porta band saw, and a craftsman 10" band saw.
I just ordered a 10x20' shed that I'm dividing 8' for the clean area with A/C and 36" door. The remaining 12' will have a 4' roll up door. Going from about 70 sf to 200 is going to be nice. As most in this game I have added tongs, hammers, and made a bunch more tools. I do believe after using my small anvil a larger one will help, especially since I just acquired a 5.5# french style hammer. I think I started pretty basic.
This thread will give me food for thought in laying out my new shop.
When I decided to begin this journey into bladesmithing, I already had my 30X30 shop. It consisted of an open work space with a long work bench down one side, wired (110 and 220) and complete with a bath room with toilet and shower. There is a double stainless sink adjecent to the bath area and an icebox for beverages. Since I use the space for servicing my tractor, I had a 12X18 overhead door installed when built. There is a normal sized exterior door on the back side and two windows, one on either side of the overhead door. The walls are insulated and covered with OSB board, and the ceiling is open to allow hot air to travel up and out the ridge vent in the metal roof. This allows for plenty of natural ventilation during the hot Mississippi summer days, but made it way to cold to get much done this winter. Forging was possible, but grinding and finish work was not fun in the teens and twenties.
I plan on walling off the grinding bench and the finishing bench areas before next winter. This will allow me to heat them, and add additional lighting, which I need. With a window at the end of these two areas, I'll be able to use a fan to ventilate the grinding area, and a small window A/C unit to cool the finishing area.
To possibly answer Steve's question, I worked in a MS shop recently that was group of four out buildings. It worked well. Another item often overlooked, storage. Make sure to install plenty of cabinets and shelves for storing all the belts, papers and jigs we end up buying and making.
I have a 150# Southern Crescent anvil and a 100# Mouse Hole anvil, leg vise, coal forge, forced air propane forge, 2X72 variable speed grinder, 9" variable speed disc grinder (must have once you use one) 1968 Model 1150 PowerMatic variable speed drill press (also used for slot milling) buffer, mig welder with gas, oxy/acet torch rig, welding table with machine vise, saws, heat treat tank, toaster oven, and a 25# Little Giant Power Hammer. Along with lots of hammers, tongs, files, hand tools, jigs and stuff one accumulates in 63 years.
Something that Brion mentioned in the original post was benches. This is another thing that is hard to have too much of. Every foot of wall in my shop that isn't taken with a floor model tool is covered with a bench of some type. Most are wooden benches that I built of 2x6's and hold tools like a post vice, a drill press, a chop saw & my KMG. [If you're wondering how I attached the post vice, it was bolted solidly to the bench and has a plumbing flange screwed to the floor to secure the bottom of the post.] For a welding table I went to the local junk yard and found a very large truck bumper that I cut down and made into a table w/vice for my MIG & oxy/acet welding. <img src=' http://www.americanbladesmith.com/ipboard/public/style_emoticons//wink.gi f' class='bbc_emoticon' alt=';)' /> Though I have probably 20' of bench space it seems that very little is ever free space and I could use more.
Just something else to plan for.
Gary
Didja ever stop and consider how you can only access your work benches from one side?
If I had the space and extra footage, I'd have a work bench running down the center of the room so that I could access it from both sides.
But then, I want to build a round house so it doesn't have any wasted corners. <img src=' http://www.americanbladesmith.com/ipboard/public/style_emoticons//blink.gi f' class='bbc_emoticon' alt=':blink:' />
Karl B. Andersen
Journeyman Smith
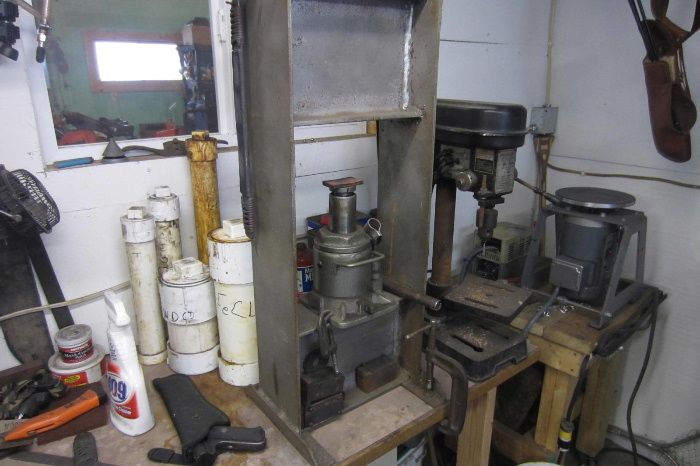
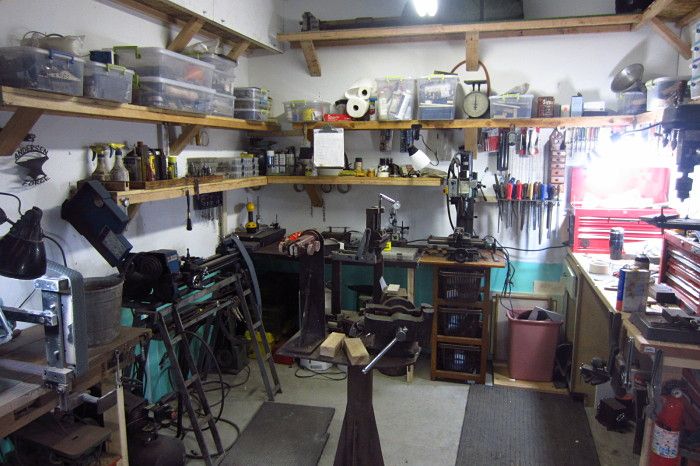
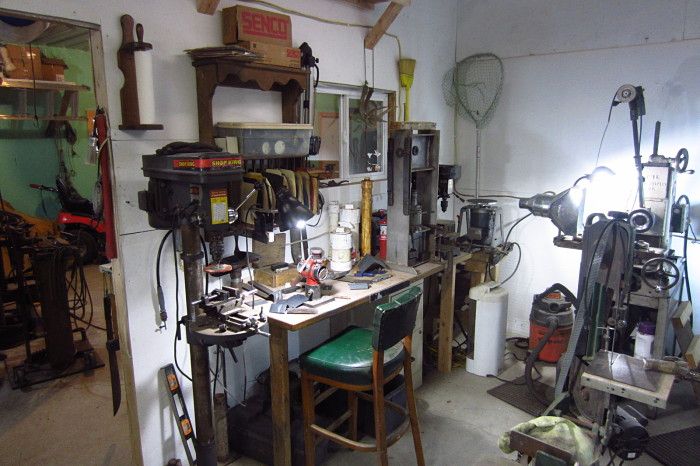
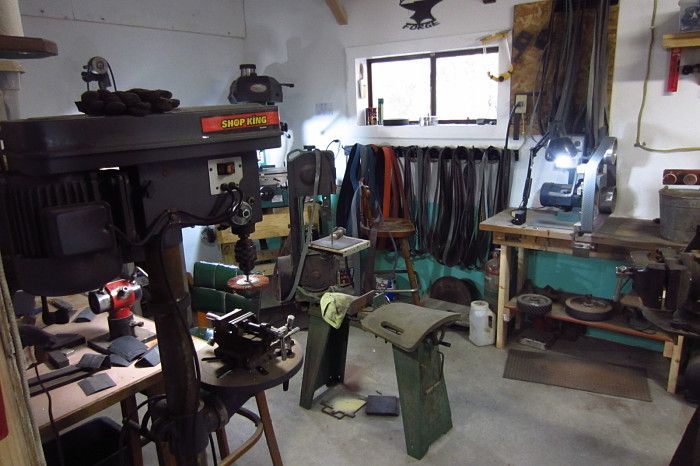
I'll post up a few pictures of some things going on in my shop.
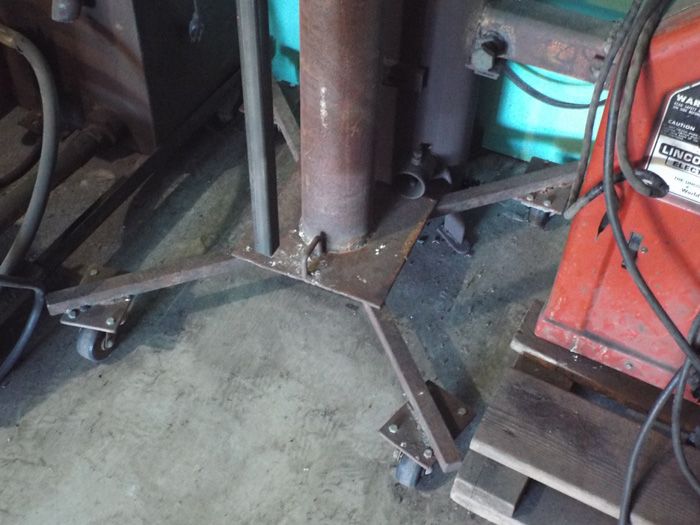
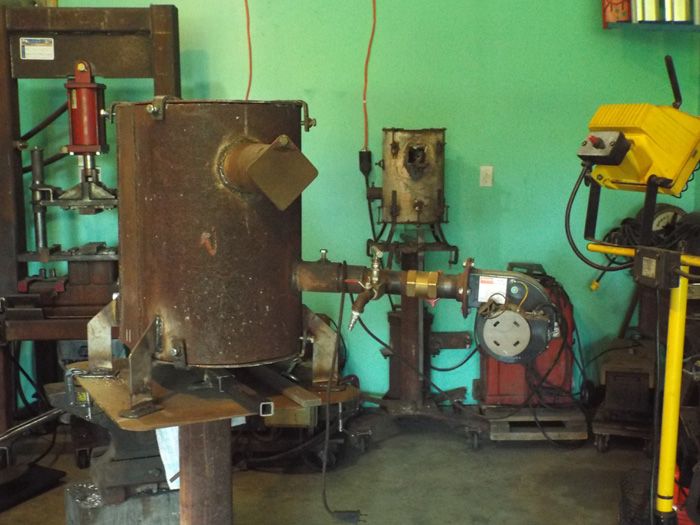
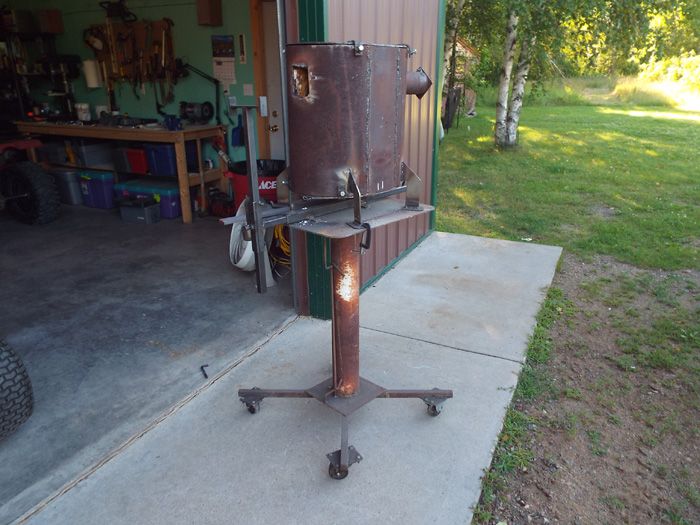
I put my forges - 3 - on wheels so I can roll them out of the way:
You can even see my welder on wheels for when I want to roll things outside and weld/grind billets.
Even see one of my quench tanks on wheels right next to the welder. The other tanks rolls underneath my press.
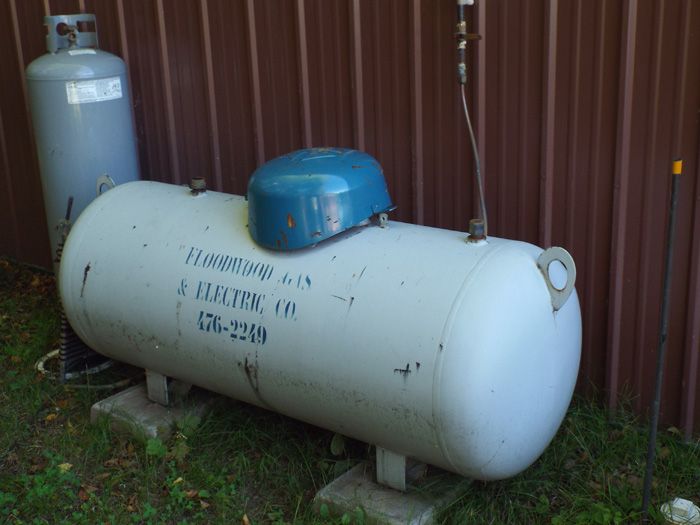
Propane tank outside:
Another shot of a forge:
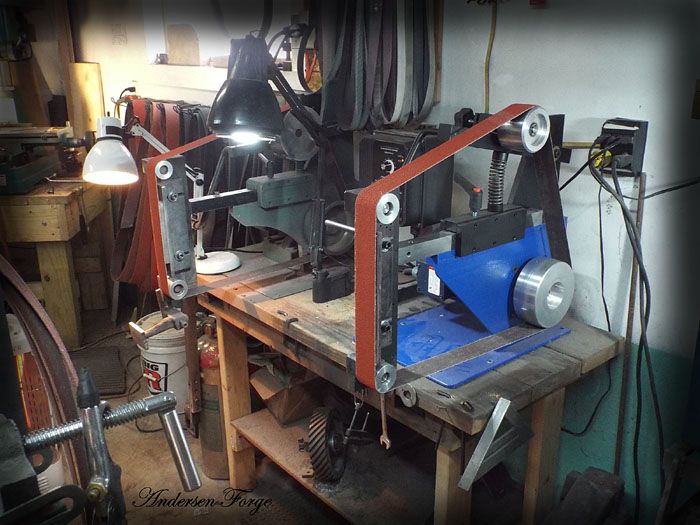
Grinder set-up:
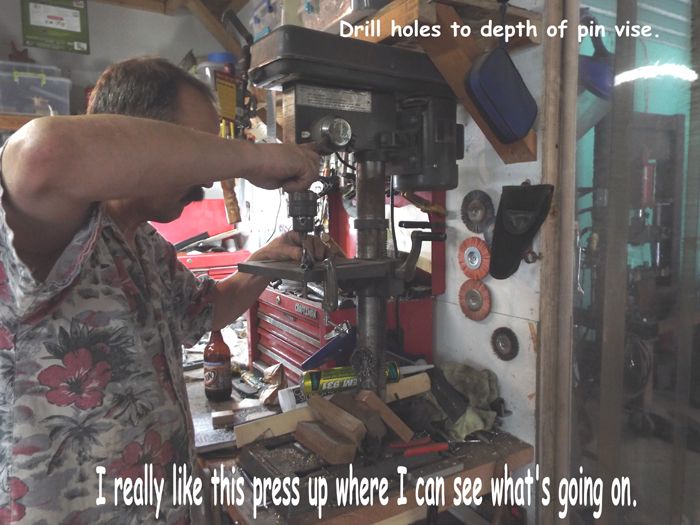
I have three drill presses and two mills, bit keep this one right next to the bench at eye level for drilling alignment pin holes in guards. This is the only job that press does so I know it's always dead nuts on 90 degrees.
Karl B. Andersen
Journeyman Smith
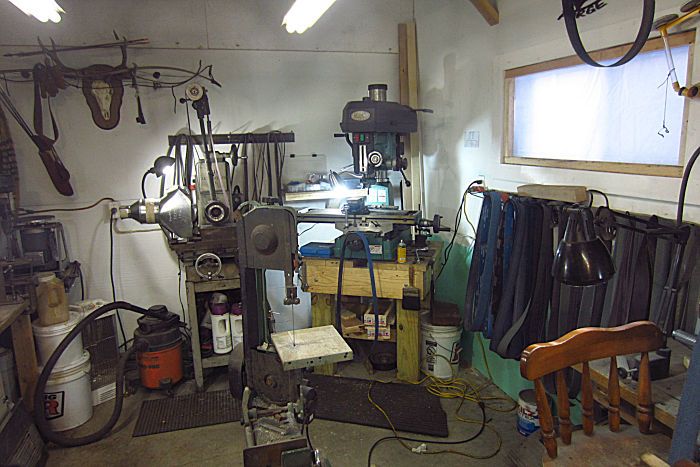
These are shortly after I moved to Minnesota and the whole shop was not complete.
But one thing I did was place high shelves on the walls. Stout shelves!! And almost everything went into clean plastic tubs. That way, everything doesn't get covered in knife dust. Just wipe the tops of the tubs off and it keeps things really clean.
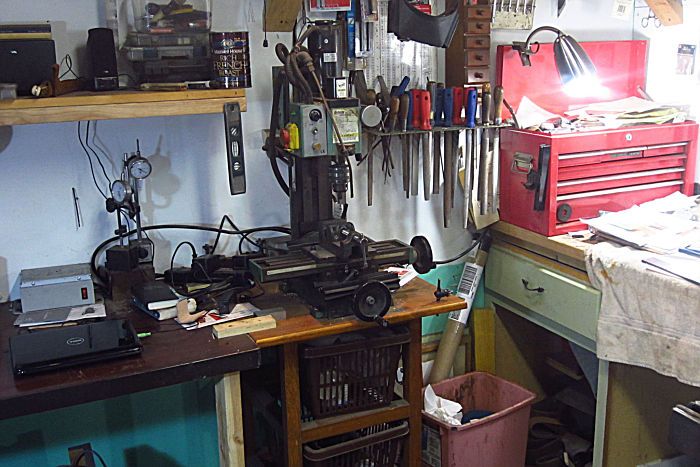
I keep this little mill next to the work bench for drilling pin holes in handles.
Files in a rack on the wall.
Stamp press:
See the high shelf? I put items up there that are mostly storage and not daily use. Some studs and wing nuts keep a 1/2" plywood "face" in place. This keeps knife dust from collecting on the dust and the contents clean!!
Just tossing pictures up here for ideas.
Karl B. Andersen
Journeyman Smith

