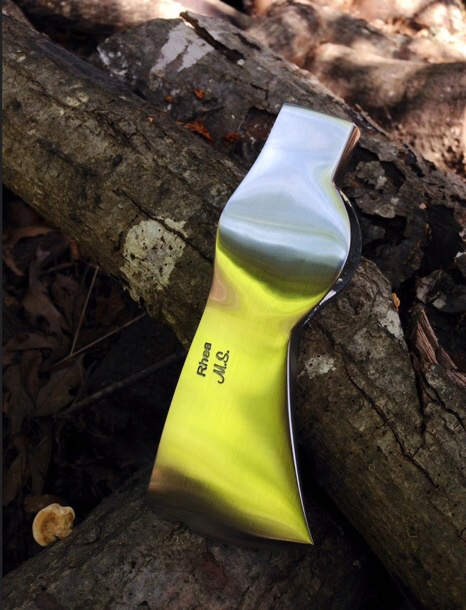
Here is a link to my Flickr page that shows how I sometimes forge a hatchet. This one is slit and drifted from a solid bar of L6 as opposed to folding and inserting a bit. To be fair, I usually use a power hammer to draw it out and to serve as my striker to drive the slitter in. On the Flickr page is a rough description of the steps. If you have any questions I will gladly try to answer them.
Hi mr Reah I would like to know more on the forging process of forging hawks and axes. Also is that a little johnnie forge in your picture link? If so do you use anything on the floor of the forge to pertect it while forging. Thank you.sincerly Scott Gallagher
Lin, that's beautiful! I don't see any hammer marks on the hatchet in the last pictures while it's still hot. Is that only forging work or have you done some grinding already in that stage? (excuses for the poor language)
I have to thank Dan for sticking in one of the pictures. I appreciate you Dan.
Scott, I don't put anything in the floor of the forge. I rarely make welds in this forge (Little Johnny forge, love it!) but it will weld.
Christophe, I had ground and smoothed it some, yes. That was of the thermo cycle stage. While I do forge close, I cant say that my forging is as smooth as that picture shows.
I will add a picture or two of my drifts when I get back home. They are home made and since I was not real sure they would work well, I just stuck a rebar handle on, so don't hold that against me. Turns out they worked and I have not changed out the handle.
I went back and added three photos to describe the tools. Seeing pictures probably help but there is some things the photos don't show, I realize. Things like how to support the head while the drift is being drive in. You may have to use a chunk of wood or create a cradle to keep from distorting the cheeks that are pulled down. The main thing is to work it at a high heat so you wont have to strike it too much to get it to shape.
Thank you mr reah
Thanks for the explanation, Lin. Can't stop looking at the axe...
What's the difference between smoothing and grinding?
Christophe, Sometimes I forget that I am not just talking to my fellow country folk. <img src=' http://www.americanbladesmith.com/ipboard/public/style_emoticons//smile.gi f' class='bbc_emoticon' alt=':)' />
I am referring to grinding or any means to smooth up my rough forging. Actually since this head has some curved surfaces I used a side grinder with a flapper wheel on it to get around the hourglass curves on the out side of the eye. The picture where it is hot and smooth was my last single cycle just before I quenched the edge and poll. I will thermo cycle after the forging and then single cycle it just before the quench.
Incidentally, when you are quenching an axe, hatchet, or a hammer (anything with an eye, drifted or otherwise), you probably should not quench the whole piece. It should be a differential hardening, but the fact that you are hardening two opposite ends sort of complicates things. I held my hatchets blade edge just in the forge opening while at the same time used a torch to "paint" the color on the poll to arrive at heat on both ends, then I stuck the blade edge into the oil and swabbed the poll with a soaked rag. Yes, it flamed but it was mostly the rag.
The cross section of an axe would probably survive a water quench with the right steel, That way you can pour running water, as from a water hose, over the top face (in the case of a hammer poll) of the piece while dipping the bottom face (in the case of a hammer) or edge in the bucket. Running water flowing over the face of a hammer head is better because it hardens the face in the right depth and jackets the face with hardened steel leaving the eye area tough. So if I were to harden a cross peen hammer head, I would dip the cross peen part in the bucket and pour water over the hammer's face allowing the eye to stay red a little longer reducing the chance of it (eye walls) getting hard at all.
If I were to say make a double bit axe, I would go about things differently for the quench. I would do all of my thermo cycling and bring both cutting edges up to critical temp leaving the eye area black, then quench the whole head. I could have quenched my trapper's hatchet his way.
Quenching tools is a whole nother subject. We get familiar with knife blades and we assume that we know a lot about quenching. But I have found out that there is another level to the subject and messing around with other kinds and shapes of tools has helped me in my knife making.


