I'm slowly getting to where I can post a picture or two, bear with me.
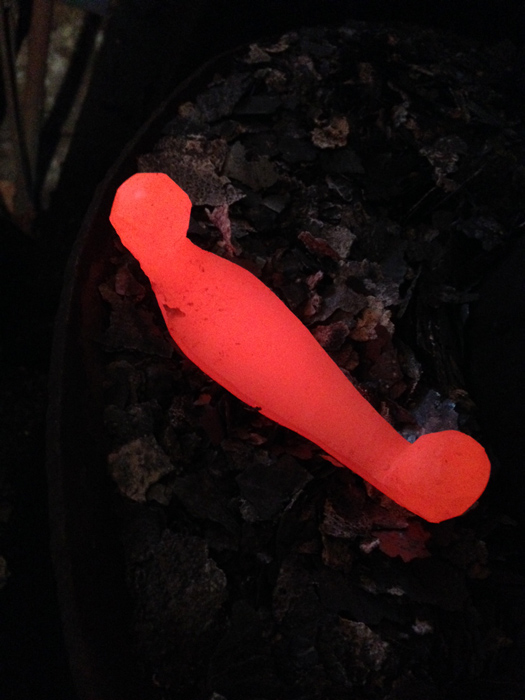
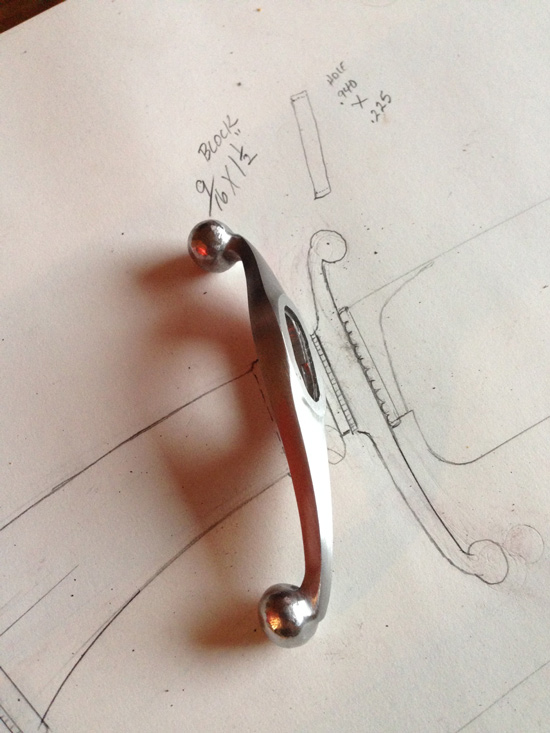
I'm working on a guard that I forged from 416 stainless. It was about 3/4 X 1 X 2-3/4 inch to start with. It needed to be 4-1/4 end to end finished. Its a ball guard so I got close and grind and file the rest of the way.
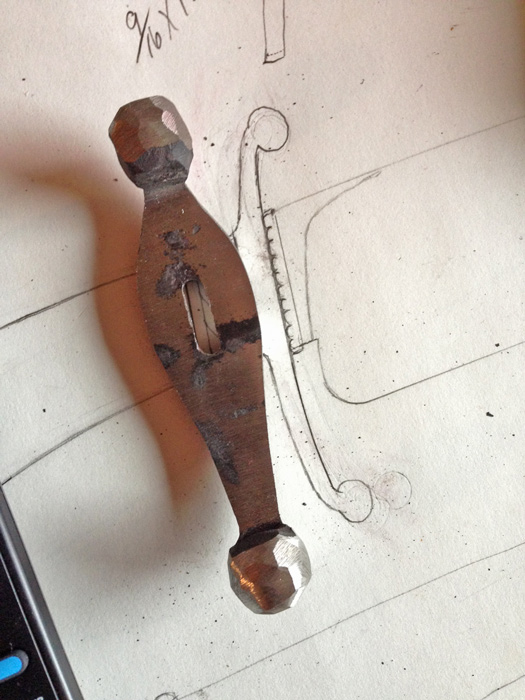
One of the first things to do is to start the slot to fit the tang and get it settled into place. Of course, you want to get the slot lined up with the top and bottom. I always make the slot tight and drift the guard to alignment by filing the slot up to size. At this point the guard is over sized and rough but I can tell by now the overall assessment is that it is pretty well lined up North and South when slid on and fit.
So, in the above pictures the guard is very rough with hours of filing and sanding to go but now I can further true up and drift to exact alignment during the filing/ shaping. I find this easier for me and less risky than completely shaping the guard and then trying to slot it afterwards. That certainly can be done. I've done it. But this way for me is better.
One thing That I'm especially watching for now is this. The ball ends are leaning forward. This means that that the hole/slot has to be settled into place tight and checked during the filing and shaping. You want the top ball to be centered with the spine and the bottom ball centered on the cutting edge. Check early and check often.
I'll have more pictures later.
Well done Lin! This is a great tutorial on forging a guard.
Dan Cassidy
Journeyman Smith
Send an email to Dan

Thanks Dan.
I forgot to mention that when forging 416 to forge it at a high heat and always subcritical anneal after every forging. Otherwise it will air harden and will be brittle and hard to cut. I had to tweak this guard three times so three anneals. Takes time.
Thanks Lin. I have a similar piece coming up with small half pennies. Definitely forge at high heat and anneal. Learned that from experience. Interesting that you have both balls pointing forward instead of the standard S shape. I like it, it will be a good one.
Brion
Brion Tomberlin
Anvil Top Custom Knives
ABS Mastersmith
Thanks, Lin. I enjoyed that. The ball tip guard is becoming a favorite of mine even though they are more work. I like how you are making it asymmetrical. You've a talent for coming up with the unique & different that I admire. You were able to forge pretty close with this. How small of a hammer do you finish with?
Maybe I've just been fortunate but I've not had a problem with the 416 hardening on me. With 420 & 440 I usually anneal but so far I've gotten by without it on the 416. I guess that Lady Luck favors the ignorant. <img src=' http://www.americanbladesmith.com/ipboard/public/style_emoticons//smile.gi f' class='bbc_emoticon' alt=':)' />
Gary
Actually Gary I have not tried 420 or 440. This is relatively new to me so I'm no expert on the stainless. I just try to be stubborn and do what I think might work. If it fails, I try something different. I'm glad to hear that you've forge it. Anything you can add about your experience will be greatly appreciated.
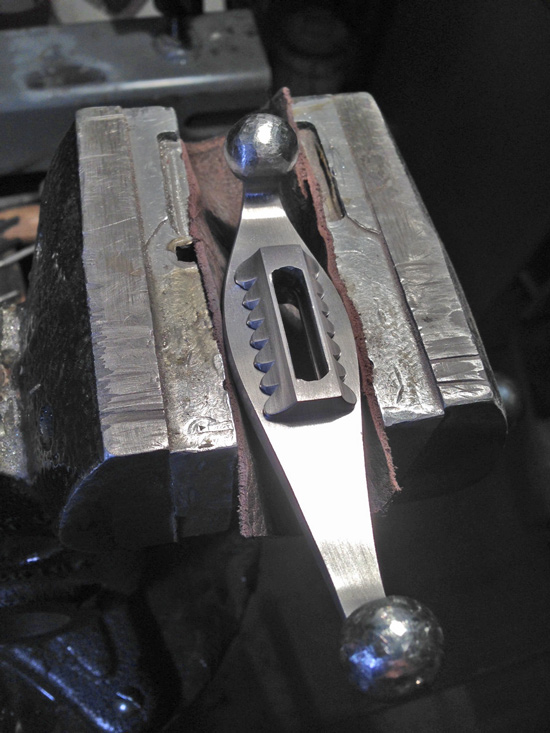
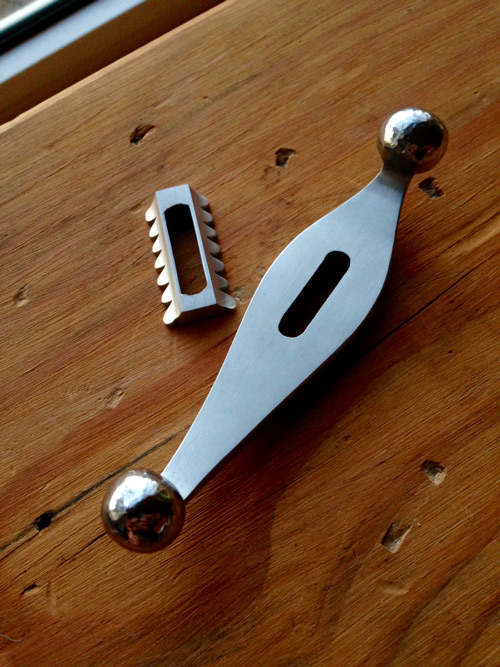
I have the guard close to being finished. I've been working on it 2 days and still am not quite there.
I have some more pictures that will give you an idea of the look.
I've not much of it but found that all three types of stainless will forge as long as you do it hot enough. Naturally any with high enough carbon are going to be more prone to air harden. That's why I prefer to use the 416. Recently I've been using more round rod than I have flat bar. For me it just seems to be easier & faster to forge to shape. Also you have the advantage of being able to turn it partially to shape on a lathe. For the last couple of guards I have turned the ball ends on the lathe before forging. It makes it a little harder to figure the initial length needed but saves having to forge the ball to shape. I've been trying to improve my forging skills but still have a little trouble with spherical especially when upsetting is required.
Gary
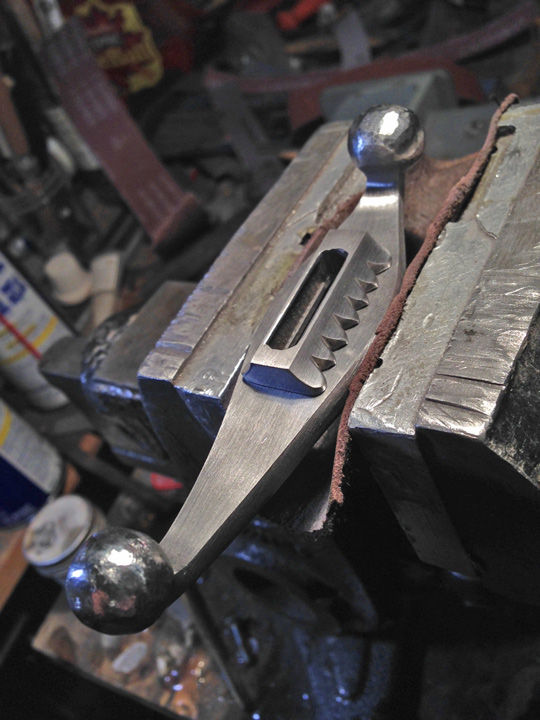
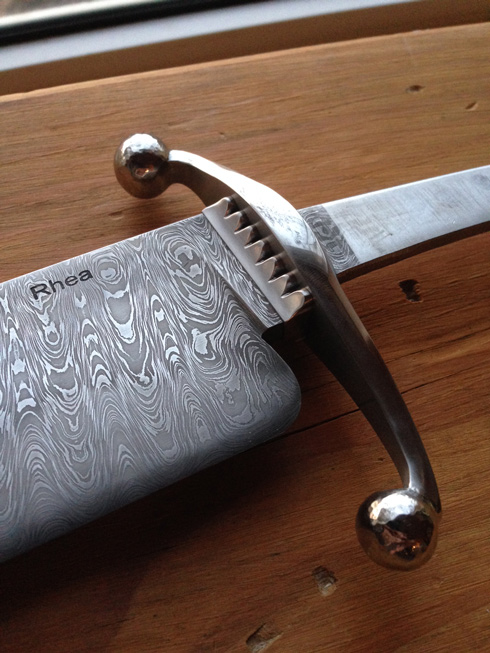
After working on this guard for two days solid, its not quite finished but it is close. Some tweaking of the finish and the ball texture and it will be done. I will also work some more on the spacer which is shown laying on the guard. There is a LOT of hand work in parts like this. Even if I had stock removed it from a big block of material I cant imagine not spending a huge amount of time in hand work. This should be to the point that you can see the steps between forging a piece and it being finished. I hope it's soon on a completed knife and is worth the effort. <img src=' http://www.americanbladesmith.com/ipboard/public/style_emoticons//smile.gi f' class='bbc_emoticon' alt=':)' />
Very nice, Lin. Thanks for sharing. I hope that it's on one that you have in Little Rock next month so I can see it up close.
Gary
This is great I really want to try it. Is there a thread showing the forging from the beginning?
that is as cool as it gets
Stuart, No I don't have any from the beginning of the forging. Honestly, when making these, I am really using all I know to put the materials in the right places in the forging process. I sometimes have to make a couple of attempts to get it done. This one I made the first time but had to heat it and tweak it a couple times after I thought it was forged. There is no shame in rough forging the piece and grinding on it then forging some more. I'm willing to do that on any complex piece. Also, this is where a blacksmithing course is helpful.
Think about it. This piece is all curves. Unless you have a computerized set up, its all by eye. You have to forge it with extra material to be removed in the grinding finishing process. It forces you to think in 3 dimension and think hard on the relationship between the different shapes and how they transition when coming together.
I got it done and on the blade late this afternoon. It looks so much like the drawing that I am very happy with it.
Lin,
I really appreciate the time and effort you put in for us on the forum and I greatly admire your hammer work. This is a fine example of serious smithing. I think Gary asked about the hammer size, and I would like to have some more detail on the annealing. I have found that certain types of non-ferrous material need constant annealing between heats, but that is nothing more than a quick cool in the slack tub once the piece cools to a black heat. Is it the same for the stainless?
Joshua States
www.dosgatosforge.com
https://www.youtube.com/channel/UCdJMFMqnbLYqv965xd64vYg
https://www.facebook.com/dos.gatos.71
Also on Instagram and Facebook as J.States Bladesmith
“So I'm lightin' out for the territory, ahead of the scared and the weak and the mean spirited, because Aunt Sally is fixin’ to adopt me and civilize me, and I can't stand it. I've been there before.â€
Well done Lin! That is going to definitely be a show piece.
Thanks for sharing!
Russell
Gary, I use a 2 lb hammer almost exclusively. I meant to mention that already.
Joshua, Non ferrous metals do indeed anneal by heating to red then quenching. But stainless is a steel and will harden if quenched when red. Might even break. To anneal is a loose term when I speak of the 416. I heat to red and let it slow cool. I will turn off the forge and sit the piece in there to cool with the forge. I have a door that can close to slow it down further. This will add considerable time to the making of a knife but will insure that you will be able to file and drill on the piece without trouble. It will also help prevent breaking some of these pieces when clamping it in the vise to file on it.

