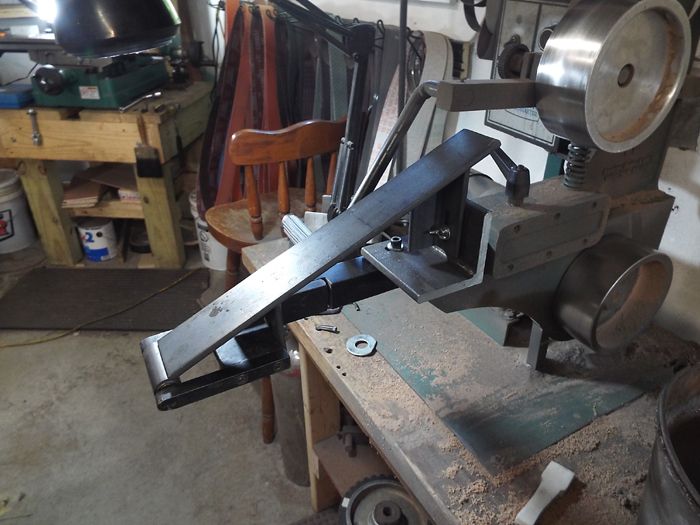
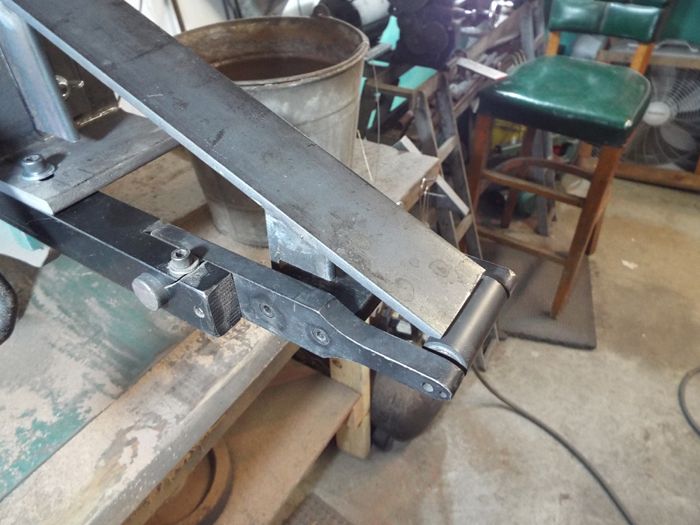
The Topic of the Month for February 2016, is integral blade grinding tips and techniques. The January 2016 Topic of the Month was about flat grinding. How about we have a look at grinding integral blades? This thread is to discuss your own technique and what knowledge you have to share that will help others. What kind of grinder do you use for integral blades? Do you use any special tools and/or jigs for grinding integrals?
Steve, I welded up an adjustable platen with round wheel for the bolster area about a year ago and have yet to use it!
I can use a 3/4, 7/8, or 1 inch small wheel for different size bolsters with the adjustable platen and keep the transition flat.
I just haven't had any time to put it to use!!
Karl B. Andersen
Journeyman Smith
I have a similar integral grinding attachment, that I built for my KMG grinder's small wheel attachment. I have used this attachment for grinding blades, but I do not have photos of using it.


There are more photos of this attachment and instructions for building it on my web site's Jigs & Fixtures page.
That attachment is great and I would love to have one. My issue is my grinder is an old Wilton Squarewheel. Without remodeling the whole machine I don't see a way to make the attachment work. Any ideas how to accurately grind an integral with my machine without a complete rebuild/remodel?
Chris
Freehand the bolsters on a small wheel.
Never gotten around to make a platen though I should.
A sharp file is my friend ... I grind these all most entiery on the flat platten and do all of the transitions with a File. I do have a rig set up for the small wheel but found I prefer the molded transitions I can get with files.
Whether grinding or using files as Matt does, do you guys affix some sort of guide/stop to the hand to keep your curves uniform?
Joshua States
www.dosgatosforge.com
https://www.youtube.com/channel/UCdJMFMqnbLYqv965xd64vYg
https://www.facebook.com/dos.gatos.71
Also on Instagram and Facebook as J.States Bladesmith
“So I'm lightin' out for the territory, ahead of the scared and the weak and the mean spirited, because Aunt Sally is fixin’ to adopt me and civilize me, and I can't stand it. I've been there before.â€
I use a guide for the back where it transitions to the tang and sometimes for the leading edge (but other wise just various shaped files free hand.
I made up a couple of special guides for the small ones I was making a few years ago. I drilled a hole in some O1 the size of the ricosso then drilled and tapped two holes on the edges, I hardened it and use this as a file guide for squaring off the tang.
MP
I don't know how I typed "hand" when I meant "tang"..... <img src=' http://www.americanbladesmith.com/ipboard/public/style_emoticons//angry.gi f' class='bbc_emoticon' alt=':angry:' />
Those rigs of Steve's and Karl's look pretty slick. Steve, what kind of belt is that in the pic?
Joshua States
www.dosgatosforge.com
https://www.youtube.com/channel/UCdJMFMqnbLYqv965xd64vYg
https://www.facebook.com/dos.gatos.71
Also on Instagram and Facebook as J.States Bladesmith
“So I'm lightin' out for the territory, ahead of the scared and the weak and the mean spirited, because Aunt Sally is fixin’ to adopt me and civilize me, and I can't stand it. I've been there before.â€
The belt looks like my Klingspore j weights
I can do a step by step if anybody wants but not right now. I have been sick for a couple of days and need to get back to my JS knives first.
Steve, what kind of belt is that in the pic?
That's a Klingspore LS-312, J-flex belt.
I've only used this fixture to make four knives. That was several years ago.
The only guide that I have used is of the two handed, don't screw it up type. <img src=' http://www.americanbladesmith.com/ipboard/public/style_emoticons//laugh.gi f' class='bbc_emoticon' alt=':lol:' />
Erik, I would like to see a step by step. Visual aids help me get the process described and finds ways to make it work with my setup.
Chris
Grind the sides of the bolster to your desired thickness.
Keep the side of the blade in the same plane as the top wheel so you get an even step along the height of the blade.
Check top and bottom of the bolster for the same step at the edge and the spine.
This will give you an upsidedown eggshape in the finished handle later.


