Hey guys,
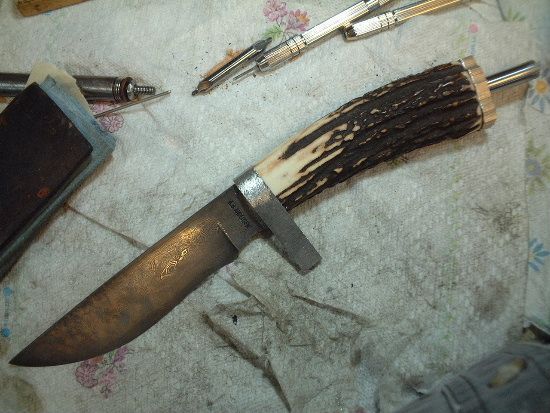
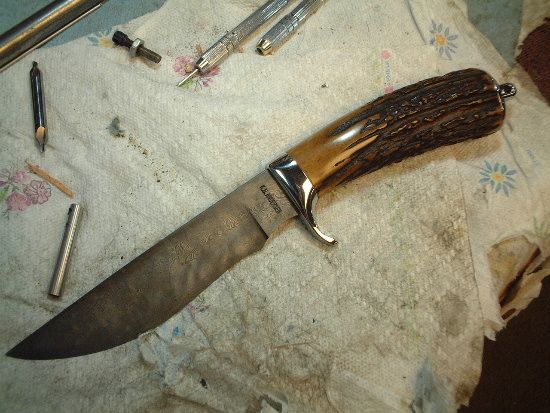
So, I recently acquired my first 2x72 grinder- a 1 horse grizzly. It's the best I can afford for now, and for the most part it will do the job. But because of the limitations of the design, I can't get into the tight corners to get the nice transition from handle to guard I would like. So my question is: Is there a way to get a smooth radius at the front of the handle without the use of a small wheel attachment?
Thank you all so much for the feedback.
-E
Evan L. Cihak
You can do it on a Grizzly with a some practice. The secret is to use the most flexible belt possible and to do it with a slack belt (above the platen) using the edge of the belt. The hardest part is to be able to blend the softer handle material with the harder steel of the guard without taking off more of the handle material and get a smooth transition. It takes some practice.
Gary
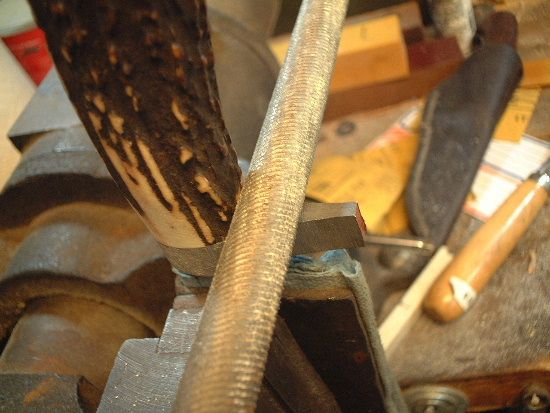
Some good suggestions already, but I'll echo Karl's. I got some good round files in different sizes and you'd be surprised how quickly you can make progress. For me, I can make mistakes a little too fast on my belt grinder....
Jeremy
Jeremy Lindley, Apprentice Smith
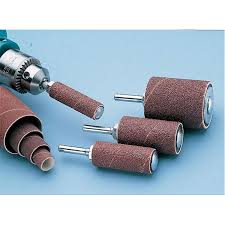
Evan, good files are your friend. May take longer but as Karl says, less chance for a screw up. I use round and half round files and small sanding drums for a dremel or in my case a foredom.
Brion
Brion Tomberlin
Anvil Top Custom Knives
ABS Mastersmith
I still use all of the above and I use my small wheel attachment. Every suggestion above is an arrow you need to have in your quiver of techniques. Oh yeah, add a piece of sandpaper wrapped around a plain round rod (get a variety of sized rods). Really easy to change grits and do the final clean up and finish. You can also use the slack belt technique with your finger behind the belt, but only if you can run your grinder at a very slow speed.
Joshua States
www.dosgatosforge.com
https://www.youtube.com/channel/UCdJMFMqnbLYqv965xd64vYg
https://www.facebook.com/dos.gatos.71
Also on Instagram and Facebook as J.States Bladesmith
“So I'm lightin' out for the territory, ahead of the scared and the weak and the mean spirited, because Aunt Sally is fixin’ to adopt me and civilize me, and I can't stand it. I've been there before.â€
Evan,
I file mine also for the same reasons already stated. I use crossing files one course and one smooth. You can purchase them from many jewelry supply businesses. They are not cheap, but the radius is different on both sides of the file. They also taper to a point, which allows you to get into tight corners. Jewelers use them on rings and other radiused pieces. Once filed I clean up with sandpaper using whatever sanding stick fits the bill. I do use the slack belt to smooth out things sometimes. I also use small wheels to rough shape things, but less mistakes by hand.
Nick Wheeler has some great videos on youtube that show how to file the guards with the crossing files.
Good Luck!
Bob
I rarely use the small wheel attachment for anything especially the transition area you speak of Evan. For one thing, I don't want that area round. True round belongs on very few places on a knife. Pins being round in cross section is one, but most other things on a knife are blend of curves, including the transition area where your finger rests against the guard. It looks better to me to have this be a "gaining curve". I'm not sure if that is the right description, but it is not really round.
I use the edge of my rotary platen, files, and sand paper.
Thank you all so much, awesome information as usual! One question though, what kind and grits of sandpaper are you using? Thanks again!
Evan L. Cihak
Evan, thanks for beginning this topic, I learned a lot and had the same question in mind from time to time.
Thanks to all for the help.
|quoted:
Thank you all so much, awesome information as usual! One question though, what kind and grits of sandpaper are you using? Thanks again!
My answer for that one is "it depends" <img src=' http://www.americanbladesmith.com/ipboard/public/style_emoticons//smile.gi f' class='bbc_emoticon' alt=':)' />. I use different rasps to rough it all in then move to files. The files take out the deeper rasp marks, then I go to the paper to take out the file marks and just move up in grit to whatever finish I want for the particular knife.
A side note:
It's very important to use something solid to back your sandpaper when sanding the handle/guard transition by hand. It's REALLY frustrating to be so far along in the process only to realize you've been sanding away the softer handle material at a faster rate than the harder guard....and not have enough material to get it back under control and bring things even and true...ask me how I know this? <img src=' http://www.americanbladesmith.com/ipboard/public/style_emoticons//wink.gi f' class='bbc_emoticon' alt=';)' />
Oh-I've gone to using the Indasa Rhynowet brand paper and really like it.
Jeremy
Jeremy Lindley, Apprentice Smith
|quoted:
Evan, thanks for beginning this topic, I learned a lot and had the same question in mind from time to time.
Thanks to all for the help.
Dean,
You're very Welcome! Like all the other tools in the shop, I try to be useful... and I second that Thanks to all for the great information.
-E
Evan L. Cihak
|quoted:
Thank you all so much, awesome information as usual! One question though, what kind and grits of sandpaper are you using? Thanks again!
It depends on the material being sanded and what the end goal is. I very rarely use coarser grit than 150 Aluminum oxide on anything (except rough grinding the blade where I go as coarse as 60 grit).
Generally speaking, Ceramic belts for blades (60, 120, 220), Aluminum oxide belts/paper for blades (disc sander), handles, & fittings (Aluminum Oxide for 60-220 grits, silicon carbide paper for 320 or finer, I use up to 2000 grit depending on the finish desired). I now use a 220 grit paper by Mirka, out of Finland. I use more 220 than anything else it seems, and this paper seems to cut longer and more consistently than other brands.
For most blades, I will hand finish to 400 grit (or 30 micron). For most handle materials and fittings, 320 or 400 (finer grit for harder materials) seems adequate before buffing with a 4-stage buff (white, red, green, pink). For file work, 400 grit to prep the surfaces for filing, up to 600 to finish the file work before buffing. Pins get hand finished to 600 grit before buffing.
That's just my method in a nutshell (exceptions and exclusions may apply!). I'm sure everyone has a preferred system of choosing type and grit of abrasive for different materials.
Joshua States
www.dosgatosforge.com
https://www.youtube.com/channel/UCdJMFMqnbLYqv965xd64vYg
https://www.facebook.com/dos.gatos.71
Also on Instagram and Facebook as J.States Bladesmith
“So I'm lightin' out for the territory, ahead of the scared and the weak and the mean spirited, because Aunt Sally is fixin’ to adopt me and civilize me, and I can't stand it. I've been there before.â€
For tight curves I use the slack section underneath, between the drive wheel and bottom platent idler wheel. I use a worn J-flex belt. If you hold the guard a way from you hook it on the belt and pull down a little and toward you the belt will roll or fold into the curved area. Even very tight areas. Best done with a light touch and if possible turn down the drive speed. No matter who's advise you follow here you are going to screw something up until you practice a while! the files have way less learning curve since you control the speed and pressure. Belts are faster but will get you in trouble faster as well. Good luck!
Steve Watkins
www.ironmanknives.com


