The Topic of the Month for January 2016, is flat grinding tips and techniques. As most forged blades are flat ground, the skill of accomplishing this grind type is critical to bladesmiths. This thread is to discuss your own technique and what knowledge you have to share that will help others. Do you use a work rest, or grind free-hand? Do you use a jig to cut in the plunge lines?
Wishing you a Happy New Year!!
|quoted:
The Topic of the Month for January 2016, is flat grinding tips and techniques. As most forged blades are flat ground, the skill of accomplishing this grind type is critical to bladesmiths. This thread is to discuss your own technique and what knowledge you have to share that will help others. Do you use a work rest, or grind free-hand? Do you use a jig to cut in the plunge lines?
Wishing you a Happy New Year!!
I mark the plunge cut with duct tape and rough grind with a 10-20 wheel depending on the width from edge to spine, after that I switch to a platen with a 120 grit ceramic belt and true the grind up. All grinding is done free hand as it is a time saver for me. I move from the 120 to a 400 grit belt and from there it is hand sanding to the desired finish (I enjoy hand sanding.
I use my flat platen and no jig or work rest. I tried using a file guide to get even plunges as some makers suggested, but I always seemed to have a lot of trouble busting through the spine. With the file guide on, I just seemed to have too much difficulty seeing where I was at and it just didn't end up working for me. When starting the blade grinding, I work on a 60 grit belt and grind the edge towards the pre heat treat thickness that I want on both sides. I stop the grind short of where I want the plunges to be. I also tend to use a giant red sharpie marker to color the blade, particularly if I'm having any issues. It makes it very easy to see where I'm taking metal off.
I then start "walking the grind up" the blade towards the spine. Grinding in the edge thickness to start with helps me see how far I have to go as I grind and I don't tend to over shoot on one side and end up with things all wonky (technical term, there). As the grind for one side gets more complete, I begin moving back towards the plunge and establish it more. I try to go slow and take small bites so I get the angle of the plunge symmetrical on both sides, even depth of plunge on both sides, and not grinding up through the spine. I don't generally worry about having it perfect, because I leave the plunges just a bit forward of final position before heat treat. I suppose I could just make it sort of close and not pay too much attention since I'll be moving them back later, but I think the practice helps me in that final stretch of grinding. Plus, I think it's easier to get them where I want them when I already have a really good foundation ground in.
I grind to 120 before heat treat and go back to that grit after. Then I work up to 400 and hand sand from there. I have some pictures of some bird and trout knives during this process. I'll try and get them posted on this to help with the explanation.
Here's what I meant by grinding in the edge. I just tip the blade edge into the belt so I get the edge down to the thickness I'm wanting.
Then I start moving that grind up from the blade edge. I don't try to take it all at once and I tend to move a bit slowly...its just a hobby for me and I have found I can make BIG errors really fast on a grinder... And by the way, this is only how I do it-I have no illusions that this is somehow THE way to do it. I'm very curious to see how others differ in their approach so I can steal their better methods <img src=' http://www.americanbladesmith.com/ipboard/public/style_emoticons//smile.gi f' class='bbc_emoticon' alt=':)' />.
And up....
And up....
Once I've got the grinding done and ready for hand sanding, the last thing I do is put a convex on the edge, using the slack portion of my belt (thank you John Doyle for putting me into this).
Then it's off to hand sanding to whatever finish I'm looking for. Hope some of this might be helpful to someone.
Jeremy
Jeremy Lindley, Apprentice Smith
I have a little time here on New Year's Eve to share.
So - I will say that I am lucky that I got to see this filmed demo by MS Tim Hancock while it was on You Tube before SOMEONE? pulled it off.
It really changed the way I grind knives in my shop.
I've been around just long enough to have spent nearly 15 years free-hand grinding. And I am mostly done with that.
Let me say for a moment that in many of our shops we use all sorts of tools and equipment from our grinders, lathes, mills, surface grinders, disc sanders, etc., etc.
And then someone pipes up and suggests that if we don't free-hand grind we can't call our knives "hand made" or some such jibberish. Like even though we use all of those other advantages we're just a little less as a maker if we use a rest.
I find that absurd.
In Tim's demo, he had a fantastic series of grinding steps that since I have adopted them, my grinding has become very stress free and $$ saving.
Belt grits in the lower sizes like 36 and 60 are designed to break off and fracture, thus exposing a continuous supply of new, sharp grit.
Well, those grits fracture very poorly without PRESSURE and the pressure is minimized when the entire width of the blade is pressed against the platen. (Doing ALL of the stock removal on the flat platen is ridiculously inefficient.)
To make better use of the grit, Tim showed how he removed the first, oh, say 70% of the excess material with a round wheel. I use an 8". This fractures the grit much better and saves $$.
I have found that belts that would otherwise be thrown away can be used for this step quite effectively. ![]()
So, after scribing center edge lines on the blade, using a tool rest and an 8" wheel, I remove most of the blade material by grinding into the center line first, and then gradually making a series of hollow grinds up the blade.
You don't even have to do a really precise job!
Set the tool rest below the center line of the wheel so as to avoid digging into the spine. (That eliminates a bunch of 'pucker factor')
Then I switch to the flat platen - again with a tool rest.
Now what I am doing is mostly just knocking down the high spots between the hollow grinds.
Bam! It takes no time at all on the flat platen. (Hint - I always clamp on a set of parallel clamps to the tang for added leverage and control.)
When using a rest, it's really easy to slowly push the blade in to even up the plunge cuts, too.
Tim made a point during his demo - he simply asked the group, "Don't you owe your customers the best knife you can possibly make?"
My answer to that was, "Yes."
With this method I am much more efficient. I save a LOT of money in belts. My grinding has improved so much I almost feel guilty.
I then take the knife to my reversible disc sander an go right into the fillet of the grind.
I used to really dislike the job of grinding out a big Bowie. Those days are over.
Karl B. Andersen
Journeyman Smith
I won't go into the specifics of what i do because it will be like many others but a few specifics that have helped over the years.
1. Use sharp belts. If the belt starts to slide you will get facets. Make friends with someone who hollow grinds and give them your belts, you won't feel as guilty about getting rid of them.
2. Try and grind as close to finished size as possible with a coarse belt (50 for me) If i try and "finish" grinding with a finer belt things go wrong. i just want to remove scratches not change things.
3. 36 and 40 grit belts are of little use to me. I shear more grain off than I use. i know some guys who have great success with them.
4. Get a disk! I now stop at a 100 grit belt and use a 9 inch disk after that. I had a bevel disk for about 5 minutes and then chucked it in the lathe and flattened it. It really gets things flat and the change in scratch pattern really can show low spots.
5. I use a sanding stick that is 14 inches long one inch square and solid aluminium. I use spray adhesive and wrap a full sheet of paper around it. I can then use my shoulders and chest to sand not my arms and wrist. It's less tiring and my neck doesn't get so stiff.
(spinal fusion so I have to find more efficient ways to do things or i am pretty beat up by the end of the day)
6. Don't hand sand hollows out. Go back to the machine and get better at it. Not trying to be a smart aleck. The machine is faster, that's why we use them.
Karl-
A friend helped me make a work rest a little while back for my grinder. I'm definitely going to have to try it out. When I was getting some help early on, a friend had a very small rest on his Bader. He tought me to rest my index finger (the one not holding the tang) on the rest and the spine on that finger. Is that how you do it, or do you put the spine on the rest itself? I have an 8" wheel that mostly only sees use for helping profile. I may have to try that, too. Is it like removing material on a full tang when trying to taper it? Hollow out a big majority so tapering it on the flat platen is easier?
I'm definitely not one that thinks free handing vs a jig or some other aid in making the knife means it's somehow "lesser". If I can end up with a better end product (and especially less stress during grinding....) I'm all for it <img src=' http://www.americanbladesmith.com/ipboard/public/style_emoticons//smile.gi f' class='bbc_emoticon' alt=':)' />. Thanks for your insights.
Jeremy
Jeremy Lindley, Apprentice Smith
I grind in much the same way as Jeremy. I am using a Wilton Square Wheel grinder that is not very forgiving. It's single speed and blazing fast. Getting the feel for where the material is being removed from was difficult. Lin told me to watch the sparks the see where the belt is working. I can see that much better on his machine than mine.
So, with my antique machine and poor lighting I have had to learn to use a delicate touch and "sneak up on" where my grind starts and stops.
Chris
Those are some very good tips, Shawn. And it's nice to hear from you, by the way.
Jeremy - you do have the right idea regarding the hollow grind - at least in direction. However, I don't do one big hollow but, rather, 5-6 smaller hollows, sort of like creating series of rows.
Keep in mind you need to remove less and less as you go toward the spine. One large hollow might get you in trouble when it comes time to flatten.
And I set my spine directly on the tool rest, and the tool rest for the hollow grinding procedure is a rather short one.
Karl B. Andersen
Journeyman Smith
Hi Jeremy, I was asked to give a class on flat grinding for the IKA in August. I had purchased Tim Hancock's DVD, Blade Grinding from ABS Store. I watched it many times, took notes, made the tools he used. I practiced for weeks and cut out 6 blades ready to grind set up with scribe lines, made up picture board to show process. Class was a success, wife also made egg rolls, what a hit!
This style of grinding has greatly advanced my grinding skills.
I was not aware that video was for sale - which explains why it was pulled from you Tube.
For 25 bucks everyone should have it.
It completely changed how I grind a knife.
Karl B. Andersen
Journeyman Smith
Jerry,
Your workshop sounds great.
Got any pix of your picture boards showing the process you could throw up here?
Hey, Jerry-too bad I missed those egg rolls <img src=' http://www.americanbladesmith.com/ipboard/public/style_emoticons//smile.gi f' class='bbc_emoticon' alt=':)' />. And Jerry's the really nice guy that helped make me that tool rest.
And thanks, Karl for the answers. The series of hollows makes good sense. And not going too deep would certainly be a worry starting out.
Jeremy
Jeremy Lindley, Apprentice Smith
I'm with Karl and Shawn on this (with minor additions).
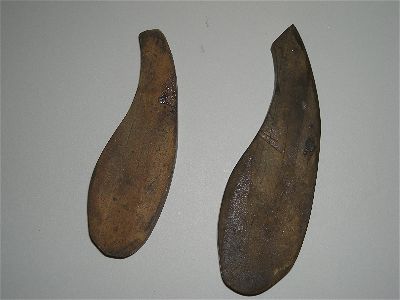
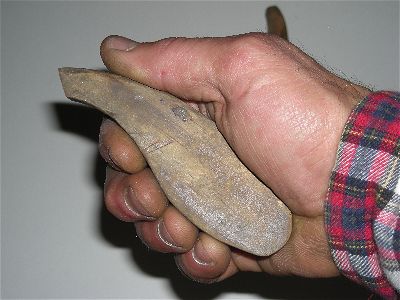
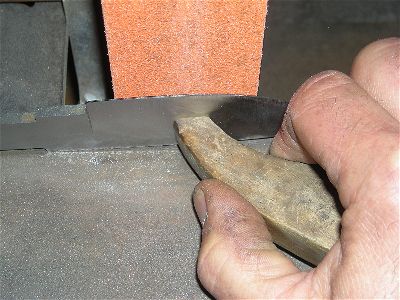
Karl for using the Tim Hancock method. If you want to learn flat grinding, and can buy Hancock's video for $25, do it. Ten years ago I took a private lesson in flat grinding from Tim and it was the best $400 I ever spent. So, if you can get it for $25, you'd be a fool not to. One of the things Tim stresses is the use of a push stick to apply the pressure needed. I made a couple of push sticks from 1/2 inch pine.
They have an ergonomic handle design.
And can apply pressure in a specific area (this helps with avoiding that running through the spine problem mentioned earlier and can assist with getting the grind evenly spaced from the spine along the blade length)
Another thing to remember to help getting the flat grind even across the width of the blade is that you have two hands and each of them performs a different function. One hand grabs the tang and only pulls the blade across the platen. It does not apply any pressure to the blade against the platen, that is the function of the hand with the push stick. The first hand holds the blade spine down on the rest and pulls the blade along. Nothing else.
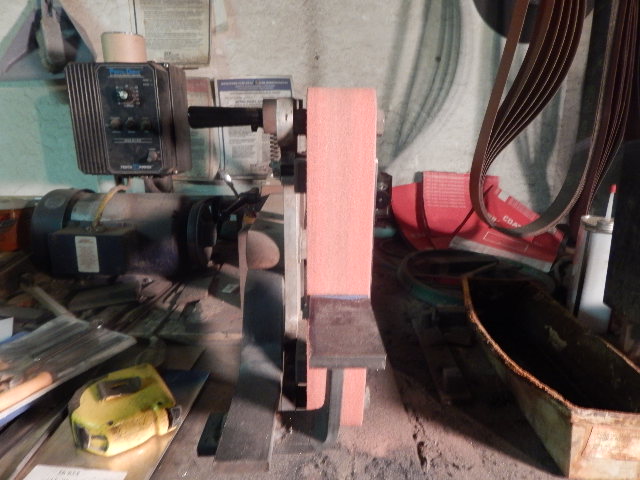
Also in the Hancock method is something that Shawn mentioned,the flat disc sander. (it needs to be variable speed and reversible) I too have no need of any belt coarser than 60 grit. I rough grind on the platen to 120 and move to 120 on the disc. The platen does not get you a truly flat grind. It has bumps and valleys. The disc grinds it truly flat. Unless you have one of those beveled discs Shawn mentioned. Those produce a very shallow hollow grind. After straightening the blade on the disc, it's off to heat treatment. I set my plunge cuts using a Riverside Machine Works jig on the flat platen. If you tried this and found it difficult to do, it might be because you haven't made a modified work rest.
The rest is slightly narrower than the platen which allows you to keep the spine flat on the table, push the jig against the side of the platen, and apply pressure with the push stick to the blade. Once again, the two hands have different functions. Finish grinding is much the same as rough grinding. Platen grind to 220 grit and disc grind to 320 or 400 grit. Using the disc to flatten out the grind makes for a lot less hand sanding. I have several hand sanding tools, but I will save them for another post.
Joshua States
www.dosgatosforge.com
https://www.youtube.com/channel/UCdJMFMqnbLYqv965xd64vYg
https://www.facebook.com/dos.gatos.71
Also on Instagram and Facebook as J.States Bladesmith
“So I'm lightin' out for the territory, ahead of the scared and the weak and the mean spirited, because Aunt Sally is fixin’ to adopt me and civilize me, and I can't stand it. I've been there before.â€
I am really digging this method and actually just purchased the dvd. It truly is worth every penny and so much more. Quick question what wheel do you like to use? Serrated, durometer preference, and a good place to buy? I don't have many attachments for my grinder and working my way up to getting a wheel now and some attachments. Evan
Evan,
A serrated wheel cuts much faster than a smooth one. For rough grinding stages, I use a 8" serrated wheel to chamfer the edge, set the plunge lines, and walk the grind up the spine. (mind you this is only doing stock removal, blades with ample forged bevels go straight to the flat platen). For finish grinding on hollow grinds, I use a 10 inch smooth wheel.
My grinder is the KMG by Beaumont Metal Works and their contact wheels are in the 70-80 durometer range.
Do you have a welder, forge and anvil? I made most of the attachments and tooling rests for my grinder from mild steel stock. Saves a ton of $ and provides good practice.
Joshua States
www.dosgatosforge.com
https://www.youtube.com/channel/UCdJMFMqnbLYqv965xd64vYg
https://www.facebook.com/dos.gatos.71
Also on Instagram and Facebook as J.States Bladesmith
“So I'm lightin' out for the territory, ahead of the scared and the weak and the mean spirited, because Aunt Sally is fixin’ to adopt me and civilize me, and I can't stand it. I've been there before.â€


