|quoted:
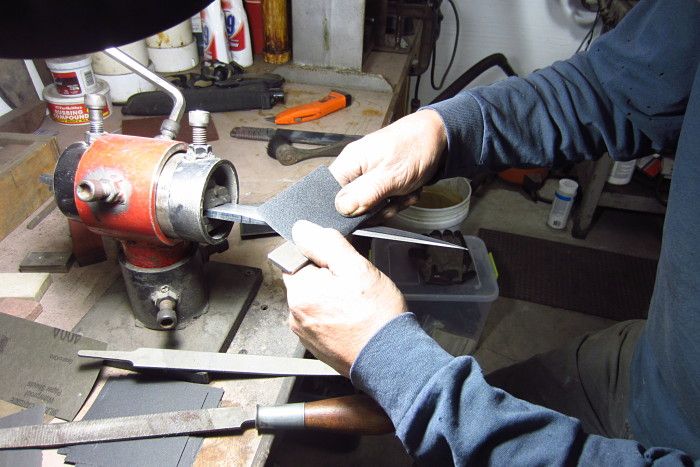
Here is a little visual assistance on my process.
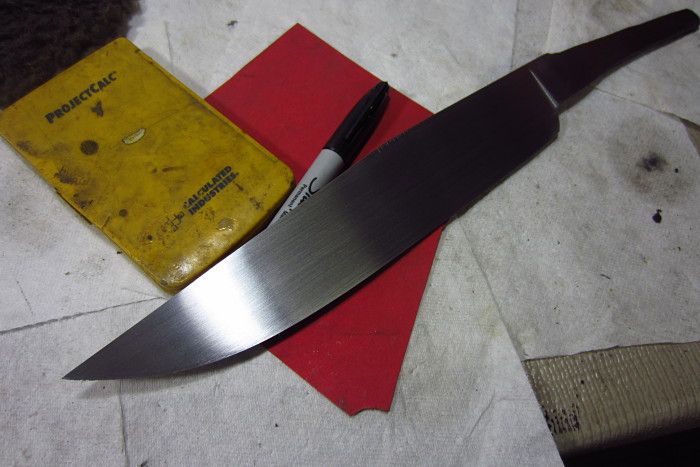
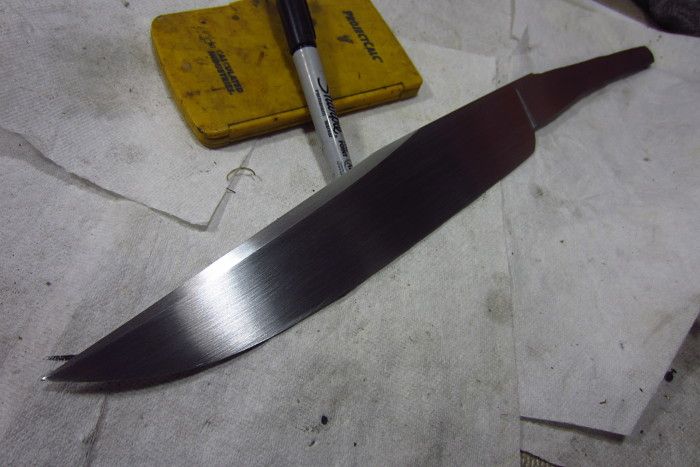
The ground blade:
I have used a French curve to determine where I want my false edge on the clipped blade:
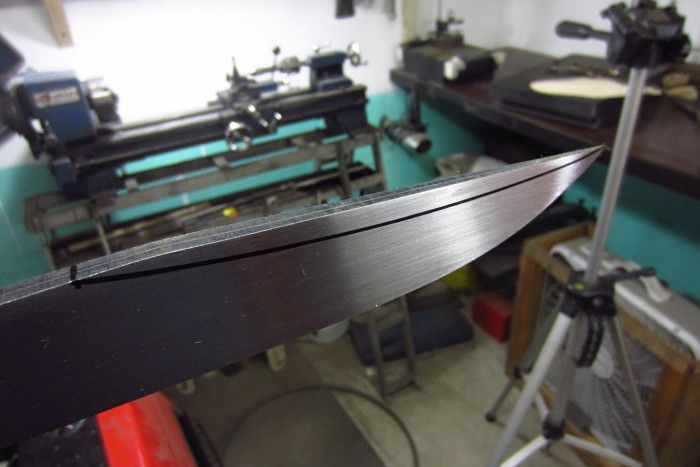
In the above photo, you can also see how I have 60 grit grind lines running crossways against the blade. Colored with lay out dye, and then center scribed.
Even though the blade has distal taper, I have used a height gauge on my surface plate to create a center line.
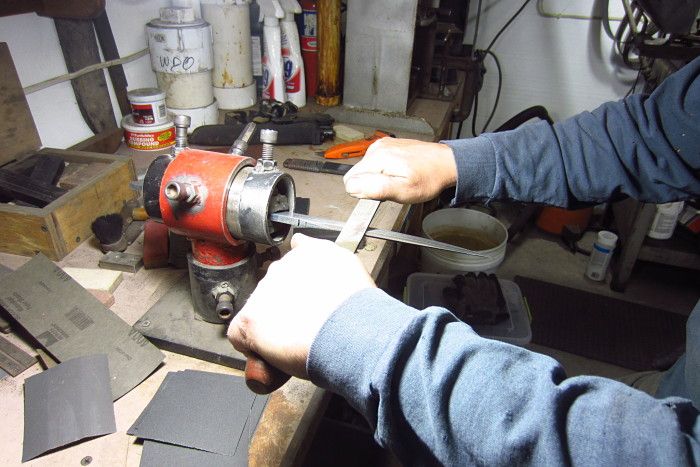
I have then locked the blade in my knife vise and turned the blade so that my false edge plane is parallel to the floor to generate more ease in draw filing.
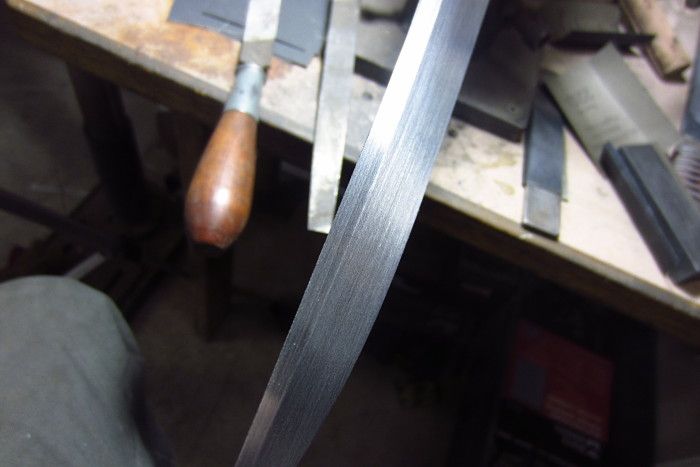
Here is the rough filed blade:
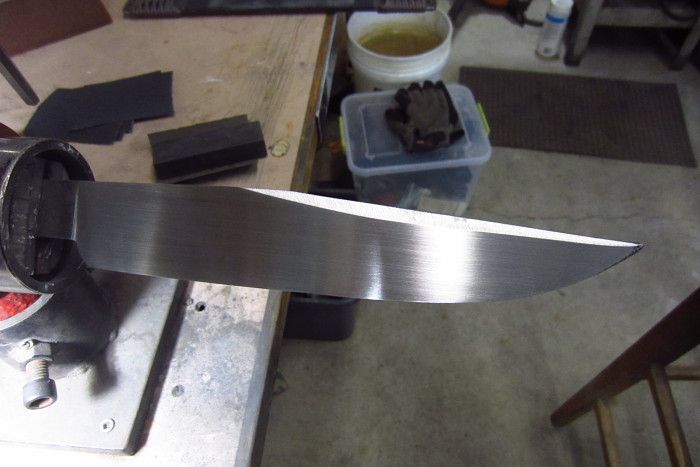
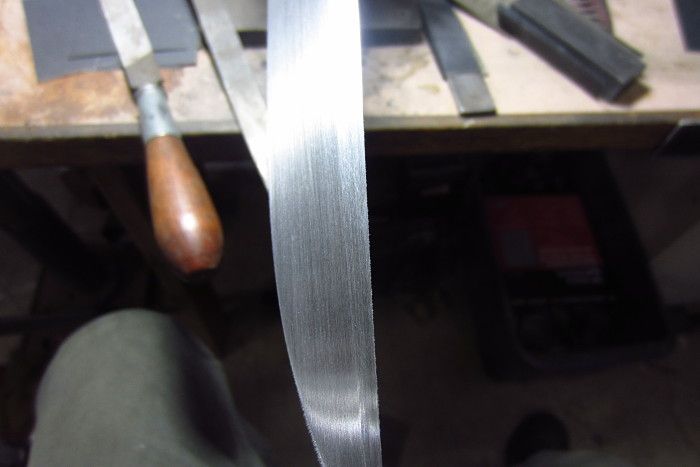
Then clean up with 220 and a hard steel back:
awesome Karl - thank you very much ! appreciate the photos.......do you leave your sanding at 220 for heat
treat ?
[font="Comic Sans MS"]'Never Quit On Improving'[/font]
|quoted:
Rob,
Looks like you have a good start on that blade!
I use my clip grinding attachment to shape all of my clips. This attachment works great for grinding the bevels on dog bone handles, as well as a variety of other uses.
Since I am able to use abrasive belts to grind the clip, I do the clip after heat treatment. Before I built this attachment, I used the same process as Brion and Karl, shaping the clip with grinding wheel and files before heat treatment.
Below is a photo of the attachment in use. You can find more photos and directions for building it on my web site. Clip Grinding Attachment
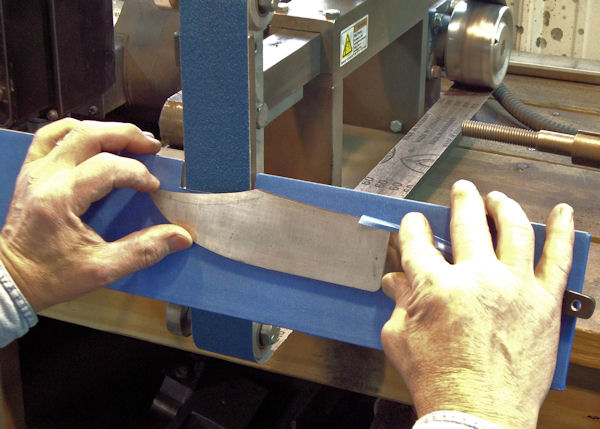
I would make some modifications to the attachment's construction, before I build another. The attachment as shown on my web site, has a limited range of adjustment. It works fine for nearly all clip grinding. But as I have found other uses for it, I would like for it to be able to adjust from 0 degrees to 90 degrees. So if you decide to build one, you might want to think about changing the method of adjustment.
thank you Steve , glad you posted this , I was actually browsing your jigs n things last night for a while......I like it !!
[font="Comic Sans MS"]'Never Quit On Improving'[/font]
Karl-
Dumb question... When using the French curve, how do you get both sides to match perfectly? I see the transition line going over the spine, but wondering how you end up with line not dipping too low? Thanks for adding your photos to this.
Jeremy
Jeremy Lindley, Apprentice Smith
Jeremy, I just mark on the french curve with a pencil. You get one side the way you want it and mark the start and end points of the clip on the curve. Then you can flip it over and match the end point marks with your point and the reference line on the spine. Should be the same on both sides.
Brion
Brion Tomberlin
Anvil Top Custom Knives
ABS Mastersmith
Yes.
|quoted:
awesome Karl - thank you very much ! appreciate the photos.......do you leave your sanding at 220 for heat
treat ?
Karl B. Andersen
Journeyman Smith
Just make a little scratch on the french curve itself and place it in the same location on the opposite side.
|quoted:
Karl-
Dumb question... When using the French curve, how do you get both sides to match perfectly? I see the transition line going over the spine, but wondering how you end up with line not dipping too low? Thanks for adding your photos to this.
Jeremy
Karl B. Andersen
Journeyman Smith
Thanks, Karl. Often the simple solutions that work the best, I suppose <img src=' http://www.americanbladesmith.com/ipboard/public/style_emoticons//smile.gi f' class='bbc_emoticon' alt=':)' />.
Jeremy
Jeremy Lindley, Apprentice Smith
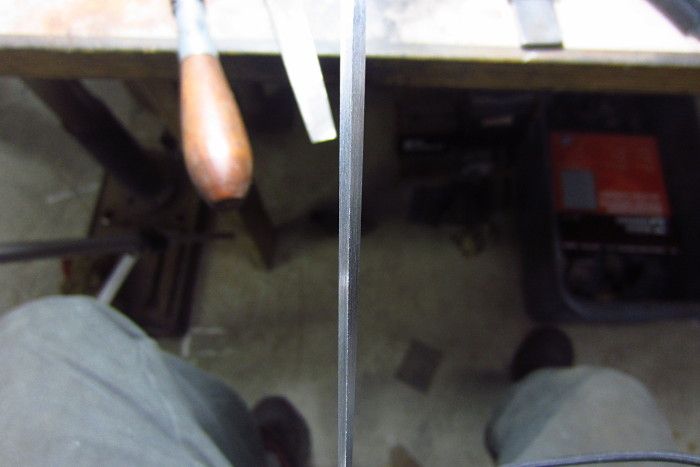
thanks Brion Steve and Karl, I went ahead last night on the false edge and am really quite happy with it , hard to tell in the picture but it is very symetrical , quite pleased. The length of the clip made it interesting but slow and steady with a combination of all suggestions offered really assisted me in this, note the french curve !! Karl I used knife holder false edge parallel to the floor which is a simple but really good idea........thanks to you all but I do have a question......where my false edge comes together there is a flat spot the length of the clip about 1/16'' or so wide but very even the length of the clip....should I roll this over while taking to a finer grit or just leave it ? or hand file some more and bring the 2 together, hope this makes sense, tried to take a picture but the poor light didnt show very well, anyways here is a glimpse of the false edge........thanks again fellas and as always your input is very welcome........
[font="Comic Sans MS"]'Never Quit On Improving'[/font]
|quoted:
I found myself extremely interested in the design for your knife vise there. What did you use to whip that all up?
(So much nicer than the piece of square tube you clamp to a bench and turn a thumb screw on that I'm familiar with...)
Michael, I did a tutorial on my build of a vise of this type on another forum a few years ago here's a link. Unfortunately it appears you cannot see the pictures without joining and signing in, but the other forum is family friendly too <img src=' http://www.americanbladesmith.com/ipboard/public/style_emoticons//smile.gi f' class='bbc_emoticon' alt=':)' />
Mike
I literally found most of that pipe sticking out of the ground.
It is pretty irrelevant what sizes you use as long as one fits in the other. Couple bolts and nuts.
Just what you see in the picture.
2 bars of steel inside with leather glued to them.
|quoted:
I found myself extremely interested in the design for your knife vise there. What did you use to whip that all up?
(So much nicer than the piece of square tube you clamp to a bench and turn a thumb screw on that I'm familiar with...)
Karl B. Andersen
Journeyman Smith
Is there a down side to doing the clip before the bevels, I havent done many with clips but the ones I have done worked out ok . And How do you guy's do your clips on upswept blades where the clip is curved man those are hard.
Thanks Anthony
|quoted:
Is there a down side to doing the clip before the bevels, I havent done many with clips but the ones I have done worked out ok . And How do you guy's do your clips on upswept blades where the clip is curved man those are hard.
Thanks Anthony
I agree-I have a harder time with curved false edges than straight ones, too. My file rides along the straight one fine, but depending on the curve, only the very edges of the file are making contact on a swept one. Do you guys use a much narrower file for curves like that?
Jeremy
Jeremy Lindley, Apprentice Smith
I'm going to try and upload a couple of pics of the tools I use for this. They are not as slick as Steve's bevel work rest, but they get the job done and were pretty easy to make. I (like Steve) have the KMG grinder. The first pic is a curved platen I made by cutting a slice out of an ole water heater and welding it to a flat platen. The 14 inch radius of the water heater gives a nice subtle roll when grinding a clip with a big curve. The second photo is a bevel that I clamp to the work rest to grind the clip. I also mark the curve out and strike the center line like Karl and Brion demonstrated, and I lay the blade on the bevel rest like Steve shows on his bevel jig. I made a few of these at different degrees of incline. I think the one pictured is 30 degrees off of vertical.I also think I uploaded them in reverse order.....
Joshua States
www.dosgatosforge.com
https://www.youtube.com/channel/UCdJMFMqnbLYqv965xd64vYg
https://www.facebook.com/dos.gatos.71
Also on Instagram and Facebook as J.States Bladesmith
“So I'm lightin' out for the territory, ahead of the scared and the weak and the mean spirited, because Aunt Sally is fixin’ to adopt me and civilize me, and I can't stand it. I've been there before.â€
Anthony and Jeremy:
If you grind the clip before you grind the primary bevels two things happen;
1. It becomes a balancing act to grind the bevels as you slide the knife across the clip.
2. The angle between the clip and the bevel changes along with the length of the clip from edge to base.
I think the geometry is better if you grind the clip last. I usually rough in the clip before HT leaving a fat edge (1/6" thick) or I wait until after HT and most of the belt grinding on the final grind is done before I even start the clip. When you thin out the tip section of the blade before HT, you leave yourself exposed to potential blade warp in the quenching. The thinner the cross section, the more potential you have for warpage.
Joshua States
www.dosgatosforge.com
https://www.youtube.com/channel/UCdJMFMqnbLYqv965xd64vYg
https://www.facebook.com/dos.gatos.71
Also on Instagram and Facebook as J.States Bladesmith
“So I'm lightin' out for the territory, ahead of the scared and the weak and the mean spirited, because Aunt Sally is fixin’ to adopt me and civilize me, and I can't stand it. I've been there before.â€

