I may have asked this in the past but i still struggle with figuring out if the tang will support the knife. how thick do i need the tang to be on a full tang 10 inches (blade) 1 3/4 inch wide and a bit less then 5/16th wide and meant for chopping? I do prefer soft tangs over hard and go out of my way to soften them so that plays into it.
Thank you for your time.
On a full tang blade that size, I would leave the tang full thickness all the way through the handle. I would not taper it, and even if I did, it wouldn't be much. You will need substantial weight at the back of the handle to balance that out.
Joshua States
www.dosgatosforge.com
https://www.youtube.com/channel/UCdJMFMqnbLYqv965xd64vYg
https://www.facebook.com/dos.gatos.71
Also on Instagram and Facebook as J.States Bladesmith
“So I'm lightin' out for the territory, ahead of the scared and the weak and the mean spirited, because Aunt Sally is fixin’ to adopt me and civilize me, and I can't stand it. I've been there before.â€
|quoted:
On a full tang blade that size, I would leave the tang full thickness all the way through the handle. I would not taper it, and even if I did, it wouldn't be much. You will need substantial weight at the back of the handle to balance that out.
Thanks for always answering my questions Joshua. I really need to find a good book on knife design I own a copy of Kevin Cashen's great DVD on knife design However, it does not cover the very intricate little details I hunger for. however, thinking on it, I think you could get a similar effect if you added a bolster/pummel like thing at the bottom of the tang to add weight to balance out the blade better.
The reason this came to mind is I once I attempted this via forge welding wrought to make an integral pummel...did not like the results at the time however I may revisit the blade as I still have the thing...may also try it with the coil spring I am using to practice making an integral before moving to the Japanese Hitachi 1085 (I got from Pop's) and 52100 rounds I bought from Blacksmiths depot.
You are more than welcome Kevin, I will always offer my perspective, when I think I have something to offer.
A book on knife design. Hmmm. All I can say is start making knives. Start by finding knives you like that someone else has made, and try combining elements together. Let's say there is a Smokey Mountain hunter blade that really looks good to you, and a handle on a different knife that strikes your fancy. Try making that blade shape and putting the other handle on it. Play around with the forms. You will develop a sense for what works and what doesn't.
I think a lot of newer makers gravitate to full tang knives because they seem easier. I did when I started out, but I quickly found a simple partial tang in a solid block handle was easier to do.
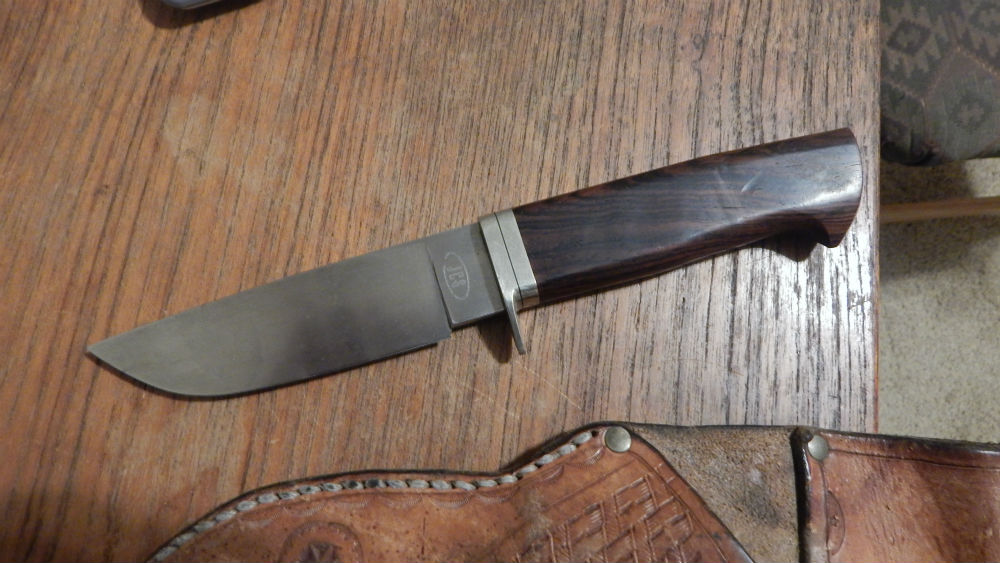
It probably helped that the very first knife I made in a class with Hancock was this one:
Making that knife taught me all sorts of things about form, function, and design. I still carry this knife when I go into the field.
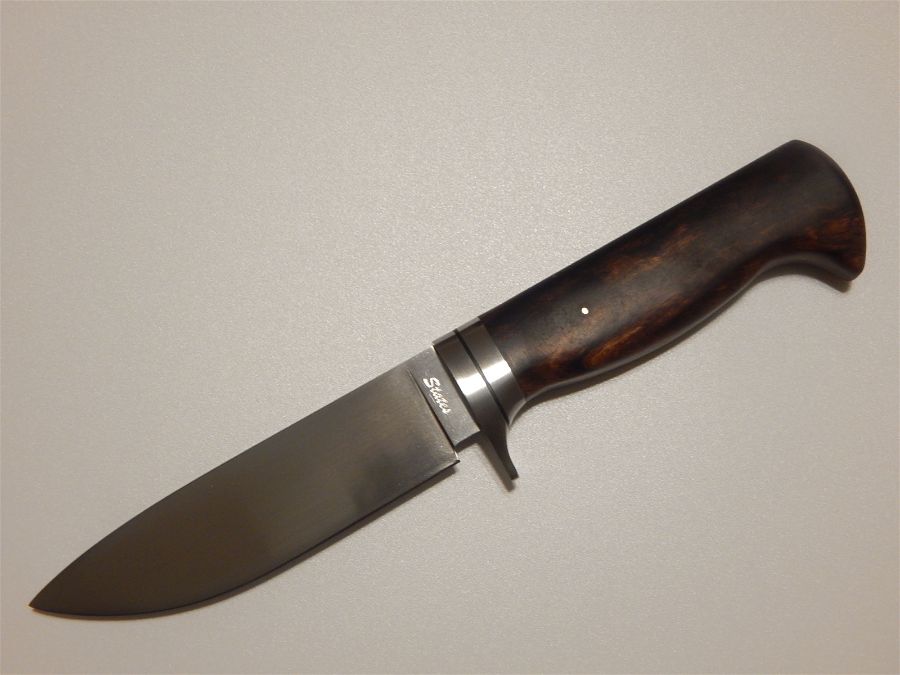
I now do a variety of different variations on that form including this.
The bolster idea you have is a good one, but put it at the front of the handle rather than the back end. This will surprise you when you realize how stable that makes the knife with that weight right at your index finger.
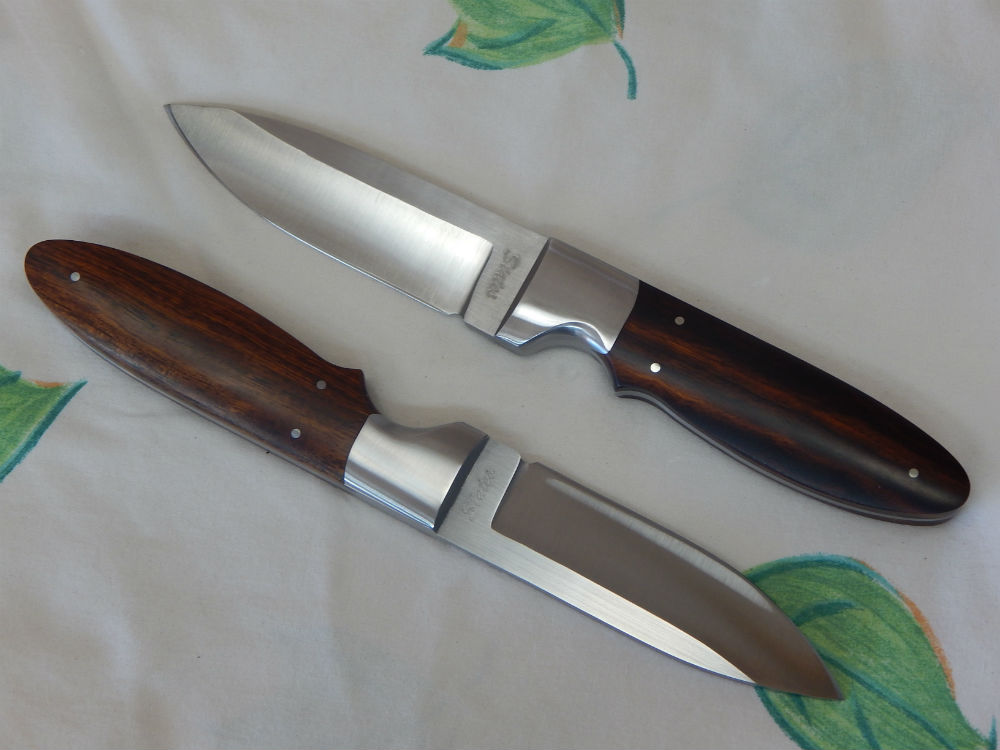
I am referring to something like these:
You do not have to dovetail the bolsters to get a really good look, and I wouldn't suggest the dovetails when you first try this. It's difficult enough to set the pins and get them to disappear without complicating it with dovetails.
If any of these look like something you would like to try making, please go right ahead. If you want, I can give you guidance on the process.
Joshua States
www.dosgatosforge.com
https://www.youtube.com/channel/UCdJMFMqnbLYqv965xd64vYg
https://www.facebook.com/dos.gatos.71
Also on Instagram and Facebook as J.States Bladesmith
“So I'm lightin' out for the territory, ahead of the scared and the weak and the mean spirited, because Aunt Sally is fixin’ to adopt me and civilize me, and I can't stand it. I've been there before.â€
I am at the point were my design sensibility wants to know why its final form is that way instead of this way if that makes sense. the handles have my interest, however, at this time I like a noticeable flat on my blades and would do a direct copy of them. I like more of a Japanese katana geometry on my blades. Heres a blade I finished just for the practice as I do not like how the L protrusion at the end of the tang turned out as i had to weld it to keep it on and I have a better way of doing it now. I call the polish a Brute de Polish as its not monotone single high grit polish but a polish going to different grits depending on the location with the back just finished with a file, the flats finished to 800 grit kings stone which is a not make shiny stone and the business end being taken to 2000 grit paper as I do not have the stones for a higher grit polish yet. the steel for the blade is Ford leaf spring as i just do not like to waste steel that cost me a lot of money l am when trying something for the first time. I put my mark on it in the end because i liked how the polish looks...the file work was just for fun and makes this more of an art knife.
PS: the handle wrap would have looked much better if I had finished polishing it then wrapped it.
No offense intended, but "Brut de Polish" is a new term, but not a new idea. Most of us call it differential finish, where areas of the blade or some elements have different finishes than other parts. The hollow ground blades I posted are a clear example. The hollow bevels are a different finish from the flats on the blades and the bolsters are a third finish level. If you check out that Dagger project I posted, you will see differential finish on the blade and almost all of the furniture. The guard has it, the pommel has it too. It's a good technique, it reflects light differently and draws the eye.
Joshua States
www.dosgatosforge.com
https://www.youtube.com/channel/UCdJMFMqnbLYqv965xd64vYg
https://www.facebook.com/dos.gatos.71
Also on Instagram and Facebook as J.States Bladesmith
“So I'm lightin' out for the territory, ahead of the scared and the weak and the mean spirited, because Aunt Sally is fixin’ to adopt me and civilize me, and I can't stand it. I've been there before.â€
|quoted:
No offense intended, but "Brut de Polish" is a new term, but not a new idea. Most of us call it differential finish, where areas of the blade or some elements have different finishes than other parts. The hollow ground blades I posted are a clear example. The hollow bevels are a different finish from the flats on the blades and the bolsters are a third finish level. If you check out that Dagger project I posted, you will see differential finish on the blade and almost all of the furniture. The guard has it, the pommel has it too. It's a good technique, it reflects light differently and draws the eye.
It should be fairly new term as I made the term up in the last few weeks and I never even thought to dub it 'deferential polish' nor did I think to ask if it was a thing.![]()
is it the dagger over on the share your work section?


