Been feeling a little better the last few days, and since I've not been at the forge in a while....I just couldn't stand it anymore. After chatting with Bing on Saturday morning, I had an idea........
I built a "can".....4"x4"x6".....plugged one end with a piece of 3/8" place, laid out a stack of 1080 & 15N20 diagonally. Filled the remaining space in with 1/4" W1 rods, then took up all the air space with 1095 powder, to which I added 10% nickel powder.
After about 45mins in the forge, this was how far I got..... 3"x3"x16".....then the forge lining failed on me. NUTS! Thankfully I had another welding forge ready to go that I spent the rest of the afternoon putting in place and setting up.
Got the replacement forge going, and the heat that I'm used to......
Worked the billet down just a bit more, let it cool, then because it was so large, I saw cut it in half, just so it would be easier to handle.
Next step is to forge the two halves down to about 1 1/2" square, anneal, and mill off the can, then cut each in half again. That will give me four pieces to decide how to orient and 4-way. Depending on what I come out with, it may go to an 8, or even a 16 way.
More to come.
Ed Caffrey, ABS MS
"The Montana Bladesmith"
www.CaffreyKnives.net
Forged the billet down to 1 1/2" sqaure. Ended up with about 30" of material. Sawed it in half, then sawed both those pieces in half...
So now I have 4 equal pieces of 1 1/2" sqaure material....
A quick clean-up of the ends with a 220 belt and an etch so I can orient everything....
The cool thing about Mosaic is that simply by rotating the pieces before welding, you change the end pattern.....
The "trick" to getting what you want is being able to visualize in your mind how the pattern will look after welding and accordion cutting/folding....you might be surprised at just how different a pattern will look from where it is now.....to what the end product will look like.
Finally, I facemill off the mating faces of each piece.....then it's just a matter of placing them together and forge welding. It can be wet welded, dry welded...or whatever you'd like...each method will have an effect on the finished product.
More to come!
Ed Caffrey, ABS MS
"The Montana Bladesmith"
www.CaffreyKnives.net
Got some more done on the "can" yesterday after church.
I got so involved in what I was doing, I didn't take an many pics as I intended to, but here goes.....
Here's the 4-way, after milling off the mating faces. (4 pieces of 1 1/2" square)
After welding the 4-way, I forged down part of the billet to 1 1/4" square and because things were getting too long to handle, cut off 10" and got it into the annealing tub (that's the part I forgot to photo!)
The other portion of the billet was forged down to 1 1/4" X 12" and 1 1/2" X 11" That means from the initial 4x4x6" can, I'll have 33" of mosaic to accordion cut/fold.
It's all in the annealing tub right now, so next steps will be to clean up each piece, layout the accordions, and spend half a day at the bandsaw! <img src=' http://www.americanbladesmith.com/ipboard/public/style_emoticons//smile.gi f' class='bbc_emoticon' alt=':)' />
More to come!
Ed Caffrey, ABS MS
"The Montana Bladesmith"
www.CaffreyKnives.net
Whew! Spent the whole day in the forging shop yesterday. Got an update for everyone on the can project....
After the 4-way was welded up, I cut it into managable sized pieces, 1 1/4" and 1 1/2"....ended up with a total of 2 pieces of each size, and placed them in the annealing tub....took nearly two days for them to cool enough to be handled.
After a quick grind with 220, here's what came out....
After face milling off all 4 sides of each piece.......
Now it's time to lay out the accordion cuts.......
The important part to this step is to use a "guide".....you want the "hinges" to be the same thickness as the rest of the billet (the black lines going lengthwise), otherwise you run a real risk of the billet tearing when it's forged open.
After everything was laid out, it was about an hour of sitting on the bansaw, cutting the "triangles" out......
What I didn't get a picture of was rounding off all the corners, and the bottoms of the "V" cuts.
Rather then take a bunch of still photos....I had a friend in the shop today....so here's a video of open the acordion cut, and finishing out the billet for annealing.
[media] http://www.youtube.com/watch?v=306VEXkELCU [/media]
Generally at this point, I will forge out the blade(s) I want from the billet, but these are already sold, and will be sent out once they are cleaned up and a light etch applied.
I'll certainly post pics of the finished billets before they leave!
Ed Caffrey, ABS MS
"The Montana Bladesmith"
www.CaffreyKnives.net
That is REALLY cool!! thanks for sharing.... I never really understood how the 'Mosaic' Damascus was made. This cleared that up quite a bit. Thanks again!
Joseph Becker
beckerforged.com
Very cool pattern Ed. Great to see you back in the shop. I will be waiting to see what the blade will look like. And I love the sliding die on the air hammer.
Brion
Brion Tomberlin
Anvil Top Custom Knives
ABS Mastersmith
<img src=' http://www.americanbladesmith.com/ipboard/public/style_emoticons//smile.gi f' class='bbc_emoticon' alt=':)' /> Just when you DON'T want it to.....the wedge on a hammer die works it's way loose! <img src=' http://www.americanbladesmith.com/ipboard/public/style_emoticons//smile.gi f' class='bbc_emoticon' alt=':)' />
Ed Caffrey, ABS MS
"The Montana Bladesmith"
www.CaffreyKnives.net
Hello Ed, It is good to hear you are back in the shop!
Wow! What a demo. They don't get any better than that! Thanks for sharing!
I'm in the process of finishing a new forge, and after viewing your demo it really has my damascus
juices flowing.
Thanks Again!
Russell
Very well done pictorial Ed. It's a pleasure seeing your work and to know that you are pluggin away at it. Thanks for sharing that.
Great WIP Ed!!! Glad you're back in the shop!!!
Finally got one of the billets from the can finished down and etched this morning.
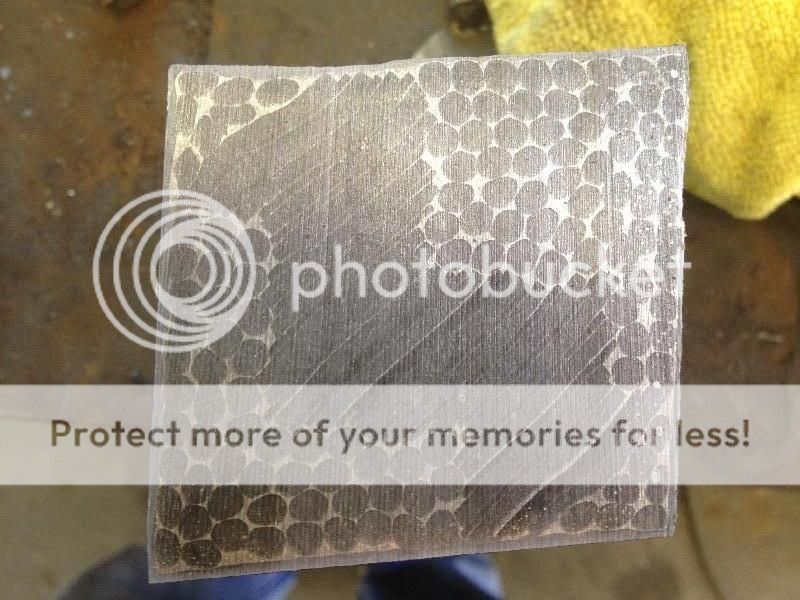
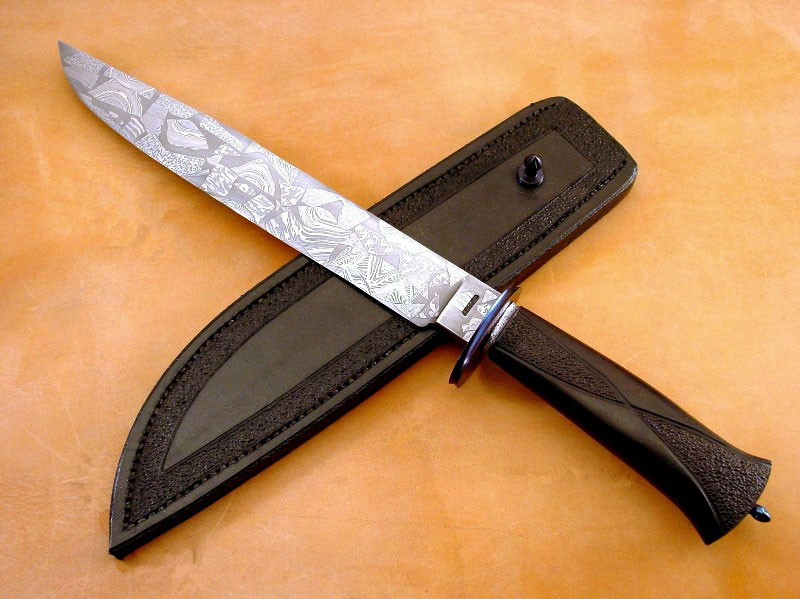
This piece is 12"X1 1/4"X1/4". All total I got 3 billets of that size, and two billets of the same length in 1 1/2" wide. 5 feet of Mosaic damascus, and lots of "pieces" to make "Fossil" with.
Took these pics in the shop because I wanted to get them posted....so they are less then perfect....but it works for what we're doing here.....
Just anothe day at the office! <img src=' http://www.americanbladesmith.com/ipboard/public/style_emoticons//tongue.gi f' class='bbc_emoticon' alt=':P' />:p
Ed Caffrey, ABS MS
"The Montana Bladesmith"
www.CaffreyKnives.net
Ed
Outstanding Damascus work and a great Work in Progress. I will finish the YouTube video that we emailed about that I have been developing with all of the photos and video from this topic and upload it to the ABS YouTube Channel and this Topic. Thank you for sharing your considerable knowledge and expertise with us.
Dan Cassidy
Journeyman Smith
Send an email to Dan

I compiled the information, photos, and video clip from this Topic and created a YouTube video which I just uploaded to the ABS YouTube Channel. Thank you to Master Smith Ed Caffrey for his work on this Topic and his sharing of information.
[media] http://www.youtube.com/watch?v=fpgXXa5wliA [/media]
Dan Cassidy
Journeyman Smith
Send an email to Dan

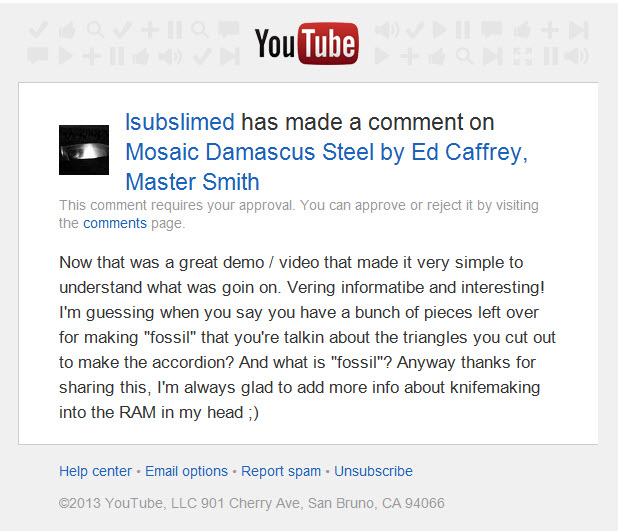
As soon as I uploaded the video to the ABS YouTube Channel, the views began and so did the Comments that can be posted to a YouTube video. This Comment was posted and as the administrator I approved it for posting. I thought that you would be interested in the question and the reply.
This was my reply on YouTube after Ed Caffrey sent me his comments:
"Master Smith Ed Caffrey replied to your question. Ed makes knives from the "Fossil" Damascus. He uses the left over "triangles" from various billets, put in a "can", and the airspace is filled with 1084 powder."
Dan Cassidy
Journeyman Smith
Send an email to Dan

Wait, the light bulb in my brain just turned on and it's shining so brightly I can't speak.......
Joshua States
www.dosgatosforge.com
https://www.youtube.com/channel/UCdJMFMqnbLYqv965xd64vYg
https://www.facebook.com/dos.gatos.71
Also on Instagram and Facebook as J.States Bladesmith
“So I'm lightin' out for the territory, ahead of the scared and the weak and the mean spirited, because Aunt Sally is fixin’ to adopt me and civilize me, and I can't stand it. I've been there before.â€


